![]()
2014 Cadillac Escalade Display Warning Messages Guide
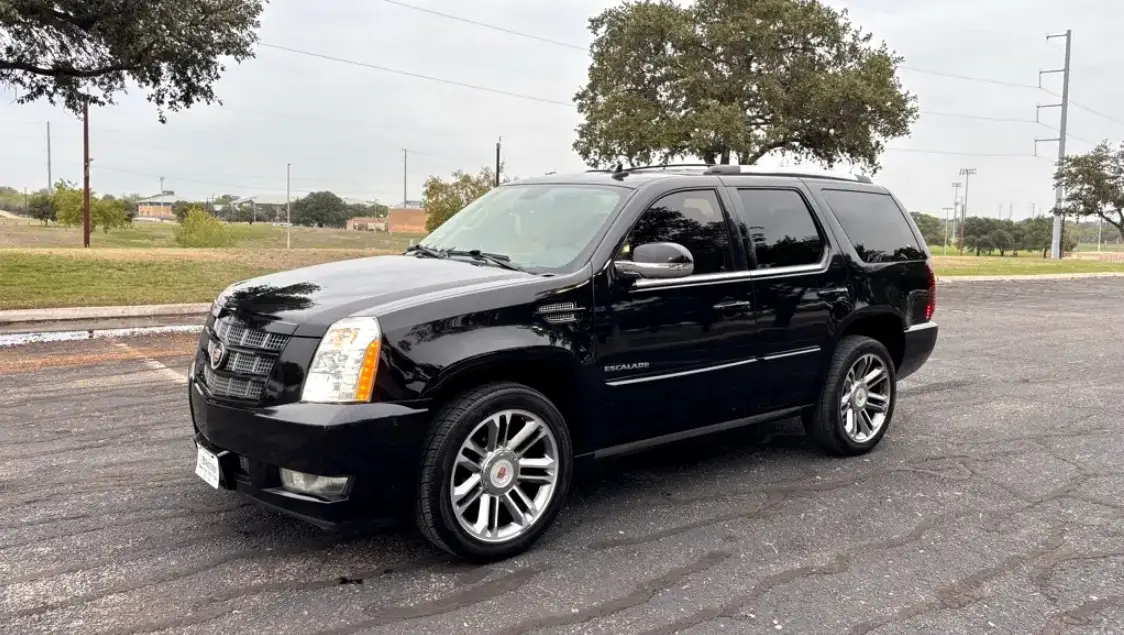
The 2014 Cadillac Escalade is a high-end SUV known for its high-tech features and stylish style. The display system is one of the most noticeable parts of this car. It not only shows important information but also sends drivers reminder messages. These warning messages are very important for keeping the car safe and in good shape. The 2014 Cadillac Escalade’s display system is an important way for the car and driver to talk to each other. It can tell the driver when the tires are low on air or when there are problems with the engine. Understanding these warning messages is important for taking quick action and doing preventative maintenance, which will help the car last longer and run better overall. In this case, looking into the details of how these warning signs are shown and understood can tell you a lot about how the 2014 Cadillac Escalade works and how it feels to use.
2023 Cadillac Escalade Specs, Price, Features, Mileage and Torque
Information Displays
Driver Information Center (DIC)
Your vehicle has a Driver Information Center (DIC).
The DIC displays information about your vehicle. It also displays
warning messages if a system problem is detected. The DIC also
allows some features to be customized. See Vehicle Personalization for more information.
All messages will appear in the DIC display located in the center of the instrument panel cluster.
The DIC comes on when the ignition is on. After a short delay, the DIC will display the information that was last displayed before the engine was turned off.
Operation and Displays
The DIC has different displays which can be accessed by pressing the DIC buttons located on the instrument panel, next to the steering wheel.
The DIC displays trip, fuel, and vehicle system information, and warning messages if a system problem is detected. A digital speedometer also appears at the bottom of the DIC display. The digital speedometer can be enabled or disabled. See “DISPLAY DIGITAL SPEED” under Vehicle Personalization for more information.
DIC Buttons

The buttons are the trip/fuel, vehicle information, customization, and set/ reset buttons. The button functions are detailed in the following pages.
![]() (Trip/Fuel): Press to display the odometer, trip odometer, fuel range, average economy, fuel used, timer, transmission temperature, instantaneous economy, and average vehicle speed. The compass and outside air temperature will also be shown in the display. The temperature will be
(Trip/Fuel): Press to display the odometer, trip odometer, fuel range, average economy, fuel used, timer, transmission temperature, instantaneous economy, and average vehicle speed. The compass and outside air temperature will also be shown in the display. The temperature will be
shown in °C or °F depending on the units selected.
 (Vehicle Information): Press to display the oil life, units, side blind zone system on/off, tire pressure readings for vehicles with the Tire Pressure Monitor System (TPMS), compass zone setting, and compass recalibration.
 (Customization): Press to scroll through each of the customization features. See Vehicle Personalization for more information.
![]() (Set/Reset): Press to set or reset certain functions and to turn off or acknowledge messages on the DIC.
(Set/Reset): Press to set or reset certain functions and to turn off or acknowledge messages on the DIC.![]()
(Menu Up/Down): Press to scroll up and down the menu items.
![]() Trip/Fuel Display Menu Items 3
Trip/Fuel Display Menu Items 3
(Trip/Fuel): Press to display the following menu items:
Odometer
Press the trip/fuel button until ODOMETER displays. This display shows the distance the vehicle has been driven in either kilometers (km) or miles (mi).
To switch between English and metric measurements, see “Units” later in this section.
Trip Odometer
Press the trip/fuel button until TRIP displays. This display shows the current distance traveled in either kilometer (km) or miles (mi)) since the last reset for the trip odometer.
The trip odometer can be reset to zero by pressing the set/reset button while the trip odometer is displayed.
Fuel Range
Press the trip/fuel button until FUEL RANGE displays. This display shows the approximate number of remaining kilometres (km) or
miles (mi) the vehicle can be driven without refuelling. The display will show LOW if the fuel level is low.
The fuel range estimate is based on an average of the vehicle’s fuel economy over recent driving history and the amount of fuel remaining in the fuel tank. This estimate will change if driving conditions change. For example, if driving in traffic and making frequent stops, this display may read one number, but if the vehicle is driven on a freeway, the number may change even though the same amount of fuel is in the fuel tank. This is because different driving conditions produce different fuel economies. Generally, freeway driving produces better fuel economy than city driving. Fuel range cannot be reset.
Average Economy
Press the trip/fuel button until AVERAGE ECONOMY displays. This display shows the approximate average liters per 100 kilometres (L/ 100 km) or miles per gallon (mpg). This number is calculated based on the number of L/100 km (mpg) recorded since the last time this menu item was reset. To reset the AVERAGE ECONOMY, press and hold the set/reset button.
Fuel Used
Press the trip/fuel button until FUEL USED displays. This display shows the number of liters (L) or gallons (gal) of fuel used since the last reset of this menu item. To reset the fuel used information, press and hold the set/reset button while FUEL USED is displayed.
Timer
Press the trip/fuel button until TIMER displays. This display can be used as a timer.
To start the timer, press the set/reset button while TIMER is displayed. The display will show the amount of time that has passed since the timer was last reset, not including time the ignition is off.
Time will continue to be counted as long as the ignition is on, even if another display is being shown on the DIC. The timer will record up to 99 hours, 59 minutes and 59 seconds (99:59:59) after which the display will return to zero.
To stop the timer, press the set/reset button briefly while TIMER is displayed.
To reset the timer to zero, press and hold the set/reset button while TIMER is displayed.
Transmission Temperature
Press the trip/fuel button until TRANS TEMP displays. This display shows the temperature of the automatic transmission fluid in either degrees Celsius (°C) or degrees Fahrenheit (°F).
Instantaneous Economy
If your vehicle has this display, press the trip/fuel button until the INST ECON displays. This display shows the current fuel economy at a particular moment and will change frequently as driving conditions change. This display shows the instantaneous fuel economy in liters per 100 kilometres (L/100 km) or miles per gallon (mpg).
Unlike the average economy, this screen cannot be reset.
The display may also show if the vehicle is currently in V4, V6 or
V8 mode.
Average Vehicle Speed
Press the trip/fuel button until AVERAGE SPEED displays. This display shows the average speed in kilometres per hour (km/h) or miles per hour (MPH).
Blank Display
This display shows no information.
Vehicle Information Display Menu Items(Vehicle Information): Press to display the following menu items:
Oil Life
Press the vehicle information button until OIL LIFE REMAINING displays. This display shows an estimate of the oil’s remaining useful life. If you see 99% OIL LIFE REMAINING on the display, that means 99% of the current oil life remains. The engine oil life system will alert you to change the oil on a schedule consistent with your driving conditions.
When the remaining oil life is low, the CHANGE ENGINE OIL SOON message will appear on the display.
See “CHANGE ENGINE OIL SOON” under Engine Oil Messages. You should change the oil as soon as you can. In addition to the engine oil life system monitoring the oil life, additional maintenance is recommended in the Maintenance Schedule in this manual.
Remember, you must reset the OIL LIFE display yourself after each oil change. It will not reset itself. Also, be careful not to reset the OIL LIFE display accidentally at any time other than when the oil has just been changed. It cannot be reset accurately until the next oil change. To reset the engine oil life system.
Side Blind Zone Alert
If your vehicle has the Side Blind Zone Alert (SBZA) system, this display allows the system to be turned on or off. Once in this display, press the set/reset button to select between ON or OFF. If you choose ON, the system will be turned on. If you choose OFF, the system will be turned off. When the SBZA system is turned off, the DIC will display the SIDE BLIND ZONE ALERT SYSTEM OFF message as a reminder that the system has been turned off. See Object Detection System Messages and Side Blind Zone Alert (SBZA) for more information.
Units
Press the vehicle information button until UNITS displays. This display allows you to select between metric or English units of measurement. Once in this display, press the set/reset button to select between ENGLISH or METRIC units. All of the vehicle information will then be displayed in the unit of measurement selected.
Tire Pressure
On vehicles with the Tire Pressure Monitor System (TPMS), the pressure for each tire can be viewed in the DIC. The tire pressure will be shown in either pounds kilopascals (kPa) or per square inch (psi). Press the vehicle information button until the DIC displays FRONT TIRES kPa (PSI) LEFT ## RIGHT ##. Press the vehicle information button again until the DIC displays REAR TIRES kPa (PSI) LEFT ##
RIGHT ##.
If a low tire pressure condition is detected by the system while driving, a message advising you to add air to a specific tire will appear in the display.
If the tire pressure display shows dashes instead of a value, there may be a problem with your vehicle. If this consistently occurs, see your dealer for service.
Battery Voltage
This display shows the current battery voltage. If the voltage is in the normal range, the value will be displayed. For example, the display may read BATTERY VOLTAGE 13 VOLTS.
If the voltage is low, the display will show LOW. If the voltage is high, the display will show HIGH. Your vehicle’s charging system regulates voltage based on the state of the battery. The battery voltage may fluctuate when viewing this information on the DIC. This is normal. for more information. If there is a problem with the battery charging system, the DIC will display a message.
Oil Pressure
This display will show the oil pressure in either pounds kilopascals (kPa) or per square inch (psi).
Compass Zone Setting
This display allows for setting the compass zone.
Compass Recalibration
This display allows for calibrating the compass.
Blank Display
This display shows no information.
Vehicle Messages
Messages displayed on the DIC indicate the status of the vehicle or some action may be needed to correct a condition. Multiple messages may appear one after another.
The messages that do not require immediate action can be acknowledged and cleared by pressing any DIC button.
The messages that require immediate action cannot be cleared until that action is performed.
All messages should be taken seriously and clearing the message does not correct the problem.
The following are the possible messages and some information about them.
SERVICE BATTERY
CHARGING SYSTEM
On some vehicles, this message displays if there is a problem with the battery charging system. Under certain conditions, the charging
system light may also turn on in the instrument cluster. Driving with this problem could drain the battery. Turn off all unnecessary
accessories. Have the electrical system checked as soon as possible. See your dealer.
Door Ajar Messages
DRIVER DOOR OPEN
This message displays and a chime sounds if the driver door is not fully
closed and the vehicle is shifted out of P (Park). Stop and turn off the vehicle, check the door for obstructions, and close the door again. Check to see if the message still appears on the DIC.
HOOD OPEN
This message displays and a chime sounds if the hood is not fully closed. Stop and turn off the vehicle, check the hood for obstructions, and close the hood again. Check to see if the message still appears on the DIC.
LEFT REAR DOOR OPEN
This message displays a chime sounds if the driver-side rear door is
not fully closed and the vehicle is shifted out of P (Park). Stop and turn
off the vehicle, check the door for obstructions, and close the door again. Check to see if the message still appears on the DIC.
PASSENGER DOOR OPEN
This message displays and a chime sounds if the front passenger door is not fully closed and the vehicle is shifted out of P (Park). Stop and turn off the vehicle, check the door for obstructions, and close the door again. Check to see if the message still appears on the DIC.
REAR ACCESS OPEN (Wagon)
This message displays and a chime sounds if the liftgate or lift glass is open while the ignition is in ON/RUN. Turn off the vehicle and check the liftgate and liftglass. Restart the vehicle and check for the message on the DIC display.
RIGHT REAR DOOR OPEN
This message displays a chime sounds if the passenger side rear door is not fully closed and the vehicle is shifted out of P (Park). Stop and turn off the vehicle, check the door for obstructions, and close the door again. Check to see if the message still appears on the DIC.
Engine Cooling System Messages
Notice: If you drive the vehicle while the engine is overheating, severe engine damage may occur. If an overheat warning appears on the instrument cluster and/or DIC, stop the vehicle as soon as possible.
ENGINE HOT A/C (Air Conditioning) TURNED OFF
This message displays when the engine coolant becomes hotter than the normal operating temperature.
See Engine Coolant Temperature Gauge. To avoid added strain on a hot engine, the air conditioning compressor automatically turns off. When the coolant temperature returns to normal, the air conditioning compressor turns back on. You can continue to drive your vehicle.
If this message continues to appear, have the system repaired by your dealer as soon as possible to avoid damage to the engine.
ENGINE OVERHEATED IDLE ENGINE
This message displays when the engine coolant temperature is too hot. Stop and allow the vehicle to idle until it cools down. See Engine
See Overheated Engine Protection Operating Mode for information on driving to a safe place in an emergency.
ENGINE OVERHEATED STOP ENGINE
This message displays a chime sounds if the engine cooling system reaches unsafe temperatures for operation. Stop and turn off the vehicle as soon as it is safe to do so to avoid severe damage. This message clears when the engine has cooled to a safe operating temperature.
Engine Oil Messages
CHANGE ENGINE OIL SOON
This message displays when the engine oil needs to be changed.
When you change the engine oil, be sure to reset the CHANGE ENGINE OIL SOON message. See Engine Oil Life System for information on how to reset the message. See Engine Oil on and Maintenance Schedule more information.
ENGINE OIL HOT IDLE ENGINE
This message displays when the engine oil becomes hotter than the normal operating temperature. Stop and allow the vehicle to idle until it cools down.
OIL PRESSURE LOW STOP ENGINE
Notice: If you drive the vehicle while the engine oil pressure is low, severe engine damage may occur. If a low oil pressure warning appears on the Driver Information Center (DIC), stop the vehicle as soon as possible. Do not drive the vehicle until the cause of the low oil pressure is corrected.
This message displays if low oil pressure levels occur. Stop the vehicle as soon as safely possible and do not operate it until the cause of the low oil pressure has been
Engine Power Messages
ENGINE POWER IS REDUCED
This message is displayed when the vehicle’s engine power is reduced. Reduced engine power can affect the vehicle’s ability to accelerate. If this message is on, but there is no reduction in performance, proceed to your destination. The performance may be reduced the next time the vehicle is driven. The vehicle may be driven at a reduced speed while this message is on, but maximum acceleration and speed may be reduced. Anytime this message stays on, the vehicle should be taken to your dealer for service as soon as possible.
Fuel System Messages
FUEL LEVEL LOW
This message displays when the vehicle is low on fuel. Refill the fuel tank as soon as possible.
TIGHTEN GAS CAP
This message displays when the fuel cap has not been fully tightened. Recheck the fuel cap to ensure that it is on and tightened properly.
The diagnostic system can determine if the fuel cap has been left off or improperly installed.
A loose or missing fuel cap allows fuel to evaporate into the atmosphere. A few driving trips with the cap properly installed should turn this light and message off.
Key and Lock Messages
REPLACE THE BATTERY IN THE REMOTE KEY
This message displays if a Remote Keyless Entry (RKE) transmitter battery is low. The battery needs to be replaced in the transmitter. See “Battery Replacement” under Remote Keyless Entry (RKE) System Operation.
Lamp Messages
SERVICE LEFT HEADLAMP ASSEMBLY
On some models, this message will be displayed when the left headlamp is out and needs to be serviced. See LED Lighting for more information.
SERVICE RIGHT HEADLAMP ASSEMBLY
On some models, this message will be displayed when the right headlamp is out and needs to be serviced. See LED Lighting for more information.
TURN SIGNAL ON
This message displays and a chime sounds if a turn signal is left on for 1.2 km (0.75 mi). Move the turn signal/multifunction lever to the off position.
Object Detection System Messages
PARKING ASSIST BLOCKED
SEE OWNERS MANUAL
This message displays if something is interfering with the park assist system. See Ultrasonic Parking Assist for more information.
PARKING ASSIST OFF
After the vehicle has been started, this message displays to remind the
driver that the Ultrasonic Rear Parking Assist (URPA) system has been turned off. Press the set/reset button to acknowledge this message and clear it from the DIC display. To turn the URPA system back on, see Ultrasonic Parking Assist.
SERVICE PARKING ASSIST
This message displays if there is a problem with the Ultrasonic Rear Parking Assist (URPA) system. Do not use this system to help you
park. See Ultrasonic Parking Assist for more information.
See your dealer for service.
SERVICE SIDE BLIND ZONE ALERT SYSTEM
If your vehicle has the Side Blind Zone Alert (SBZA) system and this message displays, the system needs service. See your dealer. See Side Blind Zone Alert (SBZA) for more information.
SIDE BLIND ZONE ALERT SYSTEM OFF
If your vehicle has the Side Blind Zone Alert (SBZA) system, this message displays when the SBZA system has been turned off. and Driver Information Center (DIC) more information.
SIDE BLIND ZONE SYSTEM UNAVAILABLE
If your vehicle has the Side Blind Zone Alert (SBZA) system, this message displays when the SBZA system is disabled because the sensor is blocked and cannot detect vehicles in your blind zone. The sensor may be blocked by mud, dirt, snow, ice, or slush. This message may also display during heavy rain or due to road spray. It may also come on when driving in isolated areas with no guardrails, trees,
or road signs and light traffic. Your vehicle does not need service. For cleaning instructions.
Ride Control System Messages
SERVICE STABILITRAK
If your vehicle has StabiliTrak and this message displays, it means
there may be a problem with the StabiliTrak system. If you see this message, try to reset the system. Stop; turn off the engine for at least
15 seconds; then start the engine again. If this message still comes on, it means there is a problem. You should see your dealer for service.
The vehicle is safe to drive, however, you do not have the benefit of StabiliTrak, so reduce your speed and drive accordingly.
SERVICE SUSPENSION SYSTEM
This message is displayed when the Road Sensing Suspension (RSS)
the system is not operating properly. Have your vehicle serviced by your dealer.
SERVICE TRACTION CONTROL
If your vehicle has StabiliTrak, this message displays when there is a
problem with the Traction Control System (TCS). When this message displays, the system will not limit wheel spin. Adjust your driving accordingly. See your dealer for service.
STABILITRAK INITIALIZING
If the vehicle has StabiliTrak, this message may come on if the StabiliTrak system has not fully initialized because of road conditions or the incorrect tire size.
When the StabiliTrak system is fully initialized, the message will turn off.
If this message continues to be displayed for multiple ignition cycles and on different road surfaces, see your dealer for service.
TRACTION XX
STABILITRAK XX
This message displays when the traction control and/or StabiliTrak systems have been turned on or off. Adjust your driving accordingly. To limit wheel spin and realize the full benefits of the stability enhancement system, you should normally leave StabiliTrak on.
However, you should turn StabiliTrak off if the vehicle gets stuck in sand, mud, ice, or snow and you want to rock the vehicle to attempt to free it, or if you are driving in extreme off-road conditions and require more wheel spin.
STABILITRAK OFF may also display when the stability control has been automatically disabled. Several conditions can cause this message to appear.
- One condition is overheating, which could occur if StabiliTrak activates continuously for an extended time.
- The message also displays if the brake system warning light is on.
- The message could display if the stability system takes longer than usual to complete its diagnostic checks due to driving conditions.
- The message displays if an engine or vehicle-related problem has been detected and the vehicle needs service. See your dealer. The message turns off as soon as the conditions that caused the message to be displayed are no longer present.
Airbag System Messages
SERVICE AIR BAG
This message displays if there is a problem with the airbag system. Have your dealer inspect the system for problems.
Security Messages
SERVICE THEFT DETERRENT SYSTEM
This message displays when there is a problem with the theft-deterrent system. The vehicle may or may not restart so you may want to take the vehicle to your dealer before turning off the engine.
Tire Messages
SERVICE TIRE MONITOR SYSTEM
On vehicles with the Tire Pressure Monitor System (TPMS), this message displays if a part of the TPMS is not working properly. The tire pressure light also flashes and then remains on during the same ignition cycle. See Tire Pressure Ligh. Several conditions may cause this message to appear. See Tire Pressure Monitor Operation for more information. If the warning comes on and stays on, there may be a problem with the TPMS. See your dealer.
TIRE LEARNING ACTIVE
On vehicles with the Tire Pressure Monitor System (TPMS), this message displays when the TPMS is re-learning the tire positions on your vehicle. The tire positions must be re-learned after rotating the tires or after replacing a tire or sensor. checked and set to those shown on the Tire Loading Information label Vehicle Load Limits The DIC also shows the tire pressure values.
TIRE LOW ADD AIR TO TIRE
On vehicles with the Tire Pressure Monitor System (TPMS), this message displays when the pressure in one or more of the vehicle’s tires needs to be checked. This message also displays LEFT FRT (left front), RIGHT FRT (right front), LEFT RR (left rear),
or RIGHT RR (right rear) to indicate the location of the low tire. The low tire pressure warning light will also come on. You can receive more than one tire pressure message at a time. To read the other messages that may have been sent at the same time, press the set/reset button or the trip odometer reset stem. If a tire pressure message appears on the DIC, stop as soon as you can. Have the tire pressures checked and set to those shown on the Tire Loading Information label.
Transmission Messages
GRADE BRAKING DISABLED
This message displays when the grade braking has been disabled with the tow/haul mode button on the end of the shift lever.
GRADE BRAKING ENABLED
This message displays when the grade braking has been enabled with the tow/haul mode button on the end of the shift lever.
GRADE BRAKING ON
This message displays when the grade braking has been activated while driving on downhill grades. This message will only appear the first time the feature is activated in an ignition cycle.
MANUAL SHIFT
This message displays when the automatic transmission is in manual mode.
TRANSMISSION HOT IDLE ENGINE
Notice: Do not drive the vehicle while the transmission fluid is overheating and the transmission temperature warning is displayed on the instrument cluster and/or DIC, or the transmission can be damaged. This could lead to costly repairs that would not be covered by the warranty.
This message displays along with four chimes if the transmission fluid in the vehicle gets hot. Driving with the transmission fluid temperature high can cause damage to the vehicle. Stop the vehicle and let it idle to allow the transmission to cool. This message clears and the chime stops when the fluid temperature reaches a safe level.
Vehicle Reminder Messages
ICE POSSIBLE DRIVE WITH CARE
This message displays when ice conditions are possible.
Washer Fluid Messages
WASHER FLUID LOW ADD FLUID
This message displays when the windshield washer fluid is low. Fill the windshield washer fluid reservoir as soon as possible.
Vehicle Personalization
Your vehicle may have customization capabilities that allow you to program certain features to one preferred setting. Customization features can only be programmed to one setting on the vehicle and cannot be programmed to a preferred setting for two different drivers.
All of the customization options may not be available on your vehicle.
Only the options available will be displayed on the DIC.
The default settings for the customization features were set when your vehicle left the factory, but may have been changed from their default state since then.
The customization preferences are automatically recalled.
To change customization preferences, use the following procedure.
Entering the Feature Settings Menu
- Turn the ignition on and place the vehicle in P (Park).
To avoid excessive drain on the battery, it is recommended that the headlamps are turned off.
- Press the customization button to scroll through the available customizable options.
Feature Settings Menu Items
The following are customization features that allow you to program settings to the vehicle:
DISPLAY IN ENGLISH
This feature will only display if a language other than English has been set. This feature allows you to change the language in which the DIC messages appear to English.
Press the customization button until the PRESS V TO DISPLAY IN
ENGLISH screen appears on the DIC display. Press the set/reset button once to display all DIC messages in English.
DISPLAY LANGUAGE
This feature allows you to select the language in which the DIC messages will appear.
Press the customization button until the DISPLAY LANGUAGE screen appears on the DIC display. Press the set/reset button once to access the settings for this feature. Then press the customization button to scroll through the following settings:
ENGLISH (default): All messages will appear in English.
DEUTSCH: All messages will appear in German.
ITALIANO: All messages will appear in Italian.
FRANCAIS: All messages will appear in French.
ESPANOL: All messages will appear in Spanish.
ARABIC: All messages will appear in Arabic.
CHINESE: All messages will appear in Chinese.
RUSSIAN: All messages will appear in Russian.
NO CHANGE: No change will be made to this feature. The current setting will remain.
To select a setting, press the set/ reset button while the desired setting is displayed on the DIC.
AUTO DOOR LOCK
This feature allows you to select when the vehicle’s doors will automatically lock.
Press the customization button until AUTO DOOR LOCK appears on the DIC display. Press the set/reset button once to access the settings for this feature. Then press the customization button to scroll through the following settings:
SHIFT OUT OF PARK (default):
The doors will automatically lock when the vehicle is shifted out of P (Park).
AT VEHICLE SPEED: The doors will automatically lock when the vehicle speed is above 13 km/h (8 mph) for three seconds.
NO CHANGE: No change will be made to this feature. The current setting will remain.
To select a setting, press the set/ reset button while the desired setting is displayed on the DIC.
AUTO DOOR UNLOCK
This feature allows you to select whether or not to turn off the automatic door-unlocking feature. It also allows you to select which doors and when the doors will automatically unlock.
Press the customization button until AUTO DOOR UNLOCK appears on the DIC display. Press the set/reset button once to access the settings for this feature. Then press the customization button to scroll through the following settings:
OFF: None of the doors will automatically unlock.
DRIVER AT KEY OUT: Only the driver door will unlock when the key is taken out of the ignition.
DRIVER IN PARK: Only the driver door will unlock when the vehicle is shifted into P (Park).
ALL AT KEY OUT: All of the doors will unlock when the key is taken out of the ignition.
ALL IN PARK (default): All of the doors will unlock when the vehicle is shifted into P (Park).
NO CHANGE: No change will be made to this feature. The current setting will remain.
To select a setting, press the set/ reset button while the desired setting is displayed on the DIC.
REMOTE DOOR LOCK
This feature allows you to select the type of feedback you will receive when locking the vehicle with the Remote Keyless Entry (RKE) transmitter. You will not receive feedback when locking the vehicle with the RKE transmitter if the doors are open.
Press the customization button until REMOTE DOOR LOCK appears on the DIC display. Press the set/reset button once to access the settings for this feature. Then press the customization button to scroll through the following settings:
OFF: There will be no feedback when you press the lock button on the RKE transmitter.
LIGHTS ONLY: The exterior lamps will flash when you press the lock button on the RKE transmitter.
HORN ONLY: The horn will sound on the second press of the lock button on the RKE transmitter.
HORN & LIGHTS (default): The exterior lamps will flash when you press the lock button on the RKE transmitter, and the horn will sound when the lock button is pressed again within five seconds of the previous command.
NO CHANGE: No change will be made to this feature. The current setting will remain.
To select a setting, press the set/ reset button while the desired setting is displayed on the DIC.
REMOTE DOOR UNLOCK
This feature allows you to select the type of feedback you will receive when unlocking the vehicle with the Remote Keyless Entry (RKE) transmitter. You will not receive feedback when unlocking the vehicle with the RKE transmitter if the doors are open.
Press the customization button until REMOTE DOOR UNLOCK appears on the DIC display. Press the set/ reset button once to access the settings for this feature. Then press the customization button to scroll through the following settings:
LIGHTS OFF: The exterior lamps will not flash when you press the unlock button on the RKE transmitter.
LIGHTS ON (default): The exterior lamps will flash when you press the unlock button on the RKE transmitter.
NO CHANGE: No change will be made to this feature. The current setting will remain.
To select a setting, press the set/ reset button while the desired setting is displayed on the DIC.
DELAY DOOR LOCK
This feature allows you to select whether or not the locking of the vehicle’s doors and liftgate will be delayed. When locking the doors and liftgate with the power door lock switch and a door or the liftgate is open, this feature will delay locking the doors and liftgate until
five seconds after the last door is closed. You will hear three chimes to signal that the delayed locking feature is in use. The key must be out of the ignition for this feature to work. You can temporarily override delayed locking by pressing the power door lock switch twice.
Press the customization button until DELAY DOOR LOCK appears on the DIC display. Press the set/reset button once to access the settings for this feature. Then press the customization button to scroll through the following settings:
OFF: There will be no delayed locking of the vehicle’s doors.
ON (default): The doors will not lock until five seconds after the last door or the liftgate is closed.
NO CHANGE: No change will be made to this feature. The current setting will remain.
To select a setting, press the set/ reset button while the desired setting is displayed on the DIC.
EXIT LIGHTING
This feature allows you to select the amount of time you want the exterior lamps to remain on when it
is dark enough outside. This happens after the key is turned from ON/RUN to LOCK/OFF.
Press the customization button until EXIT LIGHTING appears on the DIC display. Press the set/reset button once to access the settings for this feature. Then press the customization button to scroll through the following settings:
OFF: The exterior lamps will not turn on.
30 SECONDS (default): The exterior lamps will stay on for 30 seconds.
- MINUTE: The exterior lamps will stay on for 1 minute.
- MINUTES: The exterior lamps will stay on for 2 minutes.
NO CHANGE: No change will be made to this feature. The current setting will remain.
To select a setting, press the set/ reset button while the desired setting is displayed on the DIC.
APPROACH LIGHTING
This feature allows you to select whether or not to have the exterior lamps turn on briefly during low light periods after unlocking the vehicle using the Remote Keyless Entry (RKE) transmitter.
Press the customization button until APPROACH LIGHTING appears on the DIC display. Press the set/reset button once to access the settings for this feature. Then press the customization button to scroll through the following settings:
OFF: The exterior lamps will not turn on when you unlock the vehicle with the RKE transmitter.
ON (default): If it is dark enough outside, the exterior lamps will turn on briefly when you unlock the vehicle with the RKE transmitter.
The lamps will remain on for 20 seconds or until the lock button on the RKE transmitter is pressed, or the vehicle is no longer off
NO CHANGE: No change will be made to this feature. The current setting will remain.
To select a setting, press the set/ reset button while the desired setting is displayed on the DIC.
AUTO HIGH BEAMS
If your vehicle has this feature, it allows you to select to have the IntelliBeam system turned off or on.
Press the customization button until AUTO HIGH BEAMS appears on the DIC display. Press the set/reset button once to access the settings for this feature. Then press the customization button to scroll through the following settings:
OFF (default): The IntelliBeam system will be turned off.
ON: The IntelliBeam system will be turned on.
NO CHANGE: No change will be made to this feature. The current setting will remain.
To select a setting, press the set/ reset button while the desired setting is displayed on the DIC.
CHIME VOLUME
This feature allows you to select the volume level of the chime.
Press the customization button until CHIME VOLUME appears on the DIC display. Press the set/reset button once to access the settings for this feature. Then press the customization button to scroll through the following settings:
NORMAL: The chime volume will be set to a normal level.
LOUD: The chime volume will be set to a loud level.
NO CHANGE: No change will be made to this feature. The current setting will remain.
There is no default for chime volume. The volume will stay at the last known setting.
To select a setting, press the set/ reset button while the desired setting is displayed on the DIC.
PARK TILT MIRRORS
This feature allows you to select whether or not the outside mirror(s) will automatically tilt down when the vehicle is shifted into R (Reverse).
Press the customization button until PARK TILT MIRRORS appears on the DIC display. Press the set/reset button once to access the settings for this feature. Then press the customization button to scroll through the following settings:
OFF (default): Neither outside mirror will be tilted down when the vehicle is shifted into R (Reverse
NO CHANGE: No change will be made to this feature. The current setting will remain.
To select a setting, press the set/ reset button while the desired setting is displayed on the DIC.
AUTO HIGH BEAMS
If your vehicle has this feature, it allows you to select to have the IntelliBeam system turned off or on.
Press the customization button until AUTO HIGH BEAMS appears on the DIC display. Press the set/reset button once to access the settings for this feature. Then press the customization button to scroll through the following settings:
OFF (default): The IntelliBeam system will be turned off.
ON: The IntelliBeam system will be turned on.
NO CHANGE: No change will be made to this feature. The current setting will remain.
To select a setting, press the set/ reset button while the desired setting is displayed on the DIC.
CHIME VOLUME
This feature allows you to select the volume level of the chime.
Press the customization button until CHIME VOLUME appears on the DIC display. Press the set/reset button once to access the settings for this feature. Then press the customization button to scroll through the following settings:
NORMAL: The chime volume will be set to a normal level.
LOUD: The chime volume will be set to a loud level.
NO CHANGE: No change will be made to this feature. The current setting will remain.
There is no default for chime volume. The volume will stay at the last known setting.
To select a setting, press the set/ reset button while the desired setting is displayed on the DIC.
PARK TILT MIRRORS
This feature allows you to select whether or not the outside mirror(s) will automatically tilt down when the vehicle is shifted into R (Reverse).
Press the customization button until PARK TILT MIRRORS appears on the DIC display. Press the set/reset button once to access the settings for this feature. Then press the customization button to scroll through the following settings:
OFF (default): Neither outside mirror will be tilted down when the vehicle is shifted into R (Reverse).
DRIVER MIRROR: The driver outside mirror will be tilted down when the vehicle is shifted into R (Reverse).
PASSENGER MIRROR: The passenger outside mirror will be tilted down when the vehicle is shifted into R (Reverse).
BOTH MIRRORS: The driver and passenger outside mirrors will be tilted down when the vehicle is shifted into R (Reverse).
NO CHANGE: No change will be made to this feature. The current setting will remain.
To select a setting, press the set/ reset button while the desired setting is displayed on the DIC.
EASY EXIT RECALL
If your vehicle has this feature, it allows you to select your preference for the automatic easy exit seat feature.
Press the customization button until EASY EXIT RECALL appears on the DIC display. Press the set/reset button once to access the settings for this feature. Then press the customization button to scroll through the following settings:
DOOR BUTTON ONLY: No automatic seat exit recall will occur. The recall will only occur after pressing the easy exit seat button.
BUTTON AND KEY OUT (default): If the features are enabled through the EASY EXIT SETUP menu, the driver seat will move back, and if the vehicle has the power tilt wheel feature, the power steering column will move up when the key is removed from the ignition or after pressing the easy exit seat button.
The automatic easy exit seat movement will only occur one time after the key is removed from the ignition. If the automatic movement has already occurred, and you put the key back in the ignition and remove it again, the seat and steering column will stay in the original exit position, unless a memory recall took place prior to removing the key again.
NO CHANGE: No change will be made to this feature. The current setting will remain.
To select a setting, press the set/ reset button while the desired setting is displayed on the DIC.
EASY EXIT SETUP
If your vehicle has this feature, it allows you to select which areas will recall with the automatic easy exit seat feature. It also allows you to turn off the automatic easy exit feature.
Press the customization button until EASY EXIT SETUP appears on the DIC display. Press the set/reset button once to access the settings for this feature. Then press the menu up/down button to scroll through the following settings:
OFF: No automatic seat exit will be recalled.
SEAT ONLY: The driver seat will recall.
TILT ONLY: The steering wheel tilt feature will recall.
SEAT & TILT (default): The driver seat and the steering wheel tilt feature will recall.
NO CHANGE: No change will be made to this feature. The current setting will remain.
To select a setting, press the set/ reset button while the desired setting is displayed on the DIC.
MEMORY SEAT RECALL}
This feature allows you to select your preference for the remote memory seat recall feature.
Press the customization button until MEMORY SEAT RECALL appears on the DIC display. Press the set/ reset button once to access the settings for this feature. Then press the customization button to scroll through the following settings:
OFF (default): No remote memory seat recall will occur.
ON: The driver seat, and on some vehicles, the outside mirrors will automatically move to the stored driving position when the unlock button on the Remote Keyless Entry (RKE) transmitter is pressed. On some vehicles with the adjustable throttle and brake pedal feature, the pedals will also automatically move.
NO CHANGE: No change will be made to this feature. The current setting will remain.
To select a setting, press the set/ reset button while the desired setting is displayed on the DIC.
REMOTE START
If your vehicle has this feature, it allows you to turn the remote start off or on. The remote start feature allows you to start the engine from outside of the vehicle using the Remote Keyless Entry (RKE) transmitter.
Press the customization button until REMOTE START appears on the DIC display. Press the set/reset button once to access the settings for this feature. Then press the customization button to scroll through the following settings:
OFF: The remote start feature will be disabled.
ON (default): The remote start feature will be enabled.
NO CHANGE: No change will be made to this feature. The current setting will remain.
To select a setting, press the set/ reset button while the desired setting is displayed on the DIC.
DISPLAY DIGITAL SPEED
This feature allows you to enable or disable the digital speedometer on the DIC.
Press the customization button until DISPLAY DIGITAL SPEED appears on the DIC display. Press the set/ reset button once to access the settings for this feature. Then press the customization button to scroll through the following settings:
OFF: The digital speedometer will be disabled.
ON (default): The digital speedometer will be enabled.
NO CHANGE: No change will be made to this feature. The current setting will remain.
To select a setting, press the set/ reset button while the desired setting is displayed on the DIC.
FACTORY SETTINGS
This feature allows you to set all of the customization features back to their factory default settings.
Press the customization button until FACTORY SETTINGS appear on the DIC display. Press the set/reset button once to access the settings for this feature. Then press the customization button to scroll through the following settings:
RESTORE ALL (default): The customization features will be set to their factory default settings.
DO NOT RESTORE: The customization features will not be set to their factory default settings.
To select a setting, press the set/ reset button while the desired setting is displayed on the DIC.
EXIT FEATURE SETTINGS
This feature allows you to exit the feature settings menu.
Press the customization button until PRESS V TO EXIT FEATURE
SETTINGS appears in the DIC display. Press the set/reset button once to exit the menu.
If you do not exit, pressing the customization button again will return you to the beginning of the feature settings menu.
Exiting the Feature Settings Menu
The feature settings menu will be exited when any of the following occurs:
- The vehicle is no longer in ON/RUN.
-
ON (default): The remote start feature will be enabled.
-
NO CHANGE: No change will be made to this feature. The current setting will remain.
To select a setting, press the set/ reset button while the desired setting is displayed on the DIC.
DISPLAY DIGITAL SPEED
This feature allows you to enable or disable the digital speedometer on the DIC.
Press the customization button until DISPLAY DIGITAL SPEED appears
on the DIC display. Press the set/ reset button once to access the settings for this feature. Then press the customization button to scroll through the following settings:
OFF: The digital speedometer will be disabled.
ON (default): The digital speedometer will be enabled.
NO CHANGE: No change will be made to this feature. The current setting will remain.
To select a setting, press the set/ reset button while the desired setting is displayed on the DIC.
FACTORY SETTINGS
This feature allows you to set all of the customization features back to their factory default settings.Press the customization button until FACTORY SETTINGS appears on the DIC display. Press the set/reset button once to access the settings for this feature. Then press the customization button to scroll through the following settings:
RESTORE ALL (default): The customization features will be set to their factory default settings.
DO NOT RESTORE: The customization features will not be set to their factory default settings.
To select a setting, press the set/ reset button while the desired setting is displayed on the DIC.
EXIT FEATURE SETTINGS
This feature allows you to exit the feature settings menu.
Press the customization button until PRESS V TO EXIT FEATURE SETTINGS appears in the DIC display. Press the set/reset button once to exit the menu.
If you do not exit, pressing the customization button again will return you to the beginning of the feature settings menu.
Exiting the Feature Settings Menu
The feature settings menu will be exited when any of the following occurs:- The vehicle is no longer in ON/RUN.
FAQs
The 2014 Cadillac Escalade’s “Check Engine” warning message usually denotes an engine or emissions system problem that has to be fixed.
The “Low Tire Pressure” alert indicates that you should inflate one or more of the tires on your 2014 Cadillac Escalade since they may be underinflated.
Make an appointment for your 2014 Cadillac Escalade’s oil change, as indicated by the “Oil Change Required” message.
The 2014 Cadillac Escalade’s “ABS Warning” may indicate a problem with the Anti Lock Braking System that has to be addressed right away.
The 2014 Cadillac Escalade’s “Battery Voltage Low” warning suggests a possible problem with the battery or charging system that needs to be checked out.
The 2014 Cadillac Escalade’s “Airbag Warning” might point to an airbag malfunction; prompt service from a qualified technician is recommended.
A professional inspection is advised for the 2014 Cadillac Escalade due to possible problems with the traction control system indicated by the “Service Traction Control” warning.
The 2014 Cadillac Escalade’s engine is overheating, as indicated by the “Temperature Warning”; stop, turn off the engine, and get help.
To encourage safer driving habits, the 2014 Cadillac Escalade’s “Lane Departure Warning” warns you when it detects unintentional lane departure.
To address potential transmission issues in the 2014 Cadillac Escalade, it is not recommended to reset the “Service Transmission” warning. Instead, speak with a qualified technician.
The 2014 Cadillac Escalade’s “Fuel Cap Warning” indicates that the fuel cap may be missing or loose; make sure it is securely fastened to fix the problem.
It is not advised to disregard the “Service Air Filter” alert; replacing the filter on time keeps the 2014 Cadillac Escalade’s engine operating at peak efficiency.
Useful Links
View Full PDF: 2014 Cadillac Escalade Owner’s Manual| Auto User Guide
Warning Symbols: 2014 Cadillac Escalade Cluster Guide
2023 Cadillac Escalade Specs, Price, Features, Mileage and Torque