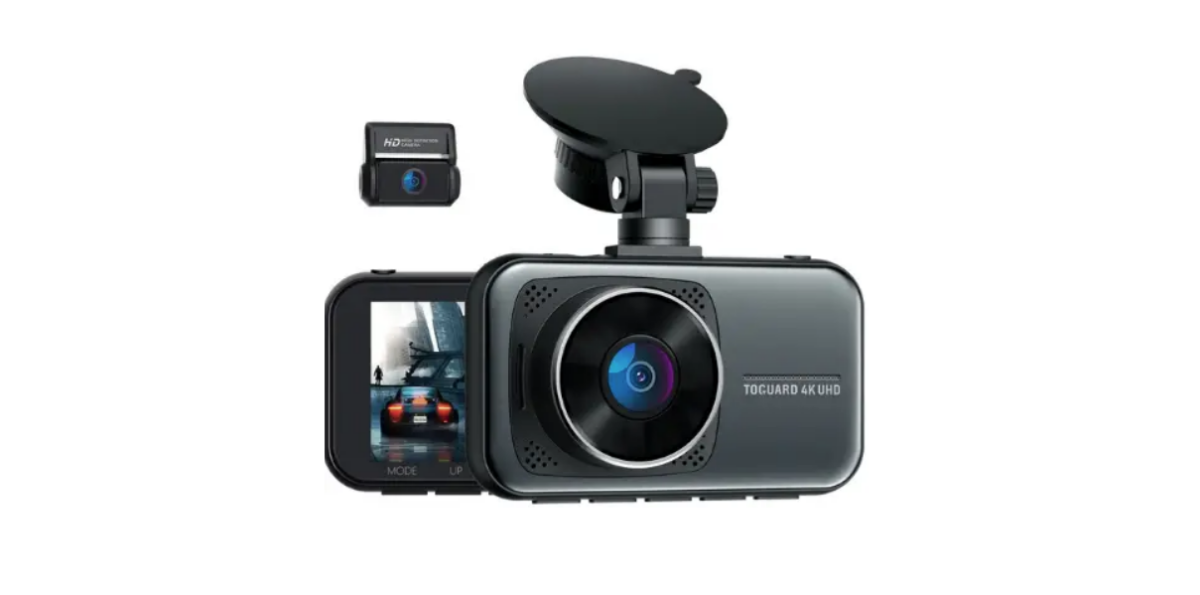
How to Operate Toguard C200 4K UHD Dash Camera

Take detailed pictures while driving with the Toguard C200 4K UHD Dash Camera. This dash cam was made with dependability and clarity in mind. It records in extremely high resolution and is simple to use, so you can be sure you never miss a moment—whether you’re taking an exciting road trip or your everyday commute.
Important Instructions of Toguard C200
- This product is intended for use in motor vehicles only. Do NOT install the camera where it might block the driver’s view of the road (including the mirrors) or the deployment of the airbag.
- Before using this device, please insert the memory card first, and need to format the micro SD card to FAT32 format on the PC first, then format the memory card in the camera menu.
- This camera records video at high resolution, Be sure to use a U3 or above high-speed Micro SD card. Support
128- 256GB cards. - The C200 uses a supercapacitor instead of a lithium battery as a power source, which is safer and lighter, It is only used to save the last video after a power cut. The camera will not power on without an external power supply.
- Be sure the camera lens is clean and there is nothing blocking the lens.
- DO NOT leave the camera in direct sunlight for a long period of time or where the temperature could go above 140°F(60°C)
Interface and Button Function

Button Function
| Button | Action | Function |
|---|---|---|
| Short Press | Turn off/on the screen | Toggle the monitor display without fully powering down the unit. |
| Switch mode in standby | Toggle between Video, Photo, and Playback modes. | |
| Select options & adjust values in the settings | Choose and modify settings in the Menu. | |
| Start/stop video or take a photo | In Video/Photo mode, control recording or capturing photos. | |
| Select & play files in Playback | Navigate and play media files. | |
| Access menu settings in modes | Open settings specific to the current mode (Video/Photo/Playback). | |
| Lock current video during recording | Secure the recording of the current video segment. | |
| Long Press | Turn on/off the unit | Power the monitor on or off completely. |
| During Video Recording | Switch front/rear image display | Toggle the view between front and rear cameras. |
| Turn on/off the audio recording | Enable or disable audio recording. |
Set up and Installation

- Use the Suction mount to install the C200 dash cam on the windshield, recommended to place it near the rearview mirror facing the front, and adjust the lens angle for best coverage.
- Plug the included power adapter into the car cigarette lighter socket, and the indicator will light up meaning power is on.
- Connect the power cable to the camera. For better looking, route the excess cable alongside the interior trim as the diagram shows.
- Install the rearview camera on the rear windscreen (inside the car), adjust the lens angle for the best coverage, and then connect the rear camera connector to the main unit.
- After installation, please start the engine, and do a bench test to make sure all function works well.
Operating Mode
The C200 operates in 3 modes: Video Recording Mode, Photo Mode and Playback Mode. These modes also have a menu to help you configure recording.
Press the MODE button to switch between different modes and access the mode you want. Watch the icon on the top left corner of the screen for each mode.
Video recording Mode
The camera will automatically enter Video Recording Mode and start recording when connected to a car charger and powered on.
A Red dot flashing on the top left corner indicates the recording is in progress. Press the OK to stop recording, or start recording again.

- Mode
- Loop Recording
- G-sensor
- Lock video
- Time&Date
- WDR
- Recording Time
- Video Resolution indicator
- Audio Recording
- SD card
- Power
In these three modes, you can enter the setting mode by pressing the MENU button.
Press the UP or DOWN button to select the setting option, press the OK button to confirm, and press the MENU button again to exit the setting option.
Video Recording Menu
Resolution
Adjust front lens recording video resolution,4K 30FPS/
2K 30FPS/1080P 30FPS available.The rear camera will record in 1080P only.
Loop Recording
Off/ 1 / 3 / 5 Minutes. This function allows you to set the recording video file length to 1/3/5 minutes to automatically overwrite the earliest file when the SD card’s storage fills up. We recommend you turn on the loop recording function to prevent the memory card space runs full and stop recording. (1 minute settings default).
WDR
ON/OFF. Wide Dynamic Range: turn on to optimize video quality with wider light range and image details.
G sensor
OFF/ Low/ Middle/ High. G-sensor will detect significant or sudden shock and movement then the camera will automatically lock the current recording file from loop recording, detection sensitivity can be adjusted accordingly.
Exposure
+2/ .. ./0/ .. ./-2. Adjust video brightness
Motion Detection
Off/on. Turn ON/OFF motion detection function. For your safety, we highly recommend turning off this function.
Record Audio
Off/on. Turn recording on and off.
Date Stamp
Off/on. Enable/Disable the date and time marks in video files.
Parking Monitor: (Optional)
With an optional hard wire kit connected, the Parking Monitor is enabled, and the camera will stay on standby after the engine is turned off. When the camera detects shaking, it will automatically turn on and take a short video, then return to standby automatically. (Must use the hardwire kit when using the Parking Monitor function.)
Photo Taking Menu
Resolution
12M(4032X3024)/10M(3648X2736)/8M(3264X2448)/ 5M(2592X1944)/3M(2048X1536)
Date Stamp
Off/on. Enable/Disable the date and time marks in photo files.
Playback Mode
This mode allows you to playback recorded video or view photos, and manage the recorded files.
- Stop the video recording, and press the MODE button twice to enter Playback Mode, you can view all the files in this mode.
- In playback mode, the folders are displayed in the following order:
Rear Camera Video
Front Camera Video - Use the UP and DOWN buttons to scroll through the recorded files/photos, and press OK to play or pause playing the selected file.
- Press the MODE button to quit playback and return to the file list.
- Use the Playback Menu to manage the files. Press the Menu button to enter the setup menu.
Playback Mode Setup Menu
Delete: Delete the recorded files.
Protect: Use this option to Lock and Unlock files, locked files will not be overwritten by loop recording.
Slide show: Select a time gap to activate this function, and all. The recorded file will be displayed in a slide show.
Specification
| Feature | Description |
|---|---|
| Model | Toguard C200 |
| Screen Display | 3-inch LCD Screen |
| Lens | 170° Wide Angle Lens |
| Video Resolution | Front: 38402160P/25601440P/19201080P, Rear: 19201080P |
| Video Format | MP4 |
| Video Coding | H.264 |
| Video Mode | Normal/Loop Recording |
| Picture Format | JPG |
| Loop Recording | 1 Min/3 Min/5 Min |
| Power ON | Supported |
| Recording | Supported |
| G-Sensor Lock | Supported |
| Language | English, Chinese, German, Japanese |
| Audio Recording | ON/OFF |
| Storage | Micro SD Card (Up to 256GB) |
| USB Interface | Mini USB Power |
| Internal Power | Super Capacitor |
| External Power Supply | 5V/2A |
| Storage Temperature | -20°C to 60°C (-4°F to 140°F) |
| Operating Temperature | -10°C to 50°C (14°F to 122°F) |
Troubleshooting
The dash cam will stop automatically when recording.
Solution:
- Check whether the memory is full.
- Check whether the loop recording function of the dash cam is working.
- Check whether the Micro SD card is high-speed above U3
- Playback the recorded video on the dash cam to check whether there might be too many locked videos, which causes the SD card space to run out and stop looping recording.
If the video played on the computer is somehow jammed or not fluent. There might be a problem with the memory card speed.
Solution:
- Format your Micro SD card in the camera.
- Change a U3 or above high-speed Card.
There are stripes interference in the video. Solution:
There should be the wrong light frequency. According to the local main frequency, make the appropriate settings 50HZ or 60HZ.
The suction mount cannot attach to the windshield well. Solution:
- Please clean the windscreen attached with a glass cleaning wipe. Removed the protective film, If it does not work, warm your windscreen then try it again.
- Please soak the suction mount in warm water for a moment.
- If it is still not working, we will be glad to send a new suction mount to you, please contact us to get a replacement.
Without an external power supply, the camera will not power on, or the camera will power off immediately after the external power supply is disconnected. Solution:
This C200 dash cam needs a 5V 2A external power supply to be powered on. The camera will not power on without an external power supply. The power source of this C200 dash cam is a safer lighter supercapacitor instead of a lithium battery, which is only used to save the last video after a power cut.
FAQs About C200 Dash Cam
Simply press the ‘Record’ button once you start your vehicle—the camera begins recording automatically.
Yes, switch to ‘Photo’ mode and press the ‘OK’ button to capture still images.
Press the ‘Menu’ button on the camera to adjust settings like resolution, loop recording, and more.
Ensure the camera is properly connected to the power source and check if the car charger is working.
Remove the SD card and connect it to a computer, or use the camera’s playback mode.
Yes, the G-sensor automatically locks and saves footage if a collision is detected.
It’s recommended to format the SD card in the camera once a month for optimal performance.
Yes, enable the parking mode in settings to have the camera record when it senses motion while parked.
The Toguard C200 supports up to a 32GB microSD card.
Enable night vision mode to improve recording quality in low-light conditions.