iZEEKER iD220 Dash Cam User Manual

The iZEEKER iD220 Dash Cam is the best vehicle surveillance technology on the market today. It combines high-resolution recording with advanced safety features to meet the exact needs of today’s drivers. With a Full HD (1080p) video resolution, this high-end dash cam records the road ahead with stunning clarity. This makes sure that every detail of your trip is recorded accurately. With its large wide-angle lens, it gives you a full picture of your surroundings, with fewer blind spots and a better view of the road. The iZEEKER iD220 has a lot of advanced features, such as a G-sensor for automatic collision detection and video locking, loop recording for easy storage management, and night vision for watching videos clearly when there isn’t much light. Extra features, such as the parking mode, keep an eye on your car while it’s parked, which adds an extra layer of security. Its simple interface and quick installation process make it easy for drivers of all tech levels to use, giving them peace of mind on every trip. The iZEEKER iD220 Dash Cam is your reliable witness on the road, whether you’re driving through a busy city or on a long, scenic route. It records everything clearly and will be very helpful if something unexpected happens.
How to operate iZEEKER iD220
Operating the iZEEKER iD220 Dash Cam involves a series of straightforward steps that will help you make the most out of its features. While specific instructions can vary slightly from one model to another, the general operation procedure for dash cams like the iZEEKER iD220 should closely follow these guidelines. For the most accurate information, always refer to the user manual that comes with your device. Here’s a basic guide to get you started:
Installation
- Mounting the Dash Cam: Attach the dash cam to your windshield or dashboard using the provided mount. Position it in a way that it gives a clear view of the road ahead without obstructing your sight while driving.
- Connecting to Power: Connect the dash cam to your vehicle’s power supply, typically through the cigarette lighter or a USB port, using the included power cable. Some devices may also support direct wiring to the vehicle’s battery for constant power.
Setup
- Inserting a MicroSD Card: Before you start recording, insert a compatible MicroSD card into the designated slot. Make sure it’s properly formatted according to the dash cam’s requirements.
- Powering On: Turn on the ignition of your vehicle. If connected to the cigarette lighter or a USB port that activates with the ignition, the dash cam should automatically power on.
- Adjusting Settings: Access the menu on the dash cam to set up the date, time, video resolution, loop recording duration, motion detection, and other features. This might be done through buttons on the device or a touchscreen interface, depending on the model.
Recording
- Automatic Recording: Once the dash cam is set up and the vehicle is turned on, it should automatically start recording. The loop recording feature ensures continuous recording by overwriting the oldest files when the memory card is full.
- Manual Recording: Some dash cams allow you to manually start and stop recordings or take still photos. Consult your device’s manual to see how these features are activated.
Viewing Footage
- On the Device: If your dash cam has a built-in screen, you can view recorded footage directly on the device.
- On a Computer: Remove the MicroSD card and use a card reader to view and save the videos on a computer. Alternatively, connect the dash cam directly to a computer using a USB cable if supported.
Additional Features
- G-Sensor: This feature automatically detects sudden shakes or collisions and locks the current video file, preventing it from being overwritten.
- Parking Mode: When enabled, the dash cam will record video if it detects motion or impact while your vehicle is parked, offering added security.
Maintenance and Troubleshooting
- Regularly check the dash cam and its mount to ensure they are securely attached.
- Keep the lens clean for clear video quality.
- Format the MicroSD card inside the dash cam periodically to maintain its performance (unless important files are saved).
Product Description
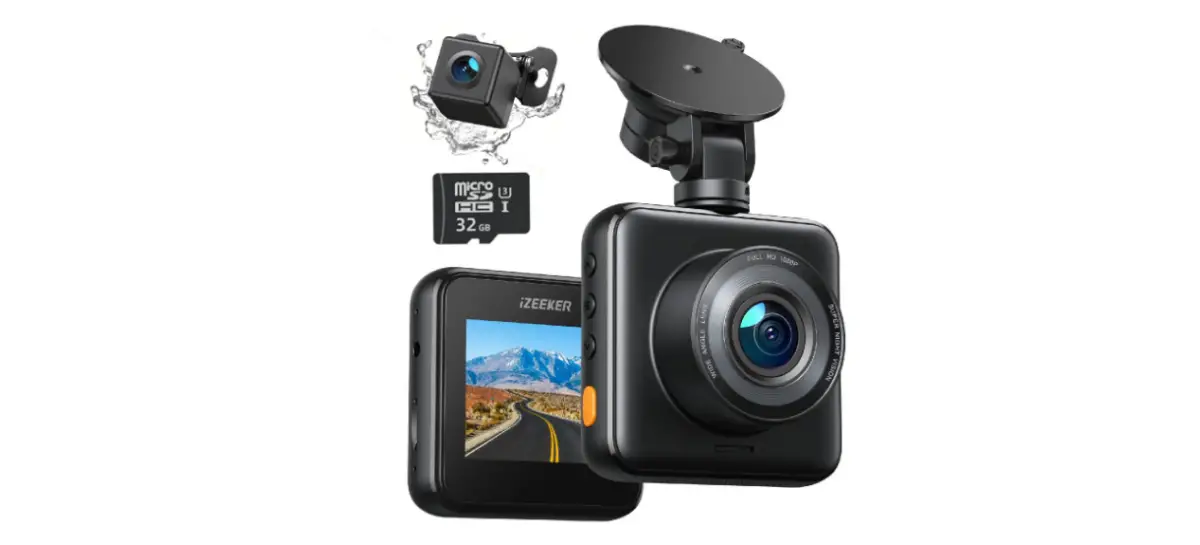
Package contents

- Dash Cam
- Suction Mount
- 3M Adhesive Mount (for rear camera)
- 2 Screws
- Micro USB Cable
- car Charger
- Rear Camera with Cable Kit
Camera Overview

- Power Port
- Mounting Groove
- Microphone
- Rear Camera Interface
- MicroSD Card Slot
- Reset
- Up
- Menu/Mode
- Down
- OK/Power
- LED Indicator
- Display Screen
- Camera Lens
- Speaker
- Rear Camera Lens
- Tapped Hole
- 3M Mount
Button & Interface Description
| Button & Interface | Description |
| Power Port | Connect the dash cam with the car charger while driving. Connect to your computer with a USB cable while watching playback. |
| Mounting Groove | Attach the mount to the camera |
| Reset | Insert a reset pin into the R hole to restart the machine under abnormal conditions. |
| Rear Camera Interface | Connect the rear camera. |
| MicroSD Card Slot | Insert a Class 1O microSD card with a capacity of 32GB~128GB. |
| Up | Press to navigate up within the menus |
| Menu/Mode | Short press to access the camera menu and system menu. Long press to toggle video recording model, photo mode, or video playback mode. |
| Down | Press to navigate down within the menus. |
| OK/Power | Short press to confirm, long press to turn on/off the camera. |
| Microphone | Toggle audio recording |
| Display Screen | 2.0″ TFT Display |
| LED Indicator | Solid Red: Charging battery Flashing red light: Video recording |
| Camera Lens | 170° wide angle for optimum picture quality |
| Speaker | For audio playback directly from the camera |
Product Description
Insert Memory Card
For reliable operation, please use a Class 1 O Micro 5D/TF card with a capacity of 32-l 28GB.
- Insert a micro5D card into the memory card slot located at the left side of the LCD screen. Align the MicroSD card as shown in the picture below. (Electrical contacts of the microSD card should be facing the LCD side of the camera, with the notches of the microSD card facing up.) When the memory card is successfully inserted, you will hear a ‘clicking’ sound.
- To remove the Micro5D card, gently push its top edge inward until it clicks. It will pop up and can be removed.
Tips
- The micro5D card must be formatted when first used.
- For a 64GB/128GB card, please use a computer to format it with the FAT32 file system before using it.
- It’s recommended to format the card regularly.
Attach Mount to Camera
Align the mount with the mounting groove located at the top of the camera, slot it into the groove, and slide it to the left.
Remove Lens Protection Film
Before installing the camera onto the windshield, remove the protection film from the camera lens.
Product Installation
- Clean the windshield using water or alcohol, and wipe clean with a lint-free cloth. Install the suction mount to the windshield, rotate the locking bar on the mount upward 90 degrees till it clicks, then mount the camera on the windshield securely.
- Connect the Micro USB cable end of the charging cable to the camera.
- Carefully route the power cable around the windshield and tuck the wire under the trim. When complete, insert the Car Charger into your vehicle’s cigarette lighter port.
- Please follow the instructions below Install the rear camera in the correct direction.
- To avoid damage to the dash cam, we suggest that you ask a professional to install it for you.
Operation Instructions
Powering On / Off
- Automatic
- The camera is designed to automatically power on when it receives power. A start-up sound will be played when the camera has started successfully.
- When the camera is ON, simply turn OFF the engine or unplug the power cable and the camera will switch OFF automatically.
- Manual
- Switching the camera OFF manually is required for vehicles where the vehicle’s power socket provides continuous power after the engine is turned OFF. To turn the power off manually, press and hold the power button for at least 3 seconds. A countdown will display on the screen. Press and hold the power button until the camera is powered off.
- To turn the camera on manually, press and hold the power button for at least 3 seconds.
- Mode Switches
Long press the mode (menu) button to toggle video recording mode, photo mode, and video playback mode. - Video Feature Menu
Press the menu button once in video recording mode - System Menu
Press the button twice
Product Specifications
| Display | 2.0″ TFT-LCD |
| Lens | 650NM lens |
| Angle | 170° |
| F/No. | 1.8 |
| Record Method | Loop Recording/ Motion Detection |
| Files Format | MOV |
| Video Encoding | H.264 |
| Video Resolution | 1920xl 080, 1280×720, 640×480 |
|
Camera Resolution |
4032×3024, 3648×2736, 3264×2448,
2592xl 944, 2048xl 536, 1920xl 080, 1280×960, 640×480 |
| Seamless Video | Yes |
| Operating Temperature | -4°F~140°F |
FAQs About iZEEKER iD220
Attach the dash cam to your windshield using the suction cup mount, ensuring it has a clear view of the road. Connect it to power using the included cable and car charger, plugging it into the cigarette lighter port.
It requires a MicroSD card, class 10 or higher, with a capacity of up to 128GB (not included). Make sure to format it in the dash cam before use.
Navigate to the settings menu using the dash cam’s buttons or touchscreen, find the format option, and select it. Confirm the action to format the card.
Yes, the dash cam is equipped with night vision capabilities, allowing it to capture clear footage in low-light conditions.
Loop recording continuously records video in short segments (e.g., 1, 3, 5 minutes). When the storage is full, it automatically overwrites the oldest files.
The G-sensor detects sudden impacts or collisions and automatically locks and saves the relevant footage, preventing it from being overwritten.
Use the dash cam’s playback mode, accessible through its menu, to view recorded videos and photos on its built-in screen.
Yes, remove the MicroSD card and use a card reader to access the files on a computer, or connect the dash cam directly with a USB cable if supported.
Yes, when enabled, the dash cam will automatically record when it detects motion or impact while your vehicle is parked.
Mount it behind the rearview mirror or in another location that does not obstruct your line of sight but still offers a clear view of the road.
Check if the memory card is full or if there are any issues with the power supply. Ensure loop recording is enabled or try formatting the MicroSD card.
Ensure the lens is clean and adjust the resolution settings in the dash cam’s menu. Avoid direct sunlight or headlights that may cause glare.
Yes, if your dash cam has a manual lock button or feature, use it to protect important video files from being overwritten.
Regularly check the mount’s security, clean the lens, and format the MicroSD card inside the dash cam to ensure optimal performance.