Yansoo X88 Dual Dash Cam User Manual

The Yansoo X88 Dual Dash Cam is a complete vehicle surveillance system made for drivers who want to be safer and keep an eye on things while they’re driving. This advanced system has two cameras, one on the front and one on the back. The front and rear cameras can record high-quality footage in Full HD resolution, so you can keep detailed records of accidents, scenic trips, and unplanned events. The front camera has a great wide-angle lens that lets you see a lot, and the back camera makes sure that you can see everything around the car, which is safer and more secure. The Yansoo X88 has night vision, so it can record even when there isn’t much light. This makes it reliable for use around the clock. Its extra features, such as loop recording, a built-in G-sensor for automatic collision detection, and parking mode, make it even more useful and an absolute must-have for careful drivers. The Yansoo X88 Dual Dash Cam is one of the best ways to make sure you have peace of mind on every trip. It has a sleek design, is easy to install, and is simple to use.
Important Notice
- The short type C cable in the package is for transferring video to your com1put1er, which can not be used as a power cord, Please use the ca r c ha rg e cable to power t n is camera.
- Before installing the camera, please power up the car recorder to test whether it can be used properly, including whether the display of the front and ‘inside cameras is normal (Please use the car charger to get power from the cigarette lighter)
- The inside view is gray because the night vision function is turned on. You can just open the menu., and find that the inside view is gray because the night vision function is turned on. You can just open the menu, find the “Shooting Sound” function, turn it off, or quickly turn it off by Long pressing the A Button, and the inside view will return to normal color.
- The camera cannot be operated while recording, so
Press the OK Button to pause the recording before making
function settings.
The camera records video at high resolution, Be sure to
use a high-speed Micro SD card, Class 10 or above, No more than 32GB. (16GB / 32GB cards are recommended). Kindly format the card in the camera menu before use. - The car camera has a built-in battery as an internal power source for emergency recording. If you want to keep the camera turned on for 24 hours, you need to power it continuously, just connect it to the Hardwire Kit. (need to purchase separately)
- Do not install the camera where it may obstruct the driver’s view (including the rearview mirror) or the deployment of the airbag. Be sure the camera lens is clean and nothing is blocking the lens.
- Do not leave the camera in direct sunlight for a long period or where the temperature could go above 158°F (70°C).
- We suggest some important function settings for your daily use: G-Sensor level choose” low”, or turn off; loop recording choose “3 minutes”; motion detection choose “off”; parking monitor choose “ON”, security camera for the car.
- We suggest you format the SD card monthly to extend
its life span. - For some other frequently asked questions, please refer to the “Frequently Asked Questions” section. If these still don’t solve your problem, please email us at AMAZON all setup issues can be easily resolved, and should be able to get you up and running in no time. Please be assured that we will take 100% responsibility for our products. We just want our customers to be happy and proud to use the Yansoo Dash Cam!
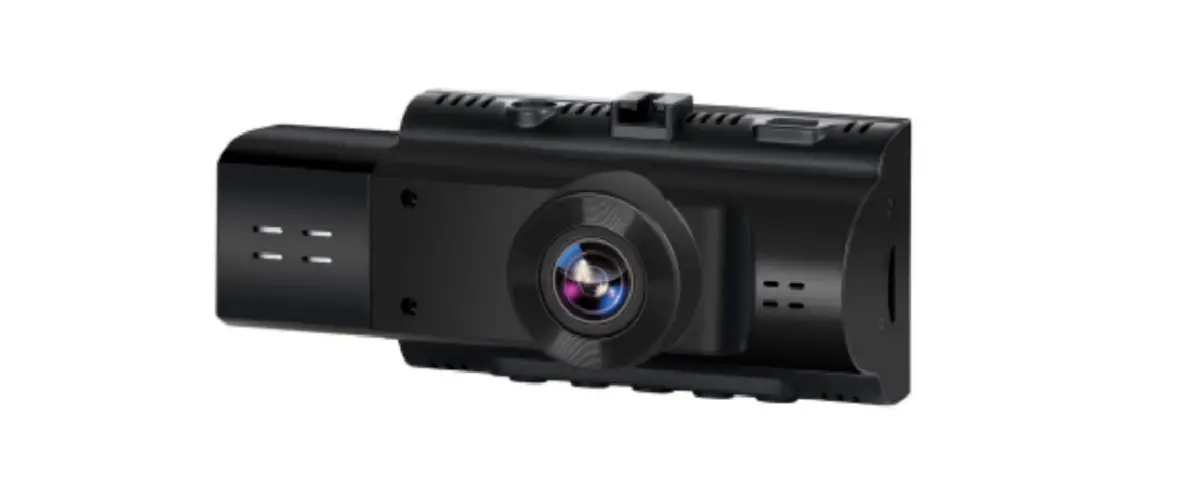
Camera Overview

- Flashing while charging
- Flashing while recording
- Microphone
- Button Guide Icons
- Reset
- Micro SD Card Slot (SD Card need to purchase separately)
- Type C Charging Port
- Mount Connector
- Rear Camera Port
- Menu Button / Mode Button
- Up Navigation Button / Quickly Turn Off the Night Vision Function Button / Screen Toggle Button /Switching between front and inside files Button
- Power Button / Screensaver Button
- Down Navigation Button / Switching microphone Button / Switching between front and rear files Button
- OK (Confirm) Button / Record Button
- Lens
- Speaker
Screen Icons

Basic Operation
Device Power
The device will be automatically powered on when it’s
plugged into a 12V accessory socket or cigarette lighter
and receives power (i.e.: when the vehicle is started).
- To turn the device on manually, press and hold the POWER Button until the screen lights up.
- To quickly turn on the Screensaver when the Dashcam is
on, use a short press on the POWER Button once. The
the display screen will go out (however the dashcam will still
be running at this time). Use a short press on the power
button again and the display screen will go back on.
Menu Settings
When the dashcam is on it will be automatically recording.
You can press the OK Button to stop the recording.
The X88 operates in 3 modes:
- Video Recording Mode, Photo Mode, and Playback Mode.
- These modes also have menus to help you configure recording and taking photos. Long Press the MENU Button to access the mode you want. You can distinguish the different modes by the icons in the upper left corner.
- In all 3 operating modes, you can short-press the MENU once to access the menu settings for that particular mode, and short-press twice to display the System Setting Menu. Press the A and V Buttons to scroll through the various setup functions and press the OK Button to select. Press the Menu Button again to exit/ return.
Video Recording Mode
The camera will automatically enter Video Recording Mode and start recording when connected to a car charger and powered on. A blue LED light and red dot flashing on the top left corner indicates the recording is in progress. Press the OK Button to stop recording for the standby mode, or start recording again. (Standby mode means that there are no ongoing operations)

In Video Recording Mode press the “MENU” Button to enter
the setting menu of the video recording mode.
- Resolution: 1080FHD (1920*1080)/ 720P (1280*720)/ VGA
- Loop Recording: This function allows you to set video file length to 1/3/5 minutes, and select a value to activate loop recording, so when storage fills up, it will automatically loop back to the earliest file and record over it. (Please note: Locked video files cannot be overwritten, you need to clear these locked files by manually deleting or formatting them)
- WDR(Wide Dynamic Range): After turning on this function, the camera will automatically fine-tune the exposure to maximize the clarity of the video when encountering low light or backlight conditions.
- Exposure: Adjustable exposure value, used to change the
image brightness. (‡3.0) - Microphone: Turn on/off audio recording in the video. You
can achieve it in two ways, manually turn it on/off through the menu or short press the down button to quickly turn it on/off. - Date Stamp: Enable/Disable the date and time marks in the video
files. (Recommended to turn on) - “Motion Detection”: This function can automatically start
recording in standby mode when a moving object is detected
in front of the camera. - “G-Sensor (Gravity Sensor)”: G-sensor will detect significant or
sudden shock and movement then automatically locks the current
recording from loop recording, Off/Low/Medium/High
sensitivity available. - “Parking Monitor”: It is used to protect your car after parking, with this function on, after you park the car and the camera powers off, it will stay in standby mode when the camera detects shock, it will automatically turn on and shoot 31 seconds of video, then shut down automatically. The G- sensor sensitivity can be adjusted to low/medium/high. (It is recommended to turn off the motion detection and parking monitor functions during driving, otherwise, it will automatically lock multiple files causing the memory to be full)
- Shooting Sound: off/on the night vision function, or quickly
turn it off/on by Long pressing the A Button. If it is on, the
interior view will show a gray picture, if it is off, it will show a
normal color. When night vision is activated, it can have a
clearer view in low light conditions. With the help of this night
vision function, drivers will get higher foresight during the night or
low light driving, and it can provide drivers with more com-
prehensive and accurate information for potential hazards.
Photo Taking Mode
To take a photo, stop video recording and hold down the MENU Button toggle to the Photo Taking Mode. Press the OK Button to take a photo.
In Photo Taking Mode press the “MENU” Button to enter
the setting menu of photo mode.
- Resolution: Set the photo resolution. (Optional: 10M
3648*2736 / 8M 3264*2448 / 5M 2592*1944 / 3M
2048*1536 / 2M 1920*1080 / 1.3M 1280*960 / VAG) - Anti-shaking: Off / On
- Date Stamp: Enable/Disable the date and time marks on
photo.
Playback Mode
- Playback of videos can be done on the device or a computer.
- To review a photo/video on the device, stop video recording and hold on the MENU button toggle to the Playback Mode.
- Use the A and V Buttons to toggle to the desired video.
- Press the OK Button to play.
- In Playback Mode, Long press the A Button to switch between front and inside files. During playback use the OK
(pause), A (rewind), and V (fast forward) Buttons to control
the video playback. - Delete: Delete Current / Delete All
- Protection: Lock One / Unlock One / Lock All / Unlock All
To delete a photo/video, stop video recording toggle to the Playback Mode, and toggle through the videos and photos to the one you want to delete. To playback a photo/video on the computer either use an SD card adapter or connect the device to the computer directly using the Type-C cable.
- To playback a video using an SD card adapter, remove the memory card and insert it into an SD card adapter. Place the adapter in the computer.
- On the computer, navigate to the device drive. “DCIM/1” is front camera videos, and “DCIM/2” is inside cam videos. Select the video to playback.
- To playback a video using a Type-C cable, connect the Cable to the device and the computer. After the device powers up, press the OK Button to select “Mass Storage”.
System Setting Menu
Press the Menu Button twice to access the System Setting Menu in any mode. The icon is highlighted in the upper left corner.
- Screen Saver: To guarantee safe driving, not to be
affected by the light of the recorder, you can set the screen
saver to shut off the display, press any key to turn it back on.
Set the time to automatically turn off the LCD after
no operation. (Optional: Off / 30 Seconds / 1 Minute / 2
Minutes / Quickly turn on the screen saver by tapping the
power button) - Auto Power Off: Set the time for the camera to automatic-
ally power to save energy, after the camera is idle for the set
time, it will power off. (Optional: Off / 1 Minute / 3 Minutes / 5 Minutes) - Frequency: 50Hz / 60Hz
- Key Sound: Off / On
- Switch Sound: Off / On
- Language: Japanese / English / German / French / Spanish /
Italian/ Chinese - Date/Time: Change the time and date by using the A and
V, then press OK to confirm. - Format: Format the Micro SD Card.
- Default Setting: Reset all settings back to factory default.
Installation
Insert the Memory Card
- Before installation, please check the camera’s normal function, and make sure you are using a high-speed Micro SD card (speed Class 10 or above.), and format the card in the camera menu before recording.
- Gently push the memory card in until you hear a click, and allow the spring release to push the card in/out.
- Installing the Camera onto the Windshield Clean the front windshield before installation. Tear off the plastic protective film from the suction cup, press the suction cup to the suitable position on the inner windshield, and rotate the suction cup handle to ensure that the suction cup is fixed. Do not install the camera in a place where it may obstruct the driver’s view.
Connect the power
Connect the car charger to the camera and the cigarette
lighter, hide the rest of the cable in the gap of the Interior
trim board. The camera will auto-start recording once
powered on.
Start the engine and have a test run.
Please feel free to contact us if you have any questions during the installation process.
After-Sales Service
Warranty
- All our products are covered by a one-year warranty.
Customer Support
- For questions, support, or warranty claims, contact us at AMAZON. We will reply to you within 12 hours.
- If you can provide photos or video to show your problem, we would appreciate it.
- IMPORTANT: Proof of original purchase (Online order receipts also accepted) is required for any warranty service. Yansoo is firmly committed to continually improving our products, services, and customer experience. As our VIP customer, if you have any thoughts on how we can do better, we would appreciate your constructive feedback and suggestions. Please contact us.
FAQs of Yansoo X88
Mount the front camera on the windshield using the suction cup or adhesive mount for a clear front view. Attach the rear camera on the rear windshield or near the license plate. Connect both cameras using the provided cable and power the system via the car’s cigarette lighter or USB port.
Use a high-speed MicroSD card, Class 10 or above, with a capacity up to 128GB, formatted in the dash cam before use for optimal performance.
A: Access the dash cam’s settings menu, find the format option, and select it. Confirm the action to format the card, preparing it for use.
A: Yes, the dash cam is equipped with night vision capabilities, allowing it to capture clear footage in low-light conditions.
Loop recording continuously captures video in set intervals (e.g., 1, 3, 5 minutes), overwriting the oldest files when the memory card is full to ensure continuous recording.
The built-in G-sensor triggers automatic video file protection, locking and saving the current footage to prevent it from being overwritten.
Footage can be viewed directly on the dash cam’s display if it has one, or by transferring the files to a computer using a MicroSD card reader or a USB connection.
Yes, when enabled, parking mode records footage if motion or an impact is detected while the vehicle is parked, requiring a continuous power source.
Install the front camera behind the rearview mirror or in another location that does not impede your field of vision but still captures a full view of the road.
Check if the memory card is full or if there’s an issue with the power supply. Ensure loop recording is enabled or consider formatting the MicroSD card.
A: Ensure the lens is clean and check if the night vision feature is activated or adjust the exposure settings if available.
A: Yes, use the manual lock feature or button on the dash cam to protect important footage from being overwritten.
Regularly check the camera mounts, clean the lenses, and format the MicroSD card within the dash cam to maintain optimal performance.
Download the latest firmware from the manufacturer’s website, save it to the MicroSD card, and follow the on-screen instructions or user manual steps to update the dash cam.
Ensure the power cable is securely connected to the dash cam and the car’s power source. Check the fuse of the car charger or try a different power source to determine if the issue lies with the power supply.