

2024 Chevrolet Express Fuses and Fuse Box | How to replace fuses
The 2024 Chevrolet Express is a reliable and flexible car. It has an important and well-organized part called the fuse box, which holds different fuses that are needed to protect the electrical systems. The fuse box is like a safety hub that keeps the electricity from going too far and damaging sensitive parts. Location: The fuse box is usually in an easy-to-reach place inside the car, either in the engine area or the cabin. This makes it simple to check and fix problems.
If there is an electricity problem, it is very important to know how to change fuses. The lid of the fuse box usually has a picture that shows what each fuse does, which can help you figure out which circuit is having trouble. To change a fuse, first find the fuse that goes with it in the picture. Then, use a fuse puller or pliers to carefully remove the bad fuse. After that, carefully put a new fuse with the same amperage number into the slot that was marked. Paying close attention to every detail during this process is very important for keeping the car’s electrical systems in good shape.
By checking the fuse box regularly, you can make sure that any electrical problems are quickly found and fixed. This will help the 2024 Chevrolet Express last longer and run better. Understanding how to change a fuse gives car drivers the power to quickly fix small electrical problems, which makes driving more enjoyable and hassle-free.
2024 Chevrolet EQUINOX Specs, Price, Features, Mileage (Brochure)
Electrical System
Electrical System Overload
The vehicle has fuses to protect against an electrical system overload. When the current electrical load is too heavy, the circuit breaker opens and closes, protecting the circuit until the current load returns to normal or the problem is fixed. This greatly reduces the chance of circuit overload and fire caused by electrical problems.
Fuses protect the wires that provide the power to the devices in your vehicle. If there is a problem on the road and a fuse needs to be replaced, the same amperage fuse can be borrowed. Choose some feature of the vehicle that is not needed to use and replace it as soon as possible.
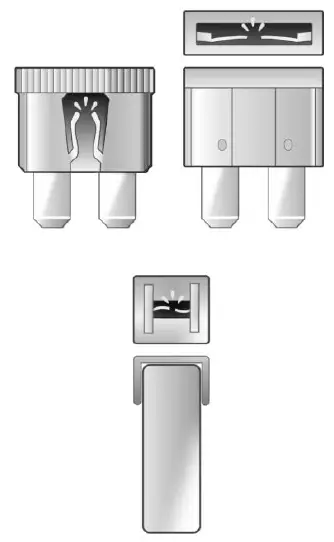
To check a fuse, look at the band inside the fuse. If the band is broken or melted, replace the fuse. Be sure to replace a bad fuse with a fuse of identical size and rating.
Replacing a Blown Fuse
At the next opportunity, see your dealer to replace the blown fuse.
Headlamp Wiring
An electrical overload may cause the lamps to go on and off, or in some cases to remain off. Has the headlamp wiring checked right away if the lamps go on and off or remain off?
Windshield Wipers
If the wiper motor overheats due to heavy snow or ice, the windshield wipers will stop until the motor cools and will then restart.
Although the circuit is protected from electrical overload, overload due to heavy snow or ice may cause wiper linkage damage. Always clear ice and heavy snow from the windshield before using the windshield wipers.
Fuses and Circuit Breakers
The wiring circuits in the vehicle are protected from short circuits by a combination of fuses and circuit breakers. This greatly reduces the chance of damage caused by electrical problems.
Danger
Fuses and circuit breakers are marked with their ampere rating. Do not exceed the specified amperage rating when replacing fuses and circuit breakers. The use of an oversized fuse or circuit breaker can result in a vehicle fire. You and others could be seriously injured or killed.
Warning
Installation or use of fuses that do not meet GM’s original fuse specifications is dangerous. The fuses could fail, and result in a fire. You or others could be injured or killed, and the vehicle could be damaged.
See Accessories and Modifications 0 171 and General Information 0 171. To check or replace a blown fuse, see Electrical System Overload 0 195.
Engine Compartment Fuse Block
The fuse block is in the engine compartment on the driver’s side of the vehicle.
Vehicles with Upfitter Content
See www.gmupfitter.com for upfitter provisions and best practices.
Caution
Spilling liquid on any electrical component of the vehicle may damage it. Always keep the covers on any electrical component.
 The vehicle may not be equipped with all of the fuses, relays, and features shown.
| Fuses | Usage |
| 1 | ABS Motor |
| 2 | ABS Module |
| 3 | Right Trailer Stoplamp/ Turn Signal Lamp |
| 4 | – |
| 5 | – |
| 6 | Fuel System Control Module/Ignition |
| 7 | Body Control Module 5 |
| 8 | Body Control Module 7 |
| 9 | Body Control Module 4 |
| 10 | Instrument Cluster |
| 11 | Trailer Wiring |
| 12 | – |
| 13 | Interior Rear Vision Camera Module |
| 14 | Windshield Washer |
| 16 | Horn |
| 17 | Transmission |
| 18 | A/C |
| 19 | Engine Control Module Battery |
| 20 | Left Stop/Turn Cutaway Lamp |
| 21 | Left Stop/Turn Trailer Lamp |
| 22 | Right Stop/Turn Cutaway Lamp |
| 23 | – |
| 24 | Fuel Pump |
| 25 | Auxiliary Power Outlet |
| 26 | Body Control Module 3 |
| 27 | Special Equipment Option |
| 28 | Airbag |
| 29 | Steering Wheel Sensor |
| 30 | Engine Control Module Ignition |
| 31 | Transmission Control Module Ignition |
| 32 | Transmission Control Module 1 Battery |
| 33 | Rear Parking Aid Module |
| 34 | – |
| 35 | – |
| 36 | Fuel System Control Module Battery |
| 41 | Transmission Control Module 2/Battery Power |
| 42 | Trailer Wiring |
| 43 | – |
| 44 | Starter Solenoid |
| 45 | Engine Control Module/ Powertrain Signal 2 |
| 46 | DC AC Inverter |
| 47 | Fan Low Speed |
| 51 | Left High Beam Headlamp |
| 52 | Right High Beam Headlamp |
| 53 | Left Low Beam Headlamp |
| 54 | Right Low Beam Headlamp |
| 55 | Wipers |
| 56 | Canister Vent Solenoid |
| 58 | Body Control Module 2 |
| 59 | Body Control Module 1 |
| 61 | Engine Oil Solenoid |
| 62 | O2 Sensor 2 |
| 63 | – |
| 64 | Mass Airflow/ Canister Vent |
| 65 | Ignition Coils/Injectors – Odd |
| 66 | Daytime Running Lamps 2 |
| 67 | Daytime Running Lamps 1 |
| 68 | Auxiliary Stop lamps |
| 69 | External Power for Trailer |
| 70 | Upfitter Stop lamps |
| 71 | Fuel Heater/FlexFuel Sensor |
| 72 | Body Control Module 6 |
| 73 | Lighter/Data Link Connector |
| 74 | Front Blower |
| 75 | Engine Control Module |
| 76 | – |
| 77 | O2 Sensor 1 |
| 78 | Engine Control Module/ Powertrain Signal 1 |
| 79 | Ignition Coils/Injectors– Even |
| Relays | Usage |
| 15 | Run/Crank |
| 37 | – |
| 38 | Fuel Pump |
| 39 | Crank |
| 40 | A/C Compressor |
| 48 | – |
| 49 | Powertrain |
| 50 | – |
| 57 | – |
| 60 | – |
2024 Chevrolet EQUINOX Specs, Price, Features, Mileage (Brochure)
Auxiliary Fuse Block
This component is near the fuse block in the engine compartment
| Fuses | Usage |
| MR-1 | Upfitter 1 |
| MR-2 | Upfitter 2 |
| MR-3 | Upfitter Power Control |
| Relays | Usage |
| MR Rel 1 | Upfitter 1 |
| MR Rel 2 | Upfitter 2 |
Floor Console Fuse Block
The floor console fuse block is under the driver’s seat. The vehicle may not be equipped with all of the fuses, relays, and features shown.
| Mini– Fuses | Usage |
| F1 | – |
| F2 | Steering Wheel Sensor |
| F3 | Auxiliary Parking Lamps |
| F4 | Front Parking Lamps |
| F5 | Trailer Parking Lamps |
| F6 | Upfitter/Parking Lamps |
| F7 | Right Rear Parking Lamp |
| F8 | Left Rear Parking Lamp |
| F9 | Outside View Mirror Switch/Front Camera Module |
| F10 | Airbag/Automatic Occupant Sensing |
| F11 | – /OnStar |
| F12 | – |
| F13 | HVAC 2 |
| F14 | HVAC 1 |
| F15 | Reflected LED Display |
| F16 | Upfitter Aux 1/Gas Ambulance |
| F17 | Heated Outside Mirrors |
| F18 | Rear Window Defogger |
| F19 | Compass |
| F20 | Radio/Chime/SiriusXM Satellite Radio |
| F21 | Remote Function Actuator/Tire Pressure Monitor |
| F22 | Ignition Switch/Discrete Logic Ignition Sensor/ Pass Key 3 |
| F23 | Instrument Cluster |
| F24 | – |
| F25 | HVAC Control |
| F26 | Auxiliary/Trailer Reverse Lamps |
| F27 | Reverse Tail Lamps |
| F28 | Upfitter 2/Gas Ambulance |
| F29 | Rear Blower |
| F30 | Upfitter/Courtesy Lamps |
| F31 | Front Door Lock |
| F32 | Rear Door Lock |
| F33 | Cargo Door Unlock |
| F34 | The Front Passenger Door Unlock |
| F35 | Rear Passenger Door Unlock |
| F36 | Driver Door Unlock |
| F37 | – |
| F38 | – |
| Relays | Usage |
| K1 | Run |
| K2 | – |
| K3 | Parking Lamps |
| K4 | Upfitter 2 |
| K5 | Rear Window Defogger |
| K6 | Retained Accessory Power |
| Circuit Breakers | Usage |
| CB1 | Power Seats |
| CB2 | Power Windows |
FAQs
Fuses in the 2024 Chevrolet Express protect electrical components by breaking the circuit if there’s an electrical overload or a short circuit.
The number of fuse boxes can vary, but typically, there’s a primary fuse box under the hood and a secondary one inside the vehicle.
The primary fuse box is usually located in the engine compartment, near the battery.
The secondary fuse box is often located in the interior of the vehicle, such as under the dashboard or in the glove compartment.
Commonly, you may need a fuse puller, needle-nose pliers, and a replacement fuse of the correct amperage.
Inspect the metal strip inside the fuse. If it’s broken or melted, the fuse is likely blown. Additionally, the transparent plastic of the fuse may appear discolored.
The vehicle may use blade-type fuses, which are flat and rectangular.
The fuse box covers have a diagram that indicates the amperage for each fuse. Using the wrong amperage can lead to electrical problems.
It’s crucial to use the correct amperage and type of fuse. The brand is less important as long as the specifications match.
Some vehicles come with spare fuses stored in the fuse box or included in the owner’s manual pouch.
Use a fuse puller or needle-nose pliers to grip the fuse and gently pull it straight out.
In some cases, you can inspect fuses without removing them if they have a transparent top, but it’s often better to remove and check them thoroughly.
Before replacing fuses, turn off the ignition and disconnect the battery to ensure safety.
If a fuse repeatedly blows, there may be an underlying electrical issue. Consult a professional mechanic to diagnose and address the problem.
There’s no strict sequence, but it’s advisable to start with the fuses related to the malfunctioning component. Always use the correct amperage replacements.
Useful Link:
View Full PDF: 2024 Chevrolet Express Owner’s Manual | Auto User Guide
2024 Chevrolet EQUINOX Specs, Price, Features, Mileage (Brochure)