2023 Ducati DesertX Display Setup Guide
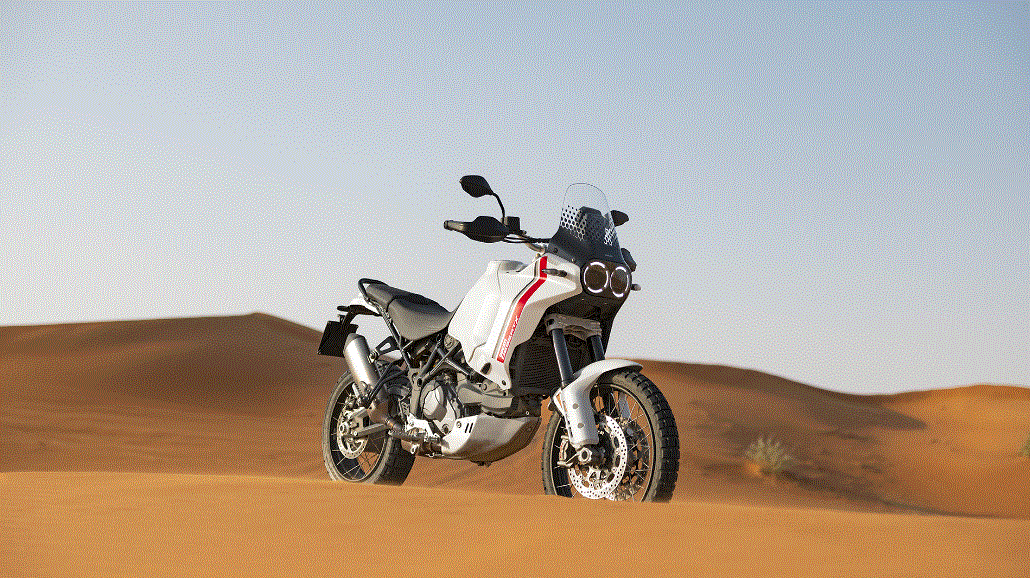
The 2023 Ducati DesertX Display Setup exemplifies an exhilarating fusion of state-of-the-art engineering and meticulous Italian artistry within the domain of adventure motorcycles. Ducati continues to test the limits of performance, innovation, and design as we progress into the future; the DesertX is no exception. With its advanced features, rugged design, and potent performance capabilities, this eagerly awaited model vows to revolutionise the experience of adventure riding.
This introduction will examine the primary features of the 2023 Ducati DesertX Display Setup, demonstrating its potential to bring about a paradigm shift in the adventure motorcycle market and deliver an unparalleled riding encounter for riders. The DesertX is poised to excite riders and explorers with its advanced off-road capabilities and cutting-edge digital instrumentation; it provides a view into the thrilling future of motorcycles.
Setting Menu – Info Display
This function allows you to change the order of the travel information displayed in the Info display.
- From the Interactive Menu, use buttons (1) and (2) to select the item “Setting menu” and press ENTER (3).
- Select the “Info display” item and press ENTER (3).

The list of the selectable items, with the number of their current position is displayed.
If the order of trip information has been changed previously, the “Default” item is also displayed in the list, allowing you to restore the original order.
Use the buttons (1) and (2) to scroll through the items in the list. Press ENTER (3) to change the position number of the selected item.

In the following example, the position of the “Trip 1 time” item is changed from 6 to 9:.
- Use buttons (1) and (2) to select item “Trip 1 time” and press the ENTER button (3).
The screen (A) is displayed. The upper part of the screen shows the selected item and the current position, and the lower part shows the list of items in the current order. - The values displayed above and below the digit
(B) indicate that the position number can be changed using buttons (1) and (2). - Once the value of the new position has been set (in the example “9”), press ENTER (3) to confirm. The order of the Info display is then updated with the new position (C).
select “Back” and press ENTER (3) to go back to the previous screen.
Note
If the fuel level display is set to “Range”, the latter is displayed grey in the list.

Note
The item “Daylight” appears in the list only if the Bluetooth control unit has been installed on the motorbike and the Turn by turn navigation licence has been enabled. Please refer to the “Turn by turn” chapter in this document.
When the item positions are changed from the original order, “Default” is displayed in the list of selectable items.
To restore the original order, select the “Default” item using buttons (1) and (2) and press ENTER (3): “Wait…” is displayed for a few seconds followed by “Restored”. Then, “Default” item disappears from the menu list, while the positions of the items and the current order of the Info display are restored to their original conditions.

Setting menu – Fuel indicator
This function allows you to change the way the fuel level is displayed, choosing between bar or remaining distance (km or miles) modes.
- From the Interactive Menu, use buttons (1) and (2) to select the item “Setting menu” and press ENTER (3).
- Select the “Fuel indicator” item and press ENTER (3).

“Level” and “Range” are displayed.
The currently set mode is shown at the bottom of the screen.
Use buttons (1) and (2) to scroll and select the desired mode. Press ENTER (3) to validate, then select
“Back”, and press ENTER (3) again to exit.
Note
When the fuel level is set to remaining km or miles, the Range item is not displayed in the Info display list.
Note
When the motorbike is in low fuel condition, if the main screen is set to “Full” mode and the fuel indicator is set to “Level”, the level will automatically be displayed in remaining km or miles. When the low fuel condition is over, the fuel indicator will return to the previously set display.
Note
When the side stand is extended, the fuel indicator will not update.
When the side stand is in the rest (horizontal) position, the first update of the fuel indicator will occur only after a few seconds.

Setting menu – DRL
This function allows setting the status of the DRL in automatic or manual mode. Available only if daytime running lights (DRL) are present.
- From the Interactive Menu, use buttons (1) and (2) to select the item “Setting menu” and press ENTER (3).
Select the “DRL” item and press ENTER (3).

The “Auto” and “Manual” items are displayed.
The currently set mode is shown at the bottom of the screen.
Use buttons (1) and (2) to scroll and select the desired mode. Press ENTER (3) to validate, then select “Back”, and press ENTER (3) again to exit.
Note
In case of battery disconnection, the “Auto” mode is automatically set.

Setting menu – Display setup
This function allows you to set the light or dark theme of the display and to adjust the brightness of the display.
- From the Interactive Menu, use buttons (1) and (2) to select the item “Setting menu” and press ENTER (3).
Select the “Display setup” item and press ENTER (3).
“Themes” and “Brightness” are displayed.
The currently set mode is shown at the bottom of the screen.
Use buttons (1) and (2) to scroll and select the desired item. Press ENTER (3) to confirm.

Themes
This function allows the light or dark theme of the display to be set.
- From the Interactive Menu, use buttons (1) and (2) to select the item “Setting menu” and press ENTER (3).
Select the “Display setup” item and press ENTER (3).
Select the “Themes” item and press ENTER (3).
The “Auto”, “Light” and “Dark” items are displayed. The currently set mode is shown at the bottom of the screen.
The “Auto” mode allows the display theme to automatically change according to the ambient light detected by the instrument panel.
Use buttons (1) and (2) to scroll and select the desired theme. Press ENTER (3) to validate, then select “Back”, and press ENTER (3) again to exit.
Note
In case of battery disconnection, the “Auto” mode is automatically set.

Backlight
This function allows adjusting the backlighting intensity.
- From the Interactive Menu, use buttons (1) and (2) to select the item “Setting menu” and press ENTER (3).
Select the “Display setup” item and press ENTER (3).
Select the “Brightness” item and press ENTER (3).
The levels from 100% to 20% are displayed.
The bottom of the screen shows the level currently set.
The brightness is automatically adjusted according to the ambient light detected by the instrument panel. The backlighting intensity adjustment is calculated in relation to what is detected by the instrument panel.
Use buttons (1) and (2) to scroll and select the desired level. Press ENTER (3) to validate, then select “Back”, and press ENTER (3) again to exit.
The backlight of the instrument panel is automatically adjusted according to the ambient light detected by photodiode (A). The backlighting intensity adjustment is calculated in relation to what is detected by the photodiode.
FAQs
Integrated into the 2023 Ducati DesertX adventure motorcycle is a comprehensive digital interface and display system known as the Ducati DesertX Display Setup.
The display provides essential information such as fuel level, speed, RPM, gear position, and cycling modes, in addition to navigation and other metrics.
Multiple riding modes, including Urban, Touring, Enduro, and Sport, are included on the DesertX to enable riders to acclimatise to a variety of conditions.
Indeed, the DesertX Display Setup provides the capability to tailor the information displayed in accordance with one’s personal preferences and riding manner.
Indeed, the display has been engineered with adaptive brightness settings to ensure optimal visibility under diverse illumination conditions.
Smartphone and Bluetooth connectivity are available on the DesertX Display, allowing you to pair your phone for music, contacts, and messages.
Indeed, the DesertX Display Setup offers turn-by-turn navigation, which significantly aids motorcyclists in locating their way, particularly when embarking on extended journeys.
In terms of durability under off-road conditions, the display has been engineered to be sturdy and resilient, capable of enduring the challenges associated with off-road cycling.
Furthermore, it is possible to manipulate a multitude of bicycle functions via the display. For instance, modifying suspension settings and selecting pedalling modes are all functions that can be executed directly from the display.
The size of the high-resolution screen on the DesertX Display guarantees optimal visibility while minimising visual distractions.
No, the interface does not feature a touchscreen; instead, it is managed via handlebar controls that are intuitive and simple to operate.
The display offers passengers continuous and timely information with minimal latency, guaranteeing that they have access to current data at all times.
Certainly, this feature enables users to maintain a connected and uninterrupted cycling experience.
Indeed, the DesertX Display provides a night mode that enhances nighttime visibility and reduces reflection.
Ducati has indeed engineered the display with user friendliness in mind, rendering it appropriate for motorcyclists spanning various levels of expertise, including novices and seasoned expedition pros.
Useful Link
View Full PDF: Ducati DesertX 2023 User Manual| Auto User Guide
2023 Ducati DesertX Cruise Control Guidelines