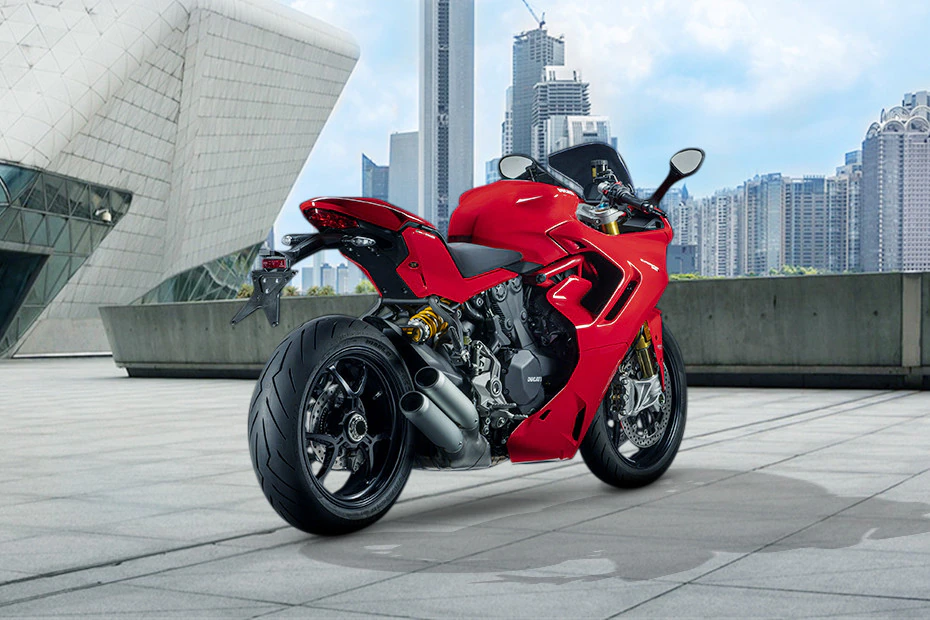
Ducati Supersport S 2020
The Ducati Supersport S 2020 is a high-quality sportbike that is both fast and useful for everyday use. The Supersport S is a versatile machine that works well both on the track and on the road. It was made to strike the right balance between comfort and speed. Its sleek and aggressive appearance is typical of Ducati, and it also has aerodynamic features to improve its performance. The Supersport S has a powerful 937cc Testastretta engine that gives it 110 horsepower, which makes for thrilling acceleration and amazing top speeds. The Supersport S has advanced electronics like Ducati Quick Shift, three riding modes, and a fully adjustable Ohlins suspension. This gives the rider exact control and a choice of how to ride. The Ducati Supersport S 2020 is the perfect companion, whether you’re carving through turns or going on a long trip. It has an unbeatable mix of power, comfort, and style for an unforgettable ride.
Restoring motorcycle operation via the PIN code
In case of key acknowledgment system or key malfunction, the instrument panel allows the user to enter his/her own PIN code to temporarily restore motorcycle operation.
If the PIN code has been activated via the “PIN Code” function in the “Setting menu” page 145, the instrument panel displays “Insert PIN” and next to it the spaces for the four digits of the PIN.
Entering the code:
- The 2 arrows above and below the digit indicate that the number can be changed from 0 to 9 using buttons (1) and (2).
- Press ENTER (3) to confirm and move on to the following digit.
- Repeat the procedure until entering all 4 digits.
Once the fourth digit is set, press ENTER (3) and the instrument panel behavior will be as follows: - if there is a problem during the PIN check, the instrument panel displays an error for 2 seconds and then passes to the main screen;
- if PIN code is not correct, the instrument panel displays “Wrong” for 2 seconds and then goes back to the previous screen, to allow you to try again.
- if the PIN CODE is correct, the instrument panel shows “Correct” for 2 seconds, and then displays the standard screen.
Important
If this procedure is necessary in order to start the motorcycle, contact an Authorised Ducati Service Centre as soon as possible to fix the problem.
Clutch lever
Lever (1) disengages the clutch. When the clutch lever (1) is operated, drive from the engine to the gearbox and the drive wheel is disengaged. Using the clutch properly is essential to smooth riding, especially when moving OFF.
Clutch control free play adjustment
The brake lever has a dial adjuster (2) for adjusting the distance between lever and twistgrip on the handlebar.
Turn clockwise to increase lever distance from the handgrip.
Turn the adjuster counterclockwise to decrease lever distance.
The lever distance can be adjusted to a distance A= 6.4 mm (0.25 in).
Important
Using the clutch properly will avoid damage to transmission parts and spare the engine.
Throttle twistgrip
The twistgrip (1) on the right handlebar opens the throttles.
When released, it will spring back to the initial position (idling speed).
Front brake lever
Pull in the lever (1) towards the twistgrip to operate the front brake. The system is hydraulically operated and you just need to pull the lever gently.
The brake lever has a knob (2) for adjusting the distance (A) from the handgrip on the handlebar. The lever distance (1) can be adjusted in a space of A= 10 mm (0.39 in).
Turn the knob (2) clockwise to increase lever (1) distance from the twist grip. Turn the adjuster (2) anticlockwise to decrease lever distance.
Attention
Before using these controls, thoroughly read the instructions in the chapter “Moving off”.
Set the front brake lever when the motorcycle is stopped.
Rear brake pedal
Press pedal (1) down with your foot to operate the rear brake.
The control system is of the hydraulic type.
Gear change pedal
The gear change pedal can move in the following two directions and, when released, it automatically returns to rest position N in the center:
- down = press down the pedal to engage the 1st gear and to shift down. The N light on the instrument panel will go out;
- upwards= lift the pedal to engage 2nd gear and then 3rd, 4th, 5th and 6th gears.
Each time you move the pedal you will engage the next gear.
The central resting condition is indicated by the switching on of the warning light “N” on the instrument panel
Adjusting the position of the gearchange pedal and rear brake pedal
The position of the gearchange (1) and rear brake (2) pedals in relation to the footrests can be adjusted to suit the requirements of the rider.
Have the gear change pedal and rear brake pedal adjusted at a Ducati Dealer or authorized Service Centre.
Engine start/stop
Attention Before starting the engine, become familiar with the controls you will need to use when riding.
Turn the ignition key (1) to “ON”.
Turn the ignition switch (2) to the (A) “RUN” position.
Make sure both the green light N and the red light
on the instrument panel come on.
Let the motorcycle start without operating the throttle control.
Note
If the battery is flat, the system automatically inhibits the starter motor cranking operation.
Important
Do not rev up the engine when it is cold. Allow some time for oil to be heated and reach all points that need lubricating.
Attention
Keeping the engine running for too long with the vehicle stationary may cause damage due to overheating caused by insufficient cooling. Do not run the engine unnecessarily while the vehicle is stationary. Move immediately after starting the engine.
The red oil pressure warning light should go out a few seconds after the engine has started.
Attention
Never start or run the engine indoors. Exhaust gases are poisonous and may lead to loss of consciousness or even death within a short time.
Important
The oil pressure light should go out a few seconds after the engine has started.
Attention
The side stand must be fully up (in a horizontal position) as its safety sensor prevents the engine from starting when down.
Note
It is possible to start the engine with side stand down and the gearbox in neutral. When starting the motorcycle with a gear engaged, pull the clutch lever (in this case the side stand must be The engine will shut off by turning the red switch (2) to the “RUNOFF” position. up).
Moving off
Attention
Your motorcycle is equipped with a rev limiter which limits the engine speed to approximately 3000 rpm when the engine is in neutral with the clutch released. This is to prevent excessive noise pollution and also to avoid reaching engine speeds that are harmful to the engine without load. When this limiter comes into operation the revs will be limited and there will be a flashing Overrev indication on the instrument panel. When the clutch is pulled, this function is not active.
- Raise the side stand until it is horizontal, as confirmed by the switching off of the warning light on the instrument panel.
- Squeeze the control lever to disengage the clutch.
- Push down on gear change lever sharply with the tip of your foot to engage the first gear.
- Speed up the engine by turning the throttle twistgrip while gradually releasing the clutch lever; the motorcycle will start moving off.
- Let go of clutch lever and speed up.
- To shift up, close the throttle to slow down the engine, disengage the clutch, lift the gear change lever and let go of the clutch lever.
To shift down, proceed as follows: release the twistgrip, pull the clutch lever, shortly speed up to help gears synchronise, shift down (engage next lower gear) and release the clutch.
The controls should be used correctly and timely: when riding uphill do not hesitate to shift down as soon as the motorcycle tends to slow down, so you will avoid stressing the engine and the motorcycle abnormally.
Attention
Avoid harsh acceleration, as this may lead to misfiring and transmission snatching. The clutch lever should not be held in longer than necessary after a gear is engaged, otherwise friction parts may overheat and wear out.
Prolonged wheelies could deactivate the ABS system.
Braking
Slow down in time, shift down to use the engine brake and then brake by operating both front and rear brakes. Pull the clutch before the motorcycle stops to avoid engine from suddenly stalling.
Anti-Lock Braking System (ABS)
Using the brakes correctly under adverse conditions is the hardest – and yet the most critical – skill to master for a rider. Braking is one of the most difficult and dangerous moments when riding a two-wheeled motorcycle: the possibility of falling or having an accident during this difficult moment is statistically higher than any other moment. A locked front wheel leads to loss of traction and stability, resulting in loss of control.
The Anti-Lock Brake System (ABS) has been developed to enable riders to use the motorcycle braking power to the fullest possible amount in emergency braking or under poor pavement or adverse weather conditions.
ABS uses hydraulics and electronics to limit pressure in the brake circuit when a special sensor mounted to the wheel informs the electronic control unit that the wheel is about to lock up.
Useful Link
Download link: https://www.ducati.com/ww/en/service-maintenance/owner-manuals