Jayco Embark 2023 Flooring User Manual
Flooring
Vinyl Flooring (if so equipped)
Periodically vacuum or sweep to remove dirt and gritty particles. Although most common spills will not permanently stain the vinyl floors, they are usually easier to remove if wiped up before they set. Blot with a paper towel and wipe clean with a damp cloth. Do not use dish detergents or vinegar and water because they will dull your floor.
To care for the vinyl floor covering, use a damp mop with water and a mild cleaner on the entire floor. DO NOT SOAK THE FLOORING. Use care to avoid wetting the carpet edges. To avoid problems of “yellowing” linoleum, the flooring manufacturer recommends avoid-ing cleaners that contain oil based solvents (i.e. lemon oil, Murphy’s Oil Soap, etc.).
Ceramic Tile (if so equipped)
Vacuum the ceramic floor tiles regularly to remove dirt and other gritty particles, then damp mop or sponge with an all-purpose, non-oil based cleaner. Heavily trafficked tile may re-quire more intensive cleaning. Refer to the manufacturers guide or contact a cleaning pro-fessional for detailed cleaning information.
Grout, the material used between the tiles is porous, and sealing it will simplify maintenance in the future. The ceramic tile manufacturer recommends applying a sealer at least twice a year for maximum stain protection. Sealers may be purchased at most local home centers or floor-covering stores.
DO NOT:
- Use cleansers containing acid or bleach for routine maintenance.
- Use wax cleaners, oil-based detergents or sealants to maintain your tile (sealants may be used on grout joints and natural stone).
- Use ammonia (it will discolor grout).
- Use harsh cleaning aids like steel wool pads or scouring pads containing metal.
- Use a cleaning agent that contains color on unglazed ceramic tile or natural stone.
DO:
- Test scouring powders on a small area first (not recommended for natural stone).
- Use a sealer on grout joints.
- Have any damaged or broken tiles replaced only by a qualified contractor.
Ceiling Fabric
The ceiling fabric is made from padded vinyl fabric. Wash with mild detergent and water. Use a soft bristle brush for stubborn soil. Rinse and dry. Some household cleaners and sol-vents remove plasticizers from vinyl, making them brittle. Abrasive cleaners may mar or scratch the surface. Always test a small hidden area before applying cleaners to the vinyl surface.
Power Window Shades
Power shades have been installed for the windshield area of your motor home – one on each side on the driver and passenger side. To extend the shades, locate the appropriate switch on the console panel and hold the switch down. To retract the shade, hold the switch up. Refer to the manufacturer’s owner guide included in your warranty packet for operation, troubleshooting and warranty information.
Bed Storage
Additional storage has been provided under the bed. To access the storage area, grasp the ledge at the foot of the bed and lift carefully. The bed platform must be held when raised. It is recommended that two people retrieve stored items from under the bed so that one person may hold the platform, and the other can retrieve the stored items from under the bed. Lower the platform slowly to close it. DO NOT DROP THE PLATFORM.
WARNING
- Before lifting, be sure there is nothing on the bed that will restrict its movement or add extra weight.
- Use caution when opening or closing the bed to keep hands and fingers at the end ledge provided (not on the side or farther back than necessary).
- Exercise extreme caution when opening the bed storage platform. Plat-form must be held open (unless equipped with a prop rod or gas struts) and slowly lowered until closed.
- The bedroom electric slide room system may be located under the bed. Use care not to obstruct the slide room system when using the under bed storage.
- Failure to comply with these guidelines can result in serious injury or property damage.
Some models may be equipped with a prop rod to assist with easy access to under bed storage.
Prop Rod If your model is equipped with a prop rod:
- With the help of a second person, raise the bed platform.
- Release the prop rod from its holder.
- Put the end of the rod in the bracket under the bed platform.
- To lower the platform, release the prop rod from the bracket under the bed plat-form, re-attach the prop rod to the holder on the bed base.
- Lower the platform slowly until closed.

Power Bunk Bed (if so equipped)
Your motorhome may be equipped with a power bunk bed. It may include a wood ladder that hooks on to the side of the bed in order to access the upper bunk. UPPER BUNK MUST BE AT THE LOWEST POSITION TO USE THE LADDER. The upper bunk has preset limits as to how far it can be raised and lowered. The lower bunk is fixed in position and does not move.
Operation
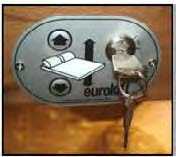
To operate the bed insert the key, and turn it to the ON position. Press the UP or DOWN arrow button. When upper bunk is positioned where you want it, turn the key.to the OFF position. Remove the key to prevent accidental movement of the bed. The bunk bed ladder must be positioned firmly in place.

WARNING
- There should be no people, pets or objects on or below the bunk while raising or lowering it
- Never ride on the bunk while the vehicle is in motion.
- Exercise extreme care when entering or exiting the bunk bed and using the ladder
- Do not allow horseplay on the bed and prohibit jumping on the bed.
- Make sure the ladder is anchored properly to the bed.
- Never allow more than one person on the ladder at a time.
- Children should always be supervised when using the ladder or when entering or exiting the bunk bed.
- Weight limit of the upper bunk bed and bunk ladder is 300 lbs. maxi-mum. Do not exceed the weight limit of the bunk ladder or the bunk bed itself.
- Failure to comply with these guidelines may result in serious injury or property damage.
Cleaning The Exterior
To protect your recreation vehicle’s exterior finish, wash it often and thoroughly. You may wash and wax your new recreation vehicle 60 days after purchase. The exterior paint needs time to cure before any wax is applied to the exterior surface. Careful maintenance for the first 60 days will assure a long lasting durable finish.
Your RV is exposed to many environmental conditions that have an adverse affect on the paint finish:
- Road Salt and Sodium Chloride
- Road Tar / Bugs
- Bird Droppings / Tree Sap
- Industrial Fallout / Acid Rain/Pollution
- UV Exposure and Moisture
The most common problems resulting from these conditions are corrosion, staining, and chemical spotting. Generally, the longer the foreign material remains in contact with the exterior finish the more extensive the damage. These problems can be minimized by regu-larly scheduled washing and polishing. Wash your recreation vehicle as soon as possible if it becomes contaminated with foreign material.
Avoid parking under trees or near ocean sea salt. Ice or snow should be brushed off, not scraped, from the painted surface. Avoid gravel roads.
Anti-freeze, gasoline or washer solvents if spilled on the painted surface should be rinsed off with water immediately. Bugs and bird droppings should be rinsed off daily.
Washing
Commercial washing should be avoided. Wash with cold water using a mild liquid soap. Dry wiping with a dry cloth is not recommended. Make sure the RV’s surface temperature is cool, under 90 F, and out of direct sunlight. A shaded area is ideal for washing your vehicle as direct sunlight causes water spotting. Use a mild soap, detergent or car wash shampoo. Try to avoid combination wash-n-wax products as these waxes can cause build up and are designed for smaller surfaces. Have two dedicated sponges or wash mitts: one for the paint finish and one for the wheels and under carriage. Brushes or wash mitts made of plastic bristles are acceptable for use on tires and wheel wells, but are not intended for use on the paint finish. Avoid using such items on painted sur-faces as they will damage the finish. Wash the wheels and wheel wells first as this removes heavy dirt and debris and prevents it from splattering on panels. Wet the entire area down to remove loose dirt and grime, then hand wash one area at a time using your dedicated paint finish sponge or wash mitt. Wash from the top and work your way down, rinsing frequently to minimize grit abrasion. Follow with a final rinse of water. This process will remove most contamination from the RV’s surface.
For stubborn stains such as road tar or bug stains, use an ammonia based glass cleaner or a small amount of rubbing alcohol on a damp cloth followed immediately by warm soapy water, and rinse with clean water. This may not dissolve the road tar, but it will loosen tar and bug stains and remove them from the surface.
Do not use solvent based cleaners on bird droppings or tree sap as these are water based stains. They can be dissolved using ammonia based glass cleaner, warm soapy water and a little “elbow grease”. After removing stubborn stains immediately rinse with clean water. Drying the RV is just as important as washing it. Tap water and well water contain many chemicals that could water stain your RV’s finish. We suggest using a damp natural or synthetic chamois. There are other drying products such as lint-free micro-fiber towels that work just as well.
[amalinkspro_table id=”32452″ new-window=”on” no follow=”on” addtocart=”off” /]
Reference Links
View Full User Guide: Jayco Embark 2023 User Manual
Download Manuals: https://www.jayco.com/manuals


