 2021 Harley Davidson Touring Maintenance Schedule
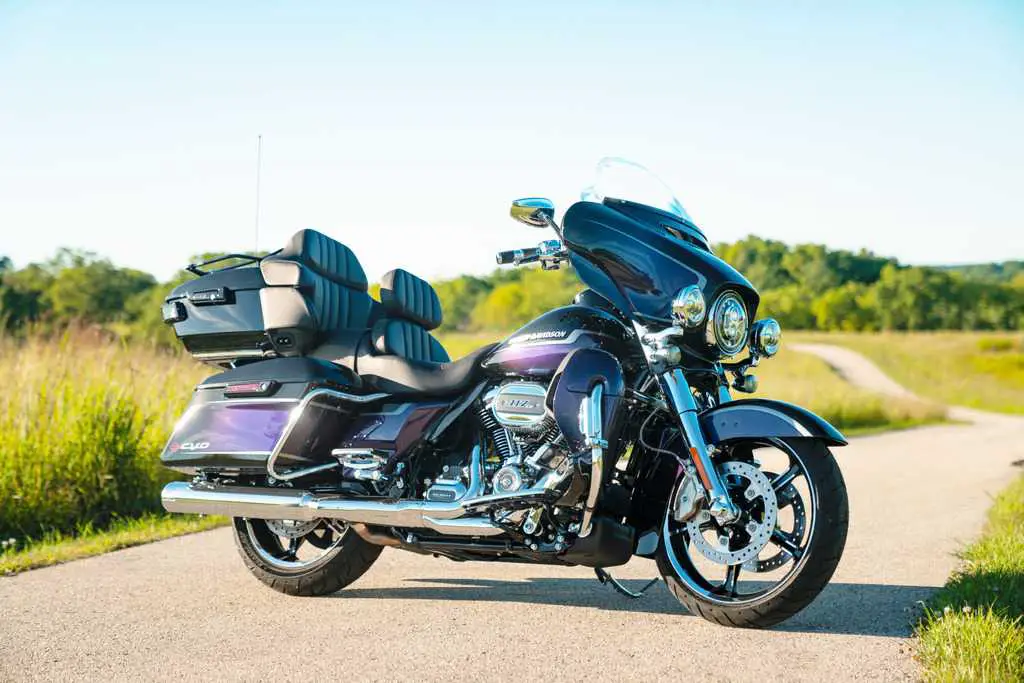
The 2021 Harley Davidson Touring series is synonymous with legendary American motorcycle touring, and good maintenance is a key component of the ownership experience. Because of their famed dependability, these motorcycles continue to deliver great performance and endurance with regular maintenance. The 2021 Harley Davidson Touring models require a variety of maintenance procedures, such as routine oil changes, brake inspections, tire upkeep, and sporadic service checks. These steps are essential for maintaining your bike’s performance, enhancing safety, and averting potential problems in the future.
SAFE OPERATING MAINTENANCE
WARNING
Perform the service and maintenance operations as indicated in the regular service interval table. Lack of regular maintenance at the recommended intervals can affect the safe operation of your motorcycle, which could result in death or serious injury. (00010a)
WARNING
If you operate your motorcycle under adverse conditions (severe cold, extreme heat, very dusty environment, very bad roads, standing water, etc.), you should perform regular maintenance intervals more frequently to ensure the safe operation of your motorcycle. Failure to maintain your motorcycle could result in death or serious injury. (00094a)
NOTICE
When lifting a motorcycle using a jack, be sure jack contacts both lower frame tubes where down tubes and lower frame tubes converge. Never lift by jacking on cross-members, oil pan, mounting brackets, components or housings. Failure to comply can cause serious damage resulting in the need to perform major repair work.(00586d)
Keep the motorcycle maintained according to Service Records. Frequently inspect the motorcycle between regular service intervals and after periods of storage to determine if additional maintenance is necessary.
Check the following items:
- Tires for correct pressure, excessive wear or any signs of tire damage.
- Belt for proper tension, wear or damage.
- Brakes, steering and throttle for responsiveness and freedom from binding.
- Brake fluid level and condition. Hydraulic lines and fittings for leaks. Coolant level if applicable. Also, check brake pads and discs for wear.
- Cables for fraying or crimping and free operation.
- Engine oil and primary chaincase/transmission fluid levels.
- Headlamp, tail lamp, brake lamp and turn signals for proper operation.
BREAK-IN MAINTENANCE
NOTE
The performance of new motorcycle’s initial service is required to keep your new motorcycle warranty in force and for proper emissions system operation. After a new motorcycle has been ridden 1000 mi (1,600 km), visit an authorized Harley-Davidson dealer for initial service. Refer to Service Records.
PREPARING THE MOTORCYCLE FOR MAINTENANCE
WARNING
Be sure to check the capacity rating and condition of hoists, slings, chains and cables before use. Exceeding capacity ratings or using lifting devices that are in poor condition can lead to an accident, which could result in death or serious injury. (00466c)
NOTE
Always support a motorcycle that is being serviced with blocks or stands.
Setting Motorcycle Upright
- Place the motorcycle upright on a level surface or suitable lift, if available.
- Verify that the motorcycle is level.
- Secure with tie-downs.
DISPOSAL AND RECYCLING
Help protect our environment! Many communities maintain facilities for recycling used fluids, plastics and metals. Dispose of or recycle used oil, lubricants, fuel, coolant, brake fluid and batteries in accordance with local regulations. Many Harley-Davidson parts and accessories are made of plastics and metals which can also be recycled.
ENGINE LUBRICATION
Engine Lubrication
CAUTION
Prolonged or repeated contact with used motor oil may be harmful to skin and could cause skin cancer. Promptly wash affected areas with soap and water. (00358b)
CAUTION
If engine oil is swallowed, do not induce vomiting. Contact a physician immediately. In case of contact with eyes, immediately flush with water. Contact a physician if irritation persists. (00357d)
NOTICE
Do not switch lubricant brands indiscriminately because some lubricants interact chemically when mixed. Use of inferior lubricants can damage the engine. (00184a) Always use the proper grade of oil for the lowest temperature expected before the next scheduled oil change. Refer to Table 41.
This motorcycle was originally equipped with GENUINE HARLEY-DAVIDSON H-D 360 MOTORCYCLE OIL 20W50. H-D 360 is the preferred oil under normal operating conditions. If operation under extreme cold or heat are expected, refer to Table 41 for alternative choices. If necessary and H-D 360 is not available, add oil certified for diesel engines. Acceptable designations include: CH-4, CI-4 and CJ-4. The preferred viscosities, in descending order, are: 20W50, 15W40 and 10W40.
At the first opportunity, see an authorized dealer to change back to 100 percent Harley-Davidson oil.
Table 41. Recommended Engine Oils
|
TYPE |
VISCOSITY |
LOWEST AMBIENT |
COLD-WEATHER |
|
Screamin’ Eagle SYN3 Full Synthetic Motorcycle Lubricant |
SAE 20W50 |
Above 30.2 °F (-1 °C) |
Excellent |
|
Genuine Harley-Davidson H-D 360 Motorcycle |
SAE 20W50 |
Above 39.2 °F (4 °C) |
Good |
|
Genuine Harley-Davidson H-D 360 Motorcycle |
SAE 50 |
Above 60.8 °F (16 °C) |
Poor |
|
Genuine Harley-Davidson H-D 360 Motorcycle |
SAE 60 |
Above 80.6 °F (27 °C) |
Poor |
Low-Temperature Lubrication
Change engine oil often in colder climates. If the motorcycle is frequently ridden less than 15 mi (24 km), in ambient temperatures below 60 °F (16 °C), reduce oil change intervals to 1500 mi (2,400 km).
NOTE
Lower ambient temperatures require more frequent oil changes. Water vapor is a normal by-product of combustion. During cold-weather operation, some water vapor condenses to liquid form on the cool surfaces inside the engine. In freezing weather, this water becomes slush or ice. If the engine is not warmed to operating temperature, accumulated slush or ice blocks the oil lines and causes engine damage. Over time, water will accumulate, mix with the engine oil and form a sludge that is harmful to the engine.
If the engine is allowed to warm to normal operating temperature, most of the water evaporates and exits through the crankcase breather.
CHECK ENGINE OIL LEVEL
CAUTION
Prolonged or repeated contact with used motor oil may be harmful to skin and could cause skin cancer. Promptly wash affected areas with soap and water. (00358b)
NOTICE
Do not overfill oil. Doing so can result in oil carryover to the air cleaner leading to equipment damage and/or equipment malfunction. (00190b)
NOTE
Check engine oil level at each complete fuel refill.
Oil Level Cold Check
- Place the vehicle on level ground resting on the jiffy stand.
NOTE
Oil level on a cold engine should never be above the midway point. - See Figure 61. Check engine oil level.
- Remove the filler plug/dipstick.
- Wipe off the dipstick.
- Insert the dipstick and tighten it into the fill spout.
- Remove the filler plug/dipstick.
- See Figure 62. Check oil level. The correct cold oil level is midway (2) between the ADD QT (1) and FULL HOT (3) marks on the dipstick.
- If oil level is at or below the ADD QT mark, add only enough oil to bring the level to the ADD QT mark.
- Start and idle the engine on jiffy stand for two minutes. Turn off the engine.
- Check oil level. Add only enough to bring the level midway between the ADD QT (1) and FULL HOT (3).
Oil Level Hot Check
NOTICE
Do not allow hot oil level to fall below Add/Fill mark on the dipstick. Doing so can result in equipment damage and/or equipment malfunction. (00189a)
NOTE
Perform engine oil level hot check only with engine oil at normal operating temperature.
- Ride the motorcycle until engine oil reaches at least 200 °F (93 °C) or higher.
- Allow the engine to idle for 1-2 minutes on jiffy stand. Turn off the engine.
- See Figure 61. Check oil level.
- Remove filler plug/dipstick.
- Wipe off the dipstick.
- Insert the dipstick and tighten into the fill spout.
- Remove filler plug/dipstick.
- See Figure 62. Check oil level. Oil level must register between the ADD QT and FULL HOT marks on the dipstick.
- If oil level is at or below the ADD QT mark, add only enough oil to bring the level to the FULL HOT mark. Do not overfill.

Figure 61. Engine Oil Filler Plug

- ADD QT mark
- Cold check level
- FULL HOT mark
Figure 62. Engine Oil Dipstick (VEHICLE UPRIGHT Gauge)
CHANGE OIL AND OIL FILTER
WARNING
Be sure that no lubricants or fluids get on tires, wheels or brakes when changing fluid. Traction can be adversely affected, which could result in loss of control of the motorcycle and death or serious injury. (00047d)
NOTICE
Do not switch lubricant brands indiscriminately because some lubricants interact chemically when mixed. Use of inferior lubricants can damage the engine. (00184a)
CAUTION
Prolonged or repeated contact with used motor oil may be harmful to skin and could cause skin cancer. Promptly wash affected areas with soap and water. (00358b)
- Change engine oil at the first 1000 mi (1,600 km) for a new engine. After the initial service, change oil at regular intervals in normal service at warm or moderate temperatures. Refer to Service Records.
- Change oil at more frequent intervals in cold weather or severe operating conditions. See Winter Lubrication in Engine Lubrication.
- Run motorcycle until engine is at normal operating temperature. Turn off engine.
- Remove filler plug/dipstick.
NOTE
Replace drain plug O-ring. - See Figure 63. Remove the oil drain plug (2) and O-ring. Allow oil to drain completely.
NOTE
Use P&A Oil Catcher (Part No. 62700199) or equivalent to keep drain oil off crankcase when removing oil filter. Residual drain oil could falsely appear as a crankcase oil leak at a later time. - Remove the oil filter using oil filter wrench and hand tools. Do not use with air tools.
Special Tool: OIL FILTER WRENCH (94863-10) Special Tool: OIL FILTER WRENCH (94686-00) - Clean the oil filter mount flange.
- Clean any residual oil for crankcase and transmission housing.
- See Figure 64. Install new oil filter.
- Lubricate gasket with a thin film of clean engine oil.
- Install new oil filter.
- Hand-tighten oil filter one-half to three-quarters of a turn after gasket first contacts filter mounting surface. Do NOT use oil filter wrench for installation.
- Install engine oil drain plug and new O-ring. Torque: 14–21 ft-lbs (19–28.5 N·m) Engine oil drain plug
NOTE
Use the proper grade of oil for the lowest temperature expected before the next oil change. Refer to Table 41 for recommended oil. - Add an initial volume of engine oil. Refer to Table 42.
Table 42. Initial Oil Fill
ITEM
QUANTITY
Engine oil initial fill
4.0 qt (3.8 L)
- Verify proper oil level. See Check Engine Oil Level.
- Perform engine oil level cold check.
- Start engine and carefully check for oil leaks around drain plug and oil filter.
- Perform engine oil level hot check.

- Transmission drain plug (left side)
- Engine oil drain plug and O-ring
- Hex plug (do not remove)
Figure 63. Oil Pan

Figure 64. Lubricating New Oil Filter Gasket
OIL COOLER
Models that are not Twin-Cooled have an oil cooler. Some also have a oil cooler fan. Keep the cooler and fan clean and free from dirt and debris to maintain maximum cooling efficiency.
CHECK TRANSMISSION LUBRICANT
NOTE
Check transmission fluid with the motorcycle at ambient temperature. Inspect transmission dipstick O-ring. Replace if necessary.
- Park motorcycle on a level surface on jiffy stand.
- See Figure 65. Remove transmission filler plug/dipstick. Wipe dipstick clean.
- Install filler plug/dipstick until O-ring contacts the case. Do not tighten.
- See Figure 66. Remove filler plug/dipstick. Check lubricant level on dipstick. Proper oil level is between the Add (A) (1) and Full (F) (2) marks.
- If lubricant level is low, add recommended Harley-Davidson lubricant to bring level to between the A mark and the F marks. Refer to Table 43.
- Install filler plug/dipstick. Tighten to specification. Torque: 25–75 in-lbs (2.8–8.5 N·m) Transmission filler plug/dipstick

Figure 65. Transmission Filler Plug/Dipstick Location

- Add (A)
- Full (F)
Table 43. Recommended Transmission Lubricants
|
LUBRICANT |
QUANTITY * |
|
|
fl oz |
L |
|
|
FORMULA+ TRANSMISSION AND |
28 |
0.83 |
|
SCREAMIN’ EAGLE SYN3 FULL SYNTHET- IC MOTORCYCLE LUBRICANT 20W50 |
28 |
0.83 |
|
* Fill quantity for a transmission lubricant change. |
||
CHANGE TRANSMISSION LUBRICANT
- See Figure 66. Remove transmission filler plug/dipstick.
WARNING Be sure that no lubricants or fluids get on tires, wheels or brakes when changing fluid. Traction can be adversely affected, which could result in loss of control of the motorcycle and death or serious injury. (00047d) - See Figure 67. Remove transmission drain plug. Drain transmission.
- Clean and inspect drain plug and O-ring.
NOTICE Do not over-tighten filler or drain plug. Doing so could result in a lubricant leak. (00200b) - Install drain plug with new O-ring. Tighten. Do not over-tighten.
Torque: 14–21 ft-lbs (19–28.5 N·m) Transmission drain plug - Fill the transmission with recommended Harley-Davidson lubricant. Refer to Table 43. Volume: 28 fl oz (0.83 L)
- Check lubricant level. Add enough lubricant to bring the level between the add (A) and full (F) marks. See Figure 66.
- Install filler plug/dipstick. Tighten.
Torque: 25–75 in-lbs (2.8–8.5 N·m) Transmission filler plug/dipstick

- Transmission drain plug (right side)
- Engine oil drain plug and O-ring
- Hex plug (do not remove)
Figure 67. Transmission Drain
CHANGE PRIMARY CHAINCASE LUBRICANT
- Run the motorcycle until the engine is at normal operating temperature. Turn off the engine.
WARNING Be sure that no lubricants or fluids get on tires, wheels or brakes when changing fluid. Traction can be adversely affected, which could result in loss of control of the motorcycle and death or serious injury. (00047d) - Secure the motorcycle upright (not leaning on jiffy stand) on a level surface.
- See Figure 68. Drain primary chaincase.
- Clean drain plug magnet. If plug has excessive debris, inspect the condition of chaincase components.
- Install drain plug and new O-ring. Tighten.
Torque: 14–21 ft-lbs (19–28.5 N·m) Primary chaincase drain plug
Figure 68. Removal/Installation of Chaincase Drain Plug - See Figure 70. Remove screws (3) and clutch inspection cover (2).
- Remove seal (1). Wipe oil from groove in chaincase cover and mounting surface.
NOTICE Do not overfill the primary chaincase with lubricant. Overfilling can cause rough clutch engagement, incomplete disengagement, clutch drag and/or difficulty in finding neutral at engine idle. (00199b) - Add lubricant.
- Pour specified amount of FORMULA+ TRANSMISSION AND PRIMARY CHAINCASE LUBRICANT or SCREAMIN’ EAGLE SYN3 FULL SYNTHETIC MOTORCYCLE LUBRICANT 20W50 through clutch inspection cover opening. Refer to Table 44.
- See Figure 69. Proper level is approximately at bottom of pressure plate OD.
Table 44. Primary Chaincase Lubricant
ITEM
DRY FILL**
WET FILL***
Oz
L
Oz
L
Amount*
34
1.0
30
0.9
The amount is approximate. Fill to the bottom of the pressure plate OD with the vehicle upright.
The cover was removed and installed.
The lubricant was drained through the drain plug only.
Figure 69. Primary Lubricant Level
- Install clutch inspection cover and new seal:
- Thoroughly wipe all lubricant from cover mounting surface and groove in chain case cover.
- See Figure 70. Position new seal (1) in groove in clutch inspection cover (2). Press each of the nubs on seal into the groove.
- Secure clutch inspection cover (2) with screws with captive washers (3).
- See Figure 71. Tighten in sequence shown to 84–108 in-lbs (9.5–12.2 N·m).

- Seal
- Clutch inspection cover
- Screw and captive washer (5)
Figure 70. Clutch Cover (Typical)

Figure 71. Clutch Cover Tightening Sequence
FAQ’s
In general, Harley-Davidson advises oil changes every 3,000 to 5,000 miles, depending on the kind of oil used and the riding environment.
Using Harley Davidson-branded oil is advised to maintain best performance and warranty protection, however, it is not required.
While independent motorcycle mechanics with Harley-Davidson bike experience can be consulted, Harley-Davidson stores are well-equipped for Touring model servicing.
Depending on the particular model and tire type, the suggested tire pressure may change. For specific recommendations, consult your owner’s manual or the instructions provided by the tire manufacturer.
Checking and adjusting tire pressure is advised before every ride or at least once every week, especially before long travels.
Harley Davidson advises checking the brakes frequently, such as during normal maintenance, and replacing worn brake pads.
The frequency of chain or belt drive maintenance can change. For detailed instructions, check your owner’s manual; nonetheless, it’s typically advisable to examine and lubricate them frequently.
Regular maintenance normally entails changing the oil and filter, checking the brakes, checking the tires, and inspecting the entire system.
Yes, owners who are confident performing DIY motorcycle maintenance can handle many simple maintenance procedures including oil changes and tire pressure checks.
Yes, the maintenance plan that details suggested service intervals is typically included in the owner’s manual.
It is advised to have access to a Harley Davidson dealership or approved service center in case of breakdowns or roadside assistance coverage.
Regular washing, waxing, and the use of the right cleaning supplies can all help preserve the finish on your bike.
In addition to the factory warranty, some dealerships provide extended service agreements that cover regular upkeep and repairs.
It is advised that you store your bike in a cool, dry location with a full tank of gas and a battery tender to keep the battery charged.
Although the warranty coverage may differ, it usually includes clauses for standard upkeep and repairs. Review the details of your warranty to comprehend its terms and limitations.
Useful Link
View Full PDF : 2021 Harley Davidson Touring Auto User Guide
2021 Harley Davidson Touring Cruise Control Instructions