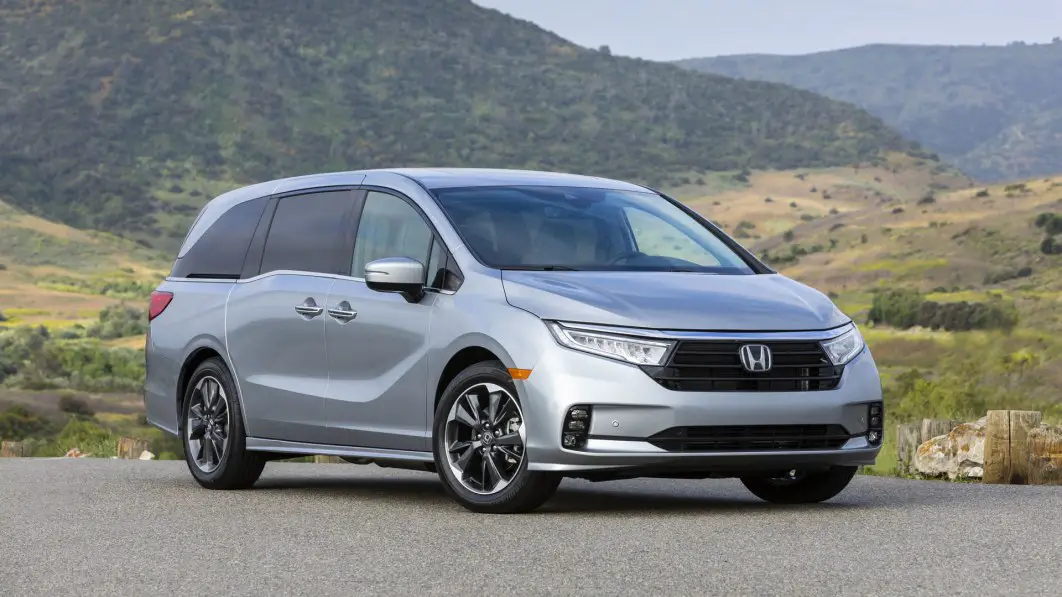
2023 Honda Odyssey Indicators
Inside the 2023 Honda Odyssey’s complex design is a set of signs that tell both the driver and the people in the car important information. These carefully placed signs on the dashboard tell you what’s going on with the car in a sophisticated way, so you can drive safely and know what’s going on. Indicators in the Odyssey are meant to light up and show what is important about different parts of the car. From the simple but essential fuel level sign to the complicated engine temperature gauge, these indicators let you see important information right away. Also, the Odyssey’s signs go beyond their basic functions to include new features like driver-assistance indicators that show when advanced safety systems are working. With a mix of traditional and modern design, the 2023 Honda Odyssey’s lights offer a smooth blend of what you know and what’s new. Their lights don’t just show information; they also show a deeper link between the driver and the machine. With these indicators, the Odyssey gives drivers the power to travel with confidence, making sure that everyone on board has a smooth and well-informed trip.
Indicators
| Indicator | Name | On/Blinking | Explanation | Message |
|
|
Parking Brake and Brake System Indicator (Red) |
• Comes on for a few seconds when you set the power mode to ON, then goes off if the parking brake has been released.
• Comes on when the parking brake is applied and goes off when it is released. • Comes on when the brake fluid level is low. • Comes on if there is a problem with the brake system. • The beeper sounds and the indicator comes on if you drive with the parking brake applied. • Comes on for about 15 seconds when you push the electric parking brake switch with the power mode in OFF. • Stays on for about 15 seconds when you set the power mode to OFF while the electric parking brake is set. |
• Comes on while driving – Make sure the parking brake is released. Check the brake fluid level.
2 What to do when the indicator comes on while driving. • Comes on along with the Parking Brake and Brake System Indicator (amber) – Immediately stop in a safe place. Contact a dealer for repair. The brake pedal becomes harder to operate. Depress the pedal further than you normally do. 2 If the Brake System Indicator (Red) Comes On or Blinks at the Same Time When the Brake System Indicator (Amber) Comes On. • Comes on along with the ABS indicator – Have your vehicle checked by a dealer. 2 If the Brake System Indicator (Red) Comes On or Blinks. • Blinks and the Parking Brake and Brake System Indicator (amber) come on at the same time – There is a problem with the electric parking brake system. The parking brake may not be set. Avoid using the parking brake and have your vehicle checked by a dealer immediately. 2 If the Brake System Indicator (Red) Comes On or Blinks at the Same Time When the Brake System Indicator (Amber) Comes On. |
|


|
|
Parking Brake and Brake System Indicator (Amber) | • Comes on for a few seconds when you set the power mode to ON, then goes off.
• Comes on if there is a problem with a system related to braking other than the conventional brake system. |
• Comes on while driving – Avoid high speeds and sudden braking. Take the vehicle to a dealer immediately. |
|
| • Comes on if there is a problem with the electric parking brake system and/or the automatic brake hold system. | • Stays on constantly – Avoid using the parking brake and have your vehicle checked by a dealer immediately. |
|


|
|
Parking Brake and Brake System Indicator (Amber) | • Comes on if there is a problem with the radar sensor.
• Indicator may come on temporarily when the Maximum Load Limit is exceeded. |
• Make sure the total load is within the Maximum Load Limit.
2 Maximum Load Limit • Stays on constantly – Have your vehicle checked by a dealer. |
— |

 |
Automatic Brake Hold System Indicator | • Comes on when the automatic brake hold system is on. |
2 Automatic Brake Hold |
 |
 |
Automatic Brake Hold Indicator | • Comes on when the automatic brake hold is activated. | 2 Automatic Brake Hold | — |
|
|
Malfunction Indicator Lamp |
• Comes on when you set the power mode to ON, and goes off when the engine starts, or after several seconds if the engine did not start. If “readiness codes” have not been set, it blinks five times before it goes off. | • Readiness codes are part of the onboard diagnostics for the emissions control systems.
2 Testing of Readiness Codes |
— |
| • Comes on if there is a problem with the emissions control system.
• Blinks when a misfire in the engine’s cylinders is detected. |
2 If the Malfunction Indicator Lamp Comes On or Blinks |
 |

|
|
Charging System Indicator |
• Comes on when you set the power mode to ON, and goes off when the engine starts.
• Comes on when there is a problem with the charging system. |
• Comes on while driving – Turn off the climate control system and rear defogger in order to reduce electricity consumption.
2 Checking the Battery 2 If the Charging System Indicator Comes On |
|
 |
Gear Position Indicator | • Indicates the current gear selection. |
2 Shifting |
— |
|
|
M (sequential mode) Indicator/ Sequential Mode Gear Selection Indicator | • Comes on when the manual sequential shift mode is applied. |
2 Sequential Mode |
— |


|
|
Transmission System Indicator |
• All the gear positions may light for several seconds, and go off. | • When all the gear positions light, immediately stop your vehicle in a safe place.
• Indicators go off if there is no problem. However, even if they go off, take your vehicle to a dealer for inspection. |
|
| • The indicated current gear selection blinks if there is a problem with the transmission system. | • Avoid sudden start and acceleration, and stop in a safe place immediately.
Have your vehicle checked by a dealer. |
|||
| • The current gear position or all the gear positions blink if there is a problem with the transmission system and the vehicle will no longer move. | • Immediately stop in a safe place.
2 Emergency Towing • Have your vehicle checked by a dealer. |
 |
||
| • The current gear position or all the gear positions blink if you cannot select (P due to a transmission system failure. | • The engine can be activated as a temporary measure.
2 If the Transmission System Indicator Blinks along with the Warning Message • Set the parking brake when parking. • Have your vehicle checked by a dealer immediately. |
|


|
|
Seat Belt Reminder Indicator |
• Comes on and the beeper sounds if you are not wearing a seat belt when you set the power mode to ON.
• If the front passenger is not wearing a seat belt, the indicator comes on a few seconds later. • Blinks while driving if either you and/or the front passenger has not fastened a seat belt. The beeper sounds and the indicator blinks at regular intervals. |
• The beeper stops and the indicator goes off when you and the front passenger fasten their seat belts.
• Stays on after you and/or the front passenger has fastened the seat belt(s) – A detection error may have occurred in the sensor. Have your vehicle checked by a dealer. 2 Seat Belt Reminder |
|
|
|
Low Fuel Indicator |
• Comes on when the fuel reserve is running low (approximately 2.9
U.S. gal/11.0 Liter left). • Blinks if there is a problem with the fuel gauge. |
• Comes on – Refuel your vehicle as soon as possible.
• Blinks – Have your vehicle checked by a dealer. |
|


|
|
Anti-lock Brake System (ABS) Indicator |
• Comes on for a few seconds when you set the power mode to ON, then goes off.
• If it comes on at any other time, there is a problem with the ABS. |
• Stays on constantly – Have your vehicle checked by a dealer. With this indicator on, your vehicle still has normal braking ability but no anti-lock function.
2 Anti-lock Brake System (ABS) |
|
|
|
Supplemental Restraint System Indicator |
• Comes on for a few seconds when you set the power mode to ON, then goes off.
• Comes on if a problem with any of the following is detected: – Supplemental Restraint System – Knee airbag system – Side airbag system – Side curtain airbag system – Seat belt tensioner |
• Stays on constantly or does not come on at all – Have your vehicle checked by a dealer. |
|
|
|
Auto High-Beam Indicator | • Comes on for a few seconds when you set the power mode to ON, then goes off.
• Comes on when all the operating conditions of the Auto high-beam are met. |
2 Auto High-Beam | — |


|
|
Vehicle Stability AssistTM (VSA®) System Indicator | • Comes on for a few seconds when you set the power mode to ON, then goes off.
• Blinks when VSA® is active. • Comes on if there is a problem with the VSA®, hill start assist, brake assist or brake lighting system. |
• Stays on constantly – Have your vehicle checked by a dealer.
2 Vehicle Stability AssistTM (VSA®), aka Electronic Stability Control (ESC), System 2 Hill start assist system |
|
|
|
Vehicle Stability AssistTM (VSA®) OFF Indicator |
• Comes on for a few seconds when you set the power mode to ON, then goes off.
• Comes on when you partially disable VSA®. |
2 VSA® On and Off P. 500 |
— |
|
|
Electric Power Steering (EPS) System Indicator |
• Comes on when you set the power mode to ON, and goes off when the engine starts.
• Comes on if there is a problem with the EPS system. |
• Stays on constantly – Have your vehicle checked by a dealer.
2 If the Electric Power Steering (EPS) System Indicator Comes On |
|


|
|
Low Tire Pressure/TPMS Indicator |
• Comes on for a few seconds when you set the power mode to ON, then goes off.
• Comes on if the tire pressure of any of the tires becomes significantly low. |
• Comes on while driving – Stop in a safe place, check tire pressures, and inflate the tire(s) if necessary. |
|
| • Blinks for about one minute, and then stays on if there is a problem with the TPMS with Tire Fill Assist, or when a compact spare tire is temporarily installed. | • Blinks and remains on – Have your vehicle checked by a dealer. If the vehicle is fitted with a compact spare, get your regular tire repaired or replaced and put back on your vehicle as soon as you can. |
|
||
|
|
Turn Signal and Hazard Warning Indicators |
• Blinks when you operate the turn signal lever.
• Blinks along with all turn signals when you press the hazard warning button. |
• Does not blink or blinks rapidly
2 Replacing Light Bulbs |
— |
 |
High Beam Indicator | • Comes on when the high beam headlights are on. | — | — |


 |
Lights On Indicator |
• Comes on whenever the light switch is on, or in AUTO when the exterior lights are on. | • If you set the power mode to ACCESSORY or VEHICLE OFF while the exterior lights are on, a chime sounds when the driver’s door is opened. |
— |
 |
Fog Light Indicator | • Comes on when the fog lights are on. | 2 Fog Lights |
— |
|
|
Immobilizer System Indicator |
• Comes on briefly when you set the power mode to ON, then goes off.
• Comes on if the immobilizer system cannot recognize the key information. |
• Blinks – You cannot start the engine. Set the power mode to VEHICLE OFF*1, then select the ON mode again.
• Repeatedly blinks – The system may be malfunctioning. Have your vehicle checked by a dealer. • Do not attempt to alter this system or add other devices to it. Electrical problems can occur. |
|
 |
Security System Alarm Indicator | • Comes on briefly when you set the power mode to ON, then goes off.
• Blinks when the security system alarm has been set. |
2 Security System Alarm | — |


*1: Canadian models only: Apply and hold the brake pedal before selecting the ON mode.
| Indicator | Name | On/Blinking | Explanation | Message |
|
|
System Message Indicator |
• Comes on along with a beep when a problem is detected. A system message on the driver information interface appears at the same time. | • While the indicator is on, press the • Refer to the Indicators information in this chapter when a system message appears on the driver information interface. Take the appropriate action for the message. • The driver information interface does not return to the normal screen unless the warning is canceled, or the ENTER button is pressed repeatedly. |
— |
 |
Econ Mode Indicator | • Comes on when you press the ECON button. | 2 ECON Button |  |
| Snow Mode Indicator | • Comes on when you press the SNOW button and snow mode is selected. | 2 Intelligent Traction Management |  |
|
|
Normal Mode Indicator | • Comes on for a few seconds when Snow mode is selected, and the vehicle is powered off, then restarted. | 2 Intelligent Traction Management | — |

 |
Auto Idle Stop Indicator (Green) | • Comes on when Auto Idle Stop is in operation. The engine automatically shuts off. | 2 Auto Idle Stop |
— |
 |
Auto Idle Stop OFF Indicator |
• Comes on when the Auto Idle Stop system has been turned off by the Auto Idle Stop OFF Button. | 2 Auto Idle Stop System ON/OFF |  |
|
|
Auto Idle Stop System Indicator (Amber) | • Comes on for a few seconds when you set the power mode to ON, then goes off. |
— |
— |
| • Blinks if there is a problem with the Auto Idle Stop system. | • Blinks – Have your vehicle checked by a dealer. |  |

| Indicator | Name | On/Blinking | Explanation | Message |
|
|
Auto Idle Stop Suspend Indicator |
• Comes on while Auto Idle Stop is temporarily suspended in the following situations. |
— |
— |
| – Brake pedal is not fully pressed. | • Depress the brake pedal firmly. |  |
||
| – The transmission is in a position other than |
2 Auto Idle Stop |
 |
||
| – System charging is prioritized. |
|
|||
| – Climate control system is prioritized. | ||||
| – Engine coolant temperature is not in operating range. | ||||
| – The Intelligent Traction Management is set to Snow. | ||||
| – The battery temperature is too low.
– Auto Idle Stop does not activate for some reason. |


 |
Auto Idle Stop Suspend Indicator | — | • If you press and hold the Auto Idle Stop OFF button, you can select whether to display the status messages or not. |  |
 |
Lane Keeping Assist System (LKAS) Indicator (Amber) | • Comes on for a few seconds when you set the power mode to ON, then goes off.
• Comes on if there is a problem with the LKAS. |
• Stays on constantly – Have your vehicle checked by a dealer. |  |
 |
Lane Keeping Assist System (LKAS) Indicator (White/Green) | • Lights up in white when you press the LKAS button.
• Lights up in green when the LKAS is in operation. |
2 Lane Keeping Assist System (LKAS) |
— |
|
|
Adaptive Cruise Control (ACC) with Low Speed Follow Indicator (Amber) |
• Comes on for a few seconds when you set the power mode to ON, then goes off.
• Comes on if there is a problem with ACC with Low Speed Follow. |
• Comes on while driving – Have your vehicle checked by a dealer. |
|
| • Indicator may come on temporarily when the Maximum Load Limit is exceeded.
• ACC with Low Speed Follow has been automatically canceled. |
• Make sure the total load is within the Maximum Load Limit.
2 Maximum Load Limit • Stays on constantly – Have your vehicle checked by a dealer. |
— |
||
 |
Adaptive Cruise Control (ACC) with Low Speed Follow Indicator (White/Green) | • Lights up in white when you press the • Lights up in green when you press the RES/+ button or -/SET button. |
2 Adaptive Cruise Control (ACC) with Low Speed Follow |
— |

| Indicator | Name | On/Blinking | Explanation | Message |
 |
Cruise Mode Indicator (White/Green) | • Lights up in white when you change to cruise mode.
• Lights up in green when you have set a speed for cruise control. |
2 To Switch ACC with Low Speed Follow to Cruise Control | — |
|
|
Safety Support Indicator (Amber) | • Comes on if there is a problem with RDM, CMBSTM, or blind spot information system. | • Stays on constantly – Have your vehicle checked by a dealer. |
|
| • Indicator may come on temporarily when the Maximum Load Limit is exceeded. | • Make sure the total load is within the Maximum Load Limit.
2 Maximum Load Limit |


|
|
Safety Support Indicator (Amber) |
• Comes on when RDM and/or CMBSTM shuts itself off. | • Indicator may come on temporarily when passing through an enclosed space, such as a tunnel.
• The area around the radar sensor is blocked by dirt, mud, etc. Stop your vehicle in a safe place and wipe the debris off with a soft cloth. Indicator may take some time to go off after the radar sensor is cleaned. • Have your vehicle checked by a dealer if the indicator does not go off even after you have cleaned the radar sensor. 2 Radar Sensor |
|
| • Stays on – The temperature inside the camera is too high.
Use the climate control system to cool down the camera. The system activates when the temperature inside the camera cools down. 2 Front Sensor Camera |
|


|
|
Safety Support Indicator (Amber) |
• Comes on when RDM and/or CMBSTM shuts itself off. | • Stays on – The area around the camera is blocked by dirt, mud, etc. Stop your vehicle in a safe place and wipe the debris off with a soft cloth.
• Have your vehicle checked by a dealer if the indicator and message are still displayed even after you have cleaned the area around the camera. 2 Front Sensor Camera |
|
| • Comes on when mud, snow, or ice has accumulated in the vicinity of the blind spot information system sensor. | • Comes on while driving – Something may be interfering with the blind spot information system sensor. Check the vicinity of the blind spot information system sensor and remove any obstacles.
2 Blind spot information System |
|


|
|
Safety Support Indicator (Green/ Gray) |
• Lights up in green when RDM, CMBSTM, and blind spot information system are on.
• Lights up in green and gray when RDM, CMBSTM, or blind spot information system or any two of these systems are off. • Lights up in gray when RDM, CMBSTM, and blind spot information system are off. |
2 RDM On and Off 2 CMBSTM On and Off 2 Blind spot information system on and off |
|

Driver Information
Driver Information Interface Warning and Information Messages
The following messages appear only on the driver information interface. Press the![]() (home) button, select Warnings, then press the ENTER button to see the message again with the system message indicator on.
(home) button, select Warnings, then press the ENTER button to see the message again with the system message indicator on.
| Message | Condition | Explanation |
 |
• Appears if any door or the tailgate is not completely closed. | • Goes off when all doors and the tailgate are closed. |
 |
• Appears when the hood is opened. | • Close the hood. |
 |
• Appears when the engine oil pressure is low. | • Appears while driving – Immediately stop in a safe place.
2 If the Engine Oil Low Warning Appears |
 |
• Appears if there is a problem with the shutter grille, and the radiator coolant temperature is too high. | • Power output will be reduced, so you may not be able to accelerate or maintain your current speed. Have your vehicle checked by a dealer. |
| Canadian models
|
• Appears when the washer fluid is low. | • Refill the washer fluid.
2 Refilling Window Washer Fluid |
 |
• Appears when the temperature of the transmission is starting to get too hot.
• The performance of the vehicle may be reduced. |
• Until the message disappears, reduce your speed and allow the system to cool down. |
 |
• Appears if the battery charge becomes low. | • Charge the battery. |
 |
• Appears when the fuel fill door is opened. | • Close the fuel fill door. |

 |
• Appears when there is a problem with the battery charging system. | • Have your vehicle checked by a dealer. |
 |
• Appears when the scheduled maintenance is due soon.
• Consequently, Maintenance Due Now and Maintenance Past Due follow. |
2 Maintenance Minder Messages on the Driver Information Interface P. 593 |
|
|
• Appears if there is a problem with the power sliding door system. | • Turn off the main switch and manually operate the power sliding doors.
• Have your vehicle checked by a dealer. 2 Opening/Closing the Power Sliding Doors |

 |
• Appears when the engine coolant temperature gets abnormally high. | 2 Overheating |
|
|
Models with power tailgate
• Appears when there is a problem with the power tailgate system. |
• Manually open or close the power tailgate.
• Have your vehicle checked by a dealer. |
|
|
• Appears when the starter system has a problem. | • As a temporary measure, press and hold the ENGINE START/STOP button for up to 15 seconds while pressing the brake pedal and manually start the engine.
• Have your vehicle checked by a dealer. |


|
|
• Appears when you set the power mode to ACCESSORY or ON. | 2 Starting the Engine |
| • Appears when the engine does not restart automatically due to the following reason:
• The hood is open. • There is a problem in the system that disables Auto Idle Stop. |
• Follow the normal procedure to start the engine.
2 Starting the Engine • Close the hood. |
|
 |
• Appears when the steering wheel is locked. | • Move the steering wheel left and right while pressing the ENGINE START/STOP button. |
 |
• Appears when the power mode is in ACCESSORY. |
— |
 |
• Appears after the driver’s door is opened when the power mode is in ACCESSORY. | • Change the power mode to VEHICLE OFF.
2 ENGINE START/STOP Button |

 |
• Appears when you close the door with the power mode in ON without the remote inside the vehicle. | • Disappears when you bring the remote back inside the vehicle and close the door.
2 Keyless Remote Reminder |
 |
• Appears when the remote battery becomes weak. | • Replace the battery as soon as possible.
2 Replacing the Remote Battery |
 |
• Appears if the remote battery is too weak to start the engine or the key is not within operating range to start the engine.
A beeper sounds six times. |
• Bring the remote in front of the ENGINE START/STOP
button to be touched with. 2 If the Remote Battery is Weak |
 |
• Appears if you press the ENGINE START/STOP
button while the vehicle is moving. |
2 Emergency Engine Stop |
 |
• Appears after the driver’s door is opened when the power mode is in ACCESSORY. | • Press and hold the ENGINE START/STOP button with your foot off the brake pedal to change the power mode to VEHICLE OFF. |
 |
• Appears when you attempt to change to another gear position with the transmission in (P and the engine OFF. | • To select another gear position while in (P, the engine must be ON. |
 |
• Appears when you set the power mode to OFF while driving. | • Immediately stop in a safe place, set the parking brake, then restart the engine. If the message disappears, continue driving. |
|
|
• Appears when the vehicle is stopped with the driver’s seat belt unfastened and there is a chance that the vehicle may roll unintentionally. | • Press the (P button before release the brake pedal when idling, parking or exiting the vehicle.
2 Shift Operation |
| • Appears when the engine stops without the transmission in (P, and does not restart automatically.
• Appears if you open the hood while Auto Idle Stop activates. |
• If you want to set the power mode to ON, change the gear position to (P.
• If you want to start the engine, follow the normal procedure. 2 Starting the Engine |
|
 |
• Appears when you change to (N, then release the
(N button. |
2 If you want to keep the transmission in (N position [car wash mode] |
 |
• Appears when car wash mode is not available due to hot transmission. | • When transmission is too hot, car wash mode may not be available. Let the engine idle and cool down transmission.
2 If you want to keep the transmission in (N position [car wash mode] |
 |
• Appears when you try to change the gear position without depressing the brake pedal. | • Depress the brake pedal, then select a shift button. |

 |
• Appears when you try to change the gear position without releasing your foot off the accelerator pedal. | • Release your foot off the accelerator pedal, then select a shift button. |
|
|
• Appears when the (P button is pressed while the vehicle is moving.
• Appears if you change the gear position to (R while the vehicle is moving forward, or to (D while the vehicle is reversing. |
• Make sure that the vehicle comes to a stop before operating the select button. |
|
|
• Appears when you set the power mode to ON without fastening the driver’s seat belt.
• Appears when you change the gear position after (P has been automatically selected with the driver’s door open, the driver’s seat belt unfastened, then the brake pedal is released. |
• Fasten the seat belt properly before you start to drive.
2 Shift Operation |
 |
• Appears when you set the power mode to VEHICLE OFF, if the rear doors were opened shortly before or after the vehicle was powered on. | • Check the rear seat for passengers or items before exiting the vehicle.
2 Rear Seat Reminder |
 |
• Appears when depressing the accelerator pedal while the gear position is in (N. | • Remove your foot from the accelerator pedal. When driving, depress the brake pedal and change the gear position. |


 |
• Appears when you press and hold (N button for more than two seconds. | • Disappears when you set the gear position to other than (N.
2 If you want to keep the transmission in (N position [car wash mode] |
 |
• Appears if there is a problem with the cooling system. | • Drive slowly to prevent overheating and have your vehicle checked by a dealer as soon as possible. |
 |
• Appears if there is a problem with the headlights. | • Appears while driving – The headlights may not be on. When conditions allow you to drive safety, have your vehicle checked by a dealer as soon as possible. |
 |
Models with parking sensor system
• Appears if there is a problem with the parking sensor system. |
• Check if the area around the sensor(s) is covered with mud, ice, snow, etc. If the indicator(s) stays on or the beeper does not stop even after you clean the area, have the system checked by a dealer. |
 |
• Appears if the automatic brake hold is automatically canceled while it is in operation. | • Immediately depress the brake pedal. |
 |
• Appears when the automatic brake hold system is turned off. | 2 Automatic Brake Hold |
 |
• Appears when the automatic brake hold button is pressed without wearing the driver’s seat belt. | • Fasten the driver’s seat belt.
2 Automatic Brake Hold |
 |
• Appears when the automatic brake hold button is pressed without depressing the brake pedal while the automatic brake hold is in operation. | • Press the automatic brake hold button with the brake pedal depressed.
2 Automatic Brake Hold |
 |
• Appears when the parking brake is applied automatically while it is in operation. | 2 Automatic Brake Hold
2 Parking Brake |
 |
• Appears when you pull the electric parking brake switch without depressing the brake pedal. | • Depress the brake pedal to release the parking brake.
2 Parking Brake |
 |
• Appears as soon as a problem is detected in the keyless access system. | • Appears constantly – Have your vehicle checked by a dealer. |
 |
• Appears as soon as a problem is detected in the push button starting system. | • Appears constantly – Have your vehicle checked by a dealer. |
 |
• Appears if there is a problem with the Auto high- beam. | • Manually operate the headlight switch.
• If you are driving with the high-beam headlights when this happens, the headlights are changed to low beams. |
 |
• Appears if there is a problem with the fuel pump system. | • Set the power mode to OFF for a while, then set the power mode to ON. The message disappears if there is no problem. If the message appears again, take your vehicle to a dealer. |
 |
• Appears if there is a problem with the engine management system. | • Set the power mode to OFF for a while, then set the power mode to ON. The message disappears if there is no problem. If the message appears again, take your vehicle to a dealer. |
 |
• Appears if there is a problem with the ignition system. | • Set the power mode to OFF for a while, then set the power mode to ON. The message disappears if there is no problem. If the message appears again, take your vehicle to a dealer. |
 |
• Appears if there is a problem with the seat heaters. | • Turn off the seat heaters until the message disappears. If the message appears again, take your vehicle to a dealer. |
 |
• Appears if there is a problem with the climate control system. | • Turn off the climate control system until the message disappears. If the message appears again, take your vehicle to a dealer. |
 |
• Appears when you unlock and open the driver’s door while the engine is running by remote engine start. | 2 Remote Engine Start with Vehicle Feedback |
|
|
• Flashes when the system senses a likely collision with a vehicle in front of you. | • Take appropriate action to prevent a collision (apply the brakes, change lanes, etc.)
2 Collision Mitigation Braking SystemTM (CMBSTM) 2 Adaptive Cruise Control (ACC) with Low Speed Follow |
 |
• Appears when ACC with Low Speed Follow has been automatically canceled. | • You can resume the set speed after the condition that caused ACC with Low Speed Follow to cancel improves. Press the RES/+ button.
2 Adaptive Cruise Control (ACC) with Low Speed Follow |
 |
• Appears when pressing the –/SET button while the vehicle is moving and the brake pedal is depressed. | • ACC with Low Speed Follow cannot be set.
2 Adaptive Cruise Control (ACC) with Low Speed Follow |
 |
• Appears if the VSA® or traction control function operates while ACC with Low Speed Follow is in operation. | • ACC with Low Speed Follow has been automatically canceled.
2 Adaptive Cruise Control (ACC) with Low Speed Follow |

 |
● Appears when the distance between your vehicle and the vehicle ahead of you is too close while ACC with Low Speed Follow is in operation. | ● ACC with Low Speed Follow has been automatically canceled.
2 Adaptive Cruise Control (ACC) with Low Speed Follow |
 |
● Appears when pressing the –/SET button while the distance between your vehicle and the vehicle ahead of you is too close. | ● ACC with Low Speed Follow cannot be set.
2 Adaptive Cruise Control (ACC) with Low Speed Follow |
 |
● Appears when the driver’s seat belt is unfastened while your vehicle is automatically stopped by ACC with Low Speed Follow. | ● ACC with Low Speed Follow has been automatically canceled.
2 Adaptive Cruise Control (ACC) with Low Speed Follow |
 |
● Appears when pressing the –/SET button while the driver’s seat belt is unfastened. | ● ACC with Low Speed Follow cannot be set.
2 Adaptive Cruise Control (ACC) with Low Speed Follow |
 |
● Appears when the speed of the vehicle is too high for you to set ACC. | ● Reduce the speed, then set ACC.
2 Adaptive Cruise Control (ACC) with Low Speed Follow |
 |
● Appears when ACC is canceled due to excessive high vehicle speed. | ● Reduce the speed, then reset ACC.
2 Adaptive Cruise Control (ACC) with Low Speed Follow |
 |
● Appears when the vehicle ahead of you resumes driving, after your vehicle has been stopped automatically by ACC with Low Speed Follow. | ● Press the RES/+ button or –/SET button or depress the accelerator pedal to resume.
2 Adaptive Cruise Control (ACC) with Low Speed Follow |
 |
● Appears when the shift position is changed to any position other than |
● ACC with Low Speed Follow has been automatically canceled.
2 Adaptive Cruise Control (ACC) with Low Speed Follow |
 |
● Appears when pressing the –/SET button while the shift position is in any position other than |
● ACC with Low Speed Follow cannot be set.
2 Adaptive Cruise Control (ACC) with Low Speed Follow |
|
|
● Appears when the vehicle is stopped on a very steep slope while ACC with Low Speed Follow is in operation. | ● ACC with Low Speed Follow has been automatically canceled.
2 Adaptive Cruise Control (ACC) with Low Speed Follow |


|
|
● Appears when pressing the –/SET button while the vehicle is stopped on a very steep slope. | ● ACC with Low Speed Follow cannot be set.
2 Adaptive Cruise Control (ACC) with Low Speed Follow |
 |
● Appears when the parking brake is applied automatically while ACC with Low Speed Follow is in operation. | ● ACC with Low Speed Follow has been automatically canceled.
2 Adaptive Cruise Control (ACC) with Low Speed Follow 2 Parking Brake |
 |
● Appears when pressing the –/SET button while the parking brake is applied. | ● ACC with Low Speed Follow cannot be set.
2 Adaptive Cruise Control (ACC) with Low Speed Follow 2 Parking Brake |
 |
● Appears if ACC with Low Speed Follow is canceled while your vehicle is automatically stopped by ACC with Low Speed Follow. | ● Immediately depress the brake pedal. |

 |
• Appears if ACC with Low Speed Follow cannot be set due to repeated deceleration, driving on a long downward slope, or excess vehicle weight. | • Wait awhile, then reset ACC with Low Speed Follow.
2 Adaptive Cruise Control (ACC) with Low Speed Follow |
|
|
• Appears just before the ACC with Low Speed Follow is automatically canceled due to repeated deceleration, driving on a long downward slope, or excess vehicle weight. (Will automatically open until the distance between your vehicle and the vehicle ahead is the maximum set in distance settings.)
• Appears when the ACC with Low Speed Follow has been automatically canceled. |
2 Adaptive Cruise Control (ACC) with Low Speed Follow |
 |
• Appears when -/SET, RES/+, CANCEL, or interval button is pressed while ACC with Low Speed Follow is off. | • After pressing the 2 Adaptive Cruise Control (ACC) with Low Speed Follow |
 |
• Appears when interval button is pressed while Cruise mode is selected. | • After selecting ACC with Low Speed Follow, press the interval button.
2 Adaptive Cruise Control (ACC) with Low Speed Follow |

|
|
Lane Keeping Assist System (LKAS)
• Appears when the vehicle is driving out of a detected lane. The steering wheel vibrates rapidly. |
• Keep the vehicle within the lane you are driving.
2 Lane Keeping Assist System (LKAS) |
| Road Departure Mitigation (RDM) System
• Appears when the vehicle is driving out of a detected lane. When you selected Warning Only – The steering wheel vibrates rapidly when the vehicle is drifting out of a detected lane. When you selected Normal, Wide or Narrow – The steering wheel vibrates rapidly when the vehicle is drifting out of a detected lane. The system also steers the vehicle to help you remain within your driving lane. |
• Keep the vehicle within the lane you are driving.
2 Road Departure Mitigation (RDM) System • You can change the setting for the road departure mitigation system. Normal, Wide, Warning Only and Narrow can be selected. 2 Customized Features |
|
|
|
Road Departure Mitigation (RDM) System
When you selected Narrow • Appears when the vehicle is likely to drive out a detected lane. The RDM system also steers the vehicle to help you remain within your driving lane. |
— |
 |
• Blinks when you fail to steer the vehicle. The beeper sounds simultaneously. | • Operate the steering wheel to resume the LKAS. |


|
|
• Appears when the LKAS is in operation, or the LKAS button is pressed, but there is a problem with a system related to the LKAS. The LKAS cancels automatically. The beeper sounds simultaneously if selected by customization. | • If any other system indicators come on, such as the VSA®, ABS and brake system, take appropriate action.
2 Indicators |
|
|
• Appears if anything covers the radar sensor cover and prevents the sensor from detecting a vehicle in front.
• May appear when driving in bad weather (rain, snow, fog, etc.) |
• When the radar sensor gets dirty, stop your vehicle in a safe place, and wipe off dirt using a soft cloth. The message may take some time to go off.
• Have your vehicle checked by a dealer if the message does not disappear even after you clean the sensor cover. 2 Radar Sensor 2 Honda Sensing® |
|
|
• Appears if the temperature inside the front sensor camera is too high and some driver assist systems cannot be activated. | • Use the climate control system to cool down the camera.
• Disappears – The camera has been cooled down and the systems are activated normally. 2 Front Sensor Camera 2 Honda Sensing® |
|
|
• Appears if the area around the front sensor camera is blocked by dirt, mud, etc. and be prevented from detecting a vehicle in front.
• May appear when driving in bad weather (rain, snow, fog, etc.) |
• When the front window gets dirty, stop your vehicle in a safe place, and wipe it off with a soft cloth.
• Have your vehicle checked by a dealer if the message does not disappear even after you cleaned the area around the camera. 2 Front Sensor Camera 2 Honda Sensing® |


FAQ
Indicators are visual symbols or lights on the dashboard that convey important information about the vehicle’s status and operation.
The 2023 Odyssey typically features a variety of indicators, including warning lights and informational icons.
Warning indicators alert the driver to potential issues with the vehicle, such as low oil pressure, engine overheating, or brake system problems.
Yes, the Odyssey features indicators for turn signals, high beams, and other routine functions, often located on the instrument panel.
The owner’s manual for the 2023 Odyssey provides a comprehensive guide to understand the meaning of each indicator symbol.
The low fuel indicator illuminates when the fuel level is low, reminding you to refuel.
Yes, the Odyssey usually features a tire pressure monitoring system (TPMS) indicator that alerts you if tire pressure is too low.
The check engine light illuminates when there’s a potential issue with the engine or emissions system. It requires diagnostic attention.
The seat belt reminder indicator reminds occupants to fasten their seat belts before driving.
Yes, the airbag system indicator usually illuminates briefly during startup and goes off if the system is functioning correctly.
The ABS (Anti-Lock Braking System) indicator alerts you if there’s an issue with the ABS system that requires attention.
Yes, the Odyssey often features indicators to show when active safety systems like lane departure warning and adaptive cruise control are engaged.
The process for resetting specific indicators can vary. Refer to the owner’s manual for guidance on resetting various indicators.
The battery charging system indicator might illuminate if there’s an issue with the vehicle’s charging system, such as the alternator.
Yes, the Odyssey typically has an indicator that shows which gear the automatic transmission is in (P, R, N, D, etc.).
Useful Link:
View Full PDF: Honda Odyssey 2023 |Auto User Guide
Honda Odyssey 2023 Seat Belts User Instructions
2024 Honda Odyssey Specs, Price, Features, Mileage (Brochure)