![]()
2024 Jayco Redhawk Owner’s Manual
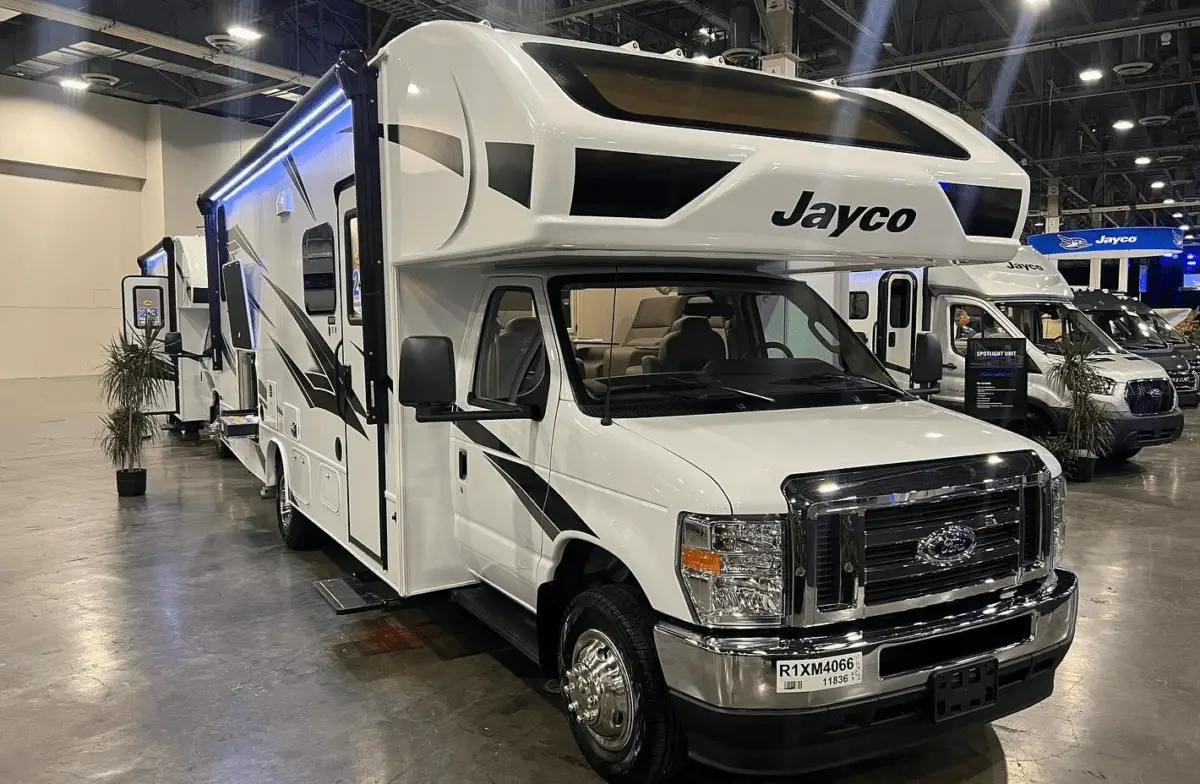
In the Class C RV market, the 2024 Jayco Redhawk is the pinnacle of dependability and adventure. The Redhawk is an ideal partner for individuals looking for a comfortable and adaptable recreational vehicle (RV) because of its well-thought-out interior design, sturdy yet fashionable appearance, and numerous useful features. For a weekend escape or a cross-country road trip, the 2024 Redhawk is the perfect combination of price, durability, and simplicity. The 2024 Redhawk is a great option for both seasoned travelers and those taking their first RV trip because of Jayco’s unwavering dedication to excellence. Prepare to travel far and make treasured experiences in this outstanding RV.
Outside Rearview Mirrors
After adjusting the front driver’s seat, adjust the outside rearview mirrors to your driving preference. Have someone help you adjust the mirrors in the desired direction for maximum rear visibility before driving. During travel, vibration may loosen the fitting holding the mirror(s), causing them to change position. As part of your regular motor home mainte-nance, check and adjust the mirrors to the desired position.
Power Remote Mirrors (if so equipped)
You can adjust the power remote mirrors when the ignition key is in the ON position.
- Move the control knob to the side you want to adjust.
- Press the control arrows in the direction you want the mirror to move.
- Return the control knob to the center to lock the mirror(s) into place.
The power remote mirrors also contain heating elements to defog or de-ice the mirrored glass if needed. To activate this feature, use the “Mirror Heat” control located on the driver’s side console next to the mirror control joystick.
NOTE: Depending on models, the mirror control joystick and the Mirror Defrost toggle switch may be separated from each other. The Mirror Defrost switch may be renamed Mirror Heat.
Rear Vision Camera
The rear vision monitor gives a limited televised view of what is behind your motor home. The rear vision camera will aid you in backing up the motor home, and can be used for a greater field of vision when driving in heavy traffic. The monitor is operational whenever the engine is running. To use the monitor, flip the switch from standby to ON (the monitor will also work when with the motor home is in “reverse” and the monitor in standby). Make sure you turn the monitor to standby while driving to avoid being distracted.
NOTE: Never operate the rear vision monitor in the ON position for ex-tended periods of time as this may result in an “image burn” on the monitor.
Check the outside rear view mirrors when driving and backing for a more complete field of vision. For detailed operating and safety information, refer to the manufacturers user guide.
Campsite Hook-Up
- Refer to Electrical Systems section before connecting the shore line power cord (when using full hook-up) OR before starting the generator or operating the ve-hicle on 12-volt power when dry camping.
- Refer to Fuel & Propane System section before using the LP system. Open the LP gas tank valve (if so equipped) slowly. There may be air in the lines and five to thirty seconds of time is needed to bleed air before LP vapor fills the lines.
- Refer to Plumbing Systems section before connecting the fresh water supply or turning ON the water pump or water heater.
- When using full hook-up, connect the sewer hose to the campsite sewer hook-up.
- If applicable, start the refrigerator and the cooling or heating system.
NOTE: For extended dry camping, management of all your resources is es-sential. Check your battery levels and conserve battery power, use it spar-ingly.
Lippert Level UP® Motor Home Leveling System (if so equipped)
Your recreation vehicle may be equipped with a 4-point automatic leveling system. The control panel is typically located inside the entrance door or in an outside basement com-partment. The following is an overview of the system to be used as a quick reference. For detailed operating and safety instructions, refer to the manufacturer’s owner’s manual. De-pending on your model, the system may vary slightly from the following instructions. Fa-miliarize yourself with the operating and safety instructions prior to using the leveling sys-tem.
Failure to act in accordance with the following warnings may result in serious personal injury or death!
- Never lift the recreation vehicle completely off the ground. Lifting the RV so the wheels are not touching the ground will create an unstable and unsafe condition and may result in serious personal injury or death.
- The leveling system is designed only for leveling the unit and should never be used to provide service for any reason under the recreation vehi-cle such as changing tires or servicing the system. It is not recommended that you change a tire yourself.
- Ensure all jack locations are clear of debris, obstructions or depressions.
- When parking the RV on extremely soft surfaces, utilize the load distri-bution pads under each jack.
- People and pets should be clear of the coach while operating the leveling system.
- Keep hands and other body parts clear of fluid leaks. Oil leaks may be under high pressure and can cause serious skin penetrating injuries.
- The use of the electronic automatic leveling system to support the coach for any reason other than which it is intended is prohibited and will vio-late terms of the limited warranty.
Prior to operation, make sure the following conditions are met:
- The recreation vehicle is parked on a reasonably level surface. EXCESS ANGLE will appear on the LCD display if the coach is 3.5° out of level front to rear or side to side. Refer to error modes in the OEM operating manual in your warranty packet.
- All pets, persons and property are clear of the unit while in operation.
- Battery should be fully charged or unit plugged into shore power.
Leveling control panel callouts
- UP ARROW: scrolls up through the menu on LCD
- DOWN ARROW: scrolls down through the menu on LCD
- ENTER: activates modes and procedures indicated on LCD
- RETRACT: places leveling system into retract mode. Man-ual
- Mode ONLY. Press and hold down for (1) second to initi-ate auto retract.
- LCD DISPLAY: displays procedures and results
- AUTO LEVEL: places leveling system into auto level mode
- FRONT JACK BUTTON: activates both front jacks in manual mode
- LEFT JACK BUTTON: activates left leveling jack(s) in manual mode
- RIGHT JACK BUTTON: activates right leveling jack(s) in manual mode
- REAR JACK BUTTON: activates both rear jacks in manual mode
- POWER BUTTON: turns leveling system on and off
Auto Level Sequence
NOTE: Zero Point Calibration MUST be set before starting the Auto Level sequence.
- Begin with a manual leveling sequence to get the vehicle to the desired level point
- Activate the Level Zero point configuration mode as follows:
- Turn the panel OFF.
- Press the FRONT switch 10 times.
- Press the REAR switch 10 times.
- A tone will sound and the display will read ZERO POINT
CALIBRATION.
Press ENTER to set the zero point.
- Screen will display Zero Point Stability Check and PLEASE WAIT.
- Tone will sound and the screen will display ZERO POINT SUCCESSFUL.
- Control will turn OFF.
For Diesel Units with Air Bag Suspensions ONLY
The leveling control will automatically detect an air bag system. If the unit does not use air bags, the display will read “NO” for air bag control.
If the display reads “NO” but an air bag system is present on the unit:
- Confirm harness is connected properly.
- Run Auto-Level function.
- Recalibrate the Zero Point.
- If the air bag system is still not being detected, contact the OEM for further informa-tion.
User Alarm Mode
If the alarm system detects that the park brake has been disengaged while at least one jack is not fully retracted and the sensor value changes in any axis more than a predefined amount, the panel will signal an error. When in alarm mode, all LEDs will flash and buzzer will beep. The Status LEDs will show the system status.
The system performs an automatic retract. No other features are available in this mode.
Miscellaneous
- The system automatically shuts down after (4) minutes of no operation. To reset the system, the coach ignition MUST be turn off, then back on, and the power button on the Control Panel MUST be pressed again.
- Auto leveling cycle cannot be started until all jacks are fully retracted. Verify jacks are retracted before attempting to auto level. (Unit will perform a full retract automatically if jacks are down on the request of an auto cycle.)
- System will refuse any operation when a low voltage condition is present.
- System will automatically alarm and retract if the park brake is disengaged and jacks are not retracted with any change in sensor readings. In alarm mode, the only available feature is to retract all jacks. Note WAIT display shows the status of Air/Auxiliary features.
NOTE: The LEDs blink differently when in special controller modes (error, alarm, and configuration). Recognizing these modes is important. Excess angle LED blinks whenever the Y axis (vehicle length) is over 5 degrees from programmed level point.
Low Voltage Signal
- The vehicle requires 12.7V DC to operate in the AUTO mode. If voltage is too low, screen displays LOW VOLTAGE. If voltage drops below 12.7V DC, the system will only operate in MANUAL MODE and continues to display LOW VOLTAGE.
- Minimum Voltage – If voltage drops below 9.5 V DC during AUTO or MANUAL op-eration LOW VOLTAGE will appear on display and system stops operating.
Automatic Leveling Procedure
NOTE: Pressing any button during an AUTO LEVEL sequence will abort auto leveling.
- Push power button (right corner). System is operational and electronic level lights become active.
- Check that the Control Pad ENGAGE PARKING BRAKE is engaged.
- Press the AUTO LEVEL button to begin the automatic leveling cycle.
- Push the power button to de-energize the system.
Manual Leveling Procedure
NOTE: When leveling your coach, the coach should be leveled from FRONT to REAR first (steps 2-4). When it is level FRONT to REAR, level the coach LEFT to RIGHT (step 5).
- Press power button on control panel. System is operational and power light will be lit.
- Press DOWN ARROW to display MANUAL LEVEL on the display. Press ENTER to set.
- Press FRONT button until jacks contact the ground and lift front of the coach 1 to 2 inches.
- Press REAR button until jacks contact the ground and lift the rear of the coach. Keep the button depressed until the level indicator displays level.
- Press LEFT or RIGHT button. If level indicator is toward left of coach, press RIGHT button. If level indicator is toward right of the coach press LEFT button. Keep the button depressed until level indicator displays level.
NOTE: The right and left jacks are used to level the coach side to side. Push-ing LEFT on the control panel will extend both left jacks. Pushing RIGHT will extend both right jacks. Jacks always work in pairs; both front, both right, etc. - Repeat steps 2 through 5 if needed.
- Turn power off to the leveling system by pressing the power button.
- Visually inspect all jacks to ensure all shoes are touching the ground. If one of the rear jack shoes not touch the ground, press the corresponding LEFT or RIGHT button to lower the non-compliant jack to the ground.
Jack Retract Procedures
- Press the power button to energize the system. LCD screen will display JACKS DOWN.
- Press DOWN ARROW to display AUTO RETRACT on the screen.
- Press ENTER to begin automatically retracting the jacks.
- NOTE: To stop retracting the jacks, turn the system off and back on again by pressing the power button twice. The coach can then be manually leveled by following steps 1-5 in the Manual Leveling Procedure section above. Press ENTER to acknowledge.
- When the JACKS DOWN display goes off, press the power button on the Control Panel to de-energize the system. After a brief visual inspection around the coach to verify the jacks are all fully retracted, you may proceed to travel.
- NOTE: To retract in the MANUAL mode, press the RETRACT button until it lights. By pressing any of the JACK buttons (LEFT, RIGHT, FRONT, REAR) the jacks will retract in pairs (i.e. FRONT retracts both front jacks, etc.).
- AUTO RETRACT can also be commenced by pressing and holding the RETRACT button for 1 second.
NOTE: In cold weather operation, always check to make sure all jacks, slide rooms and steps are fully retracted before travel.
Jacks – Manual Override
In the event the jacks will not extend or retract there is a manual procedure where the jacks can be overridden with the use of a hex wrench. For specific instructions on the override procedure refer to the manufacturer’s owner’s manual found in your warranty packet.
Drive Away Protection System
If the ignition is in the “RUN” position, jacks are down, and the operator releases the parking brake, all indicator lights will flash and the alarm will activate. The system will then auto-matically retract the jacks until the jacks are fully retracted or the operator resets the parking brake. The power unit will also operate to keep the jacks retracted in the event the leveling system loses pressure as the coach is being driven.
FAQs
The 2024 Jayco Redhawk is a Class C motorhome designed for adventurers seeking comfort and reliability on the road.
The Redhawk boasts features such as a durable exterior, well-designed interiors, and practical amenities.
Jayco offers multiple floorplan options to cater to different preferences and needs.
The size and weight can vary by floorplan, so it’s essential to check the specifications for the specific model you’re interested in.
The sleeping capacity varies, but most models can comfortably accommodate between 4 to 8 people.
Jayco typically offers a limited warranty on their RVs, but it’s advisable to check the details with your dealer.
The Redhawk is often equipped with a dependable Ford or Chevrolet engine, depending on the model.
While it can be used for extended trips, consider your specific needs and preferences for full-time living.
The Redhawk typically comes with entertainment and tech features, such as TVs, sound systems, and connectivity options.
Some models may have towing capabilities, so review the specifications for the specific model you’re interested in.
The Redhawk is primarily designed for campground and RV park use, but some models may offer off-grid features.
Fuel efficiency can vary based on factors like the engine and driving conditions, so check the specific model’s MPG rating.
Regular RV maintenance is recommended, including engine checks, appliance inspections, and winterization if needed.
Jayco often provides customization options and upgrades to personalize your RV.
The 2024 Jayco Redhawk SE starts at $121,718. The 2024 Jayco Redhawk starts at $153,293.
Useful Link
Download Manuals: https://www.jayco.com/manuals/