Jayco Eagle Fifth Wheels 2023 Black Tank Flush User Manual
Black Tank Flush
The black tank flush (no fuss flush) inlet is typically located on the utility center panel (if so equipped) labeled as “Tank Flush”. For models not equipped with a utility center, the inlet is located on the side of the recreation vehicle. The location may vary depending on your model. Attach a garden hose (connected to a pressurized fresh water source) to the black tank flush inlet. The water goes directly into the black water holding tank sprayer connection, allowing you to remove debris and preventing accumulation. A check valve is incorporated in the plumbing lines to prevent back flow. Flush the black water tank each time the grey and black water holding tanks are dumped or as needed.
- NOTE: Utility center (if so equipped) valve positions do not affect the tank flush function. It does not matter where they are positioned when operating the tank flush.
- NOTE: To help insure debris does not clog the tank sprayer orifices, use “TANK FLUSH” every time the waste holding tank is emptied.
- Dump the black water tank (see Gray Tank Drain & Black Tank Drain) and leave the black tank drain valve open.
- Connect a garden hose from the water supply source to the black tank flush.
- With the water source turned ON, flush the black water holding tank until the water running out of the black tank drain valve is clear (not discolored or cloudy).
- Disconnect the garden hose and close the black tank drain valve. Fasten the sewer hose housing dust cap back on the tank flush inlet.
CAUTION
- The black tank drain valve must be OPEN any time there is a hose (water supply) connected to the black tank flush.
- Do not leave any hose (water supply) connected to the black tank flush when it is not in use.
WARNING
Do not use the same hose to fill your fresh (potable) water tank that is used for the black tank flush.
Winterize the Black Tank Flush
- Black tank should be empty prior to winterizing.
- Rinse the black tank prior to blowing it out with air.
- Attach the 4” sewer hose to the dump connector under the RV.
- Open the waste gate valve for the black tank (under the RV).
- NOTE: If the RV has a macerator system, you need to open the bypass valve for the macerator under the RV. This will allow the black tank to drain through the 4” sewer hose.
- Attach a garden hose to the TANK FLUSH inlet at the utility center.
- Attach the other end of the hose to a pressurized water source. Turn water on.
- Flush tank until water appears clear in 4” sewer hose.
- Turn off water, disconnect the hose from faucet, disconnect hose from tank flush.
- Connect the blowout plug to the Black Tank Flush inlet at the utility center panel.
- Colored valves have no effect on the black tank flush inlet.
- Connect the air hose to the blowout plug. Set the compressor to 30 PSI maximum.
- Open the black tank drain gate valve, macerator bypass valve is open also.
- Blow air into the flush inlet for 30 to 60 seconds.
- Disconnect the air hose, compressor and blowout plug.
- Close the black tank drain gate valve and close the macerator bypass valve.
Draining the Spray Port
With fixtures and drain valves open in the RV to drain the water lines, connect the blue-coiled hose to the brass quick connect fitting at the Spray Port.
- Remove the spray nozzle from the other end of the hose.
- Hold the open end of the hose near the ground and any water in the line should drain out.
- Disconnect the hose from the fitting, and store in the RV.
- Close the port cover.
Winterizing the Spray Port with Antifreeze (if so equipped)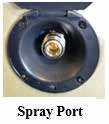
- As you are putting antifreeze into the water lines, attach the hose to the Spray Port.
- Have a container close by to capture antifreeze.
- Pull the trigger on the spray nozzle until antifreeze comes out (into the container).
- Release the nozzle and disconnect the hose from the port.
- Rinse out the hose before storing it.
Tank Heaters (if so equipped)
Your recreation vehicle may be equipped with heaters for the fresh, gray, black water tanks and the water lines or drain lines. These heaters will prevent water in the tanks and lines from freezing down to -11°F (-24°C) (contingent on recreation vehicle setup). The larger tank heaters are 120VAC and attach directly to the tanks. The thermostat con-trolled tank heaters will cycle on at 44°F (7°C) and off at 64°F (18°C). Water line or drain line heaters are smaller and operate on +12VDC and will be attached to the water lines or drain lines. The +12VDC heaters stay on constantly. All of the heaters are controlled by a single ON/OFF switch that is typically located on the command center panel or in the bathroom. The switch lights up red when ON and controls the heater circuit.
CAUTION
- In order for the 120VAC tank heaters to be in operation, the recreation vehicle MUST be hooked up to shore power or under generator power.
- If the recreation vehicle is not operating on shore power or generator power, only the +12VDC heaters will operate. This can result in the tanks freezing.
- The red light on the command center tank switch does not necessarily indicate that ALL heaters are operating; it is a only a warning that the heater circuit is ON.
The tank heater switch should be turned ON:
- When liquid is present in the holding tanks and the outside temperature approach-es and maintains freezing conditions 35°F (2°C) or colder.
The tank heater switch should be turned OFF:
- When there is NO liquid present (tanks are empty).
- When dumping the black and gray holding tanks and the drain pipes.
- When fresh water tank and supply lines are empty or being drained for storage.
- When the recreation vehicle is connected to city sewer and the gate valves are open.
- Free draining is never recommended, especially in cold weather use.
- When ambient temperatures rise and remain above freezing.
No maintenance on the heaters is required, only a periodic inspection for loose wires, dam-age, etc. For additional detailed information, refer to the tank heater manufacturer’s user guide.
Toilet
Prior to using the sanitation system, it is strongly recommended to flush the toilet several times to release sufficient water into the holding tank. Generally, more water is required only when flushing solids.
CAUTION
- It is important to prevent solid waste buildup. Follow the toilet manufacturer’s recommended instructions each time after emptying the black water holding tank.
- To help prevent toilet blockage, always use RV grade single-ply toilet pa-per. Do not flush paper towels, diapers, sanitary napkins or other foreign objects down the toilet.
- Do not use chlorine (undiluted) or caustic chemicals, such as laundry bleach or drain opening types, in the toilet system. These products dam-age the seals in toilets and dump valves.
The toilet system will perform better when water is run for ten to fifteen seconds after flush-ing to ensure that the waste will proceed to the bottom of the tank.
If there is not a sufficient amount of water used during flushing, the waste materials may not evacuate properly from the drain line to the tank. Clogged tanks and pipes could eventually occur. For added convenience and better sanitation system performance, it is advisable to always have four to six inches (10 – 15 cm) of water in the toilet. It is important to add enough water to prevent solid waste buildup. The following guidelines will help to prevent solid waste buildup.
Sewage (black) tank preparation.
- Release one to two quarts (1 or 2 liters) of water into the toilet bowl.
- Follow the directions on your (approved RV) toilet chemical bottle (customer sup-plied), by placing the recommended quantity of holding tank chemical into the toilet bowl.
- Flush the toilet and allow at least two gallons (8 liters) of water to flow into the holding tank.
Cleaning and Maintenance
The toilet should be cleaned regularly for maximum sanitation and operational efficiency. For detailed information refer to the manufacturer’s operator manual.
Spray Port (if so equipped)
Your RV may include a Spray Port on the exterior door side of the trailer. This Spray Port provides a way to rinse items off outside the RV. There are no faucets to control (cold only) water flow. Water flow is controlled by the pump if dry camping or city water if using pressurized water. There is a removable spray nozzle at the end of the coiled hose. The hose is typically stored under the bed.
Using the Spray Port
Connect the end of the blue coiled hose into the fitting on the Spray Port. It has a collar on the fitting which operates similar to an air hose fitting. Pull back the collar on the Spray Port fitting, insert the end of the hose into the collar and release. The hose locks into the fitting. With the water supply turned on, pull the trigger on the spray nozzle until you have the desire water flow. DO NOT USE THIS AS A POTABLE WATER SOURCE.
The water line supplying water to the sprayer must be drained if the RV is being transported, stored or if freezing weather is expect-ed. This water line can be winterized with RV antifreeze. Refer to Winterizing the Plumbing System for instructions on draining and winterizing the Spray Port.
[amalinkspro_table id=”32452″ new-window=”on” nofollow=”on” addtocart=”off” /]
Reference Links
View Full User Guide: Jayco Eagle Fifth Wheels 2023 User Manual
Download Manuals: https://www.jayco.com/manuals