Jayco White Hawk 2019 User Manual
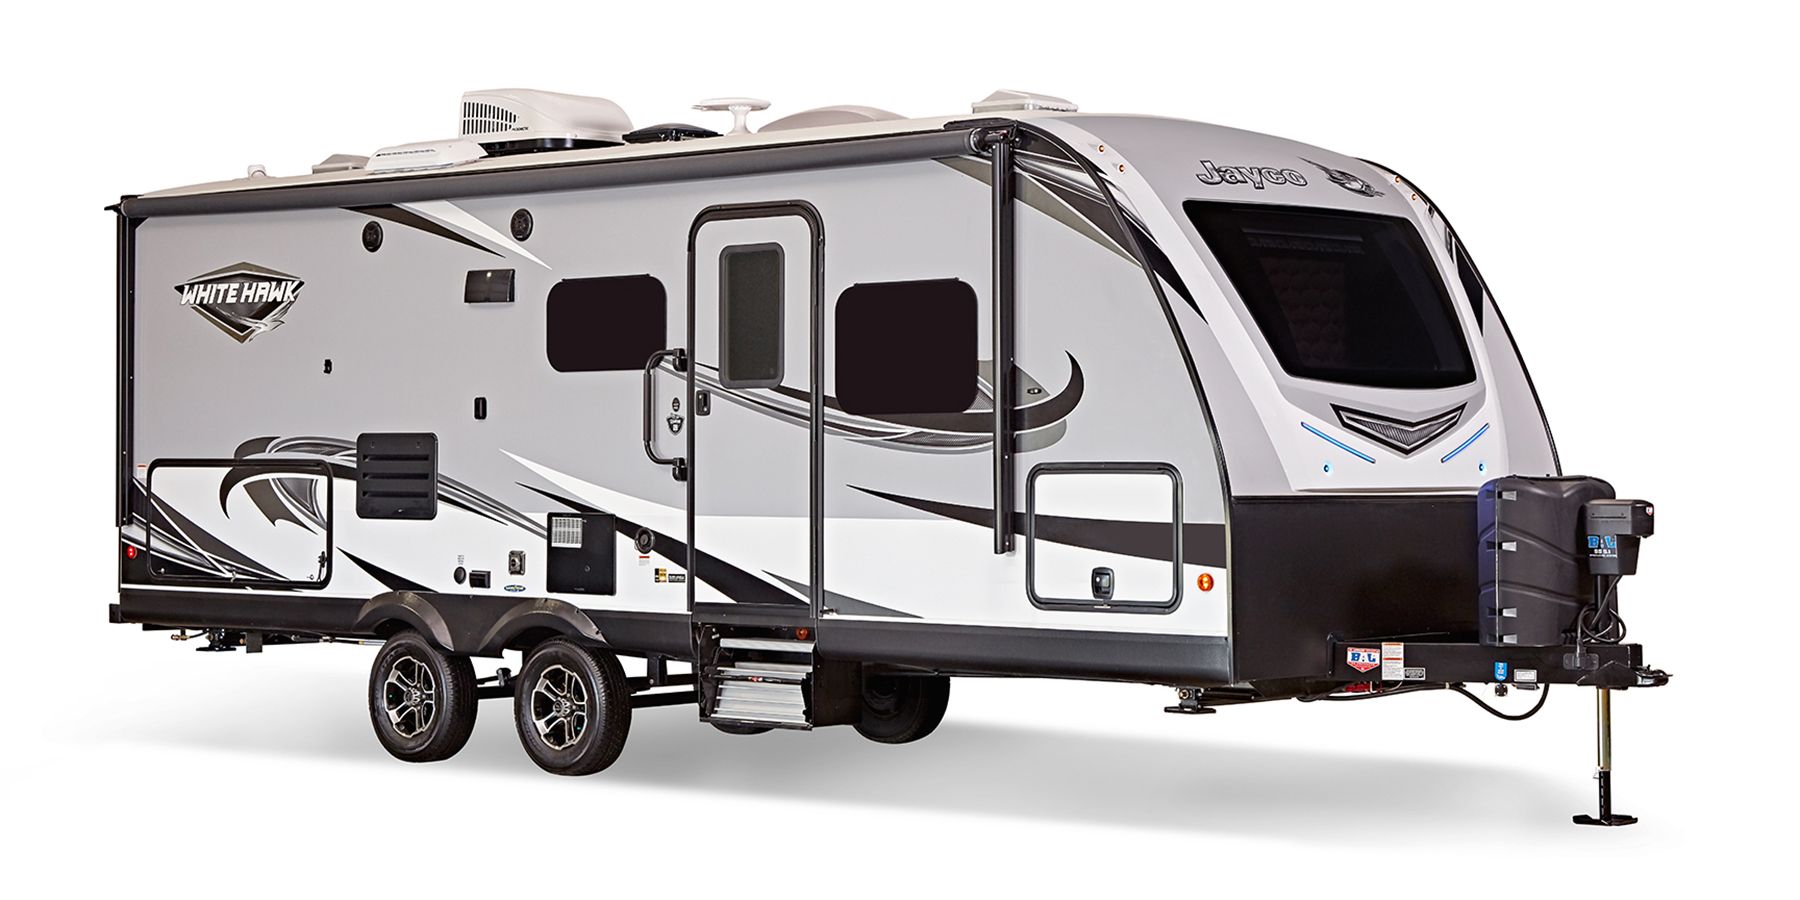
The 2019 Jayco White Hawk is a stylish, lightweight travel trailer that is the right mix of comfort, convenience, and high-quality construction. This RV is made for families and couples who want to go on adventures. It has a large, well-equipped cabin with smart layouts and thoughtful features. The White Hawk has a modern and comfortable sitting room where you can relax and have fun, and the fully-equipped kitchen makes it easy to make meals. The comfortable bed area is a great place to relax, and the bathroom has everything you need for your comfort. The White Hawk is easy to pull because it is made of light materials and is designed to be efficient. This makes it a great choice for people who want to save money on gas and move around easily. Whether you’re going on a weekend trip or a long road trip, the Jayco White Hawk 2019 is a comfy and reliable travel trailer that lets you enjoy the beauty of nature while making memories that will last a lifetime.
Travel Trailer Hitching Procedure
The following procedure will help to assist you in securely hooking up your recreation vehicle to your tow vehicle.
- Make sure the trailer wheels are blocked.
- Turn the tongue jack crank to raise the travel trailer tongue above the hitch ball.
- Open the coupler latch on the travel trailer hitch.
- Back the tow vehicle into the proper position.
- Turn the tongue jack crank to lower the coupler onto the hitch ball.
- Close the coupler latch after it is completely seated.
- Install the (customer-supplied) weight distributing bars (equalizers) as directed by the OEM.
- Remove the dolly wheel or platform and retract the tongue jack to its maximum height.
- Attach the breakaway switch cable to the tow vehicle.
- Attach the safety chains.
- Plug in your wire harness/connector plug from the tow vehicle to the travel trailer.
- Walk around the RV to verify exterior lights are working correctly.
- Remove the trailer wheel blocks.
NOTE: If an Atwood brake actuator is used with an equalizing hitch, be sure the hanger chains hang straight down and forward up to 34°. Do not use less than 6-1/2” hanger chain length. For optimum brake performance, hang chains forward 34°. Refer to the manufacturer’s owner’s manual for more information.
Travel Trailer Weight Distributing System (customer supplied)
This system provides a more stable tow vehicle/RV combination as it will spread the weight evenly to distribute it to the tow vehicle’s front and rear axles and the trailer axle. Consult with your dealer for information on the requirements and operation of this system. Be certain your tow vehicle can carry the hitch weight.
Travel Trailer Sway Control (customer supplied)
Sway control devices are available to reduce the sway produced by crosswinds, air displacement caused by other vehicles passing you in transit, incorrect weight distribution, excessive speed, the RV tires dropping onto the shoulder of the road, etc. The use of sway control will help to control the side-to-side movement and keep sway in check. Consult your dealer for additional information.
Suggestions for sway situations:
- Slowly ease your foot off the accelerator.
- Turn the steering wheel as little as possible. Natural lag time reaction when counter-steering to correct sway could possibly make it worse.
- If the trailer is equipped with electric brakes, using hand control will help to keep the vehicles aligned.
- As soon as possible, stop to determine the cause of the sway. Check all equipment and load distribution. If the problem cannot be solved immediately, contact your dealer for a service appointment. Reduce your speed until the issue is resolved.
WARNING:
A sway control device (customer supplied) should be used with your tow vehicle/travel trailer combination. Consult with your Dealer to obtain the proper equipment for your needs.
Travel Trailer Safety Chains
Your RV is equipped with chains to meet SAE standard requirements for maximum gross trailer weight. Always have the safety chains attached when towing. Install them as shown below so they do not restrict sharp turns, but tight enough so they do not drag on the ground. Crisscross the left safety chain under the coupler and attach to the right mounting slot in the trailer hitch; repeat with the right safety chain. Slack for each length should be the same but not more than necessary to permit the vehicle to turn at its minimum radius, but tight enough not to drag on the ground.
Weighing Your Tow Vehicle and RV
When the RV is fully loaded it should be weighed. The actual weight of the vehicle, all options, liquids, the hitch weight, and your personal cargo is important for you to know so you do not exceed the GVWR. Two important factors when loading your RV are total weight and balance.
It is imperative that you verify compliance within all applicable weight ratings. Overloading your RV will void the Towable Limited Warranty and the warranties of many component part manufacturers.
Periodically weigh your RV at a public scale to determine proper load distribution. To obtain the side-to-side weights, there needs to be enough space on either side of the scale to accommodate the RV being partially off the scale. Keep in mind that individual scales will operate differently.
WARNING:
- Total weight of your tow vehicle and RV must not exceed the GCWR. Do not assume that you can tow an RV that happens to be within the capacity of the tow vehicle hitch. By doing so, you may exceed the total GCWR of your tow vehicle and RV towing combination.
- It is important to redistribute the load to avoid component failure as well as to improve the handling characteristics of the vehicle and not void the Towable Limited Warranty.
Electric Brakes
The electric brakes are designed to work with the tow vehicle brakes. To maintain proper braking performance, both the RV and tow vehicle brakes must be used together. Separate use of the braking systems will cause accelerated wear and damage. When your RV is new, it is impossible to adjust the brake shoes precisely. It takes approximately 1,000 miles and/or 50 medium to heavy stops to “burnish” fit or “seat” the shoes to the brake drum. After the initial break-in period, your brake shoes must be adjusted accurately for best performance and increased durability.
Braking system components include:
- Tow vehicle battery
- Brake controller
- Wire harness/connector plug
- Trailer battery
- Breakaway switch
The tow vehicle battery is the primary source of power for your RV’s electric brake operation. To ensure available power when needed, keep your tow vehicle battery and charging system working properly.
Brake Controller (customer supplied)
The brake controller should be installed in the tow vehicle to work in conjunction with the RV electric brakes. Consult with your dealer or the brake controller OEM to decide what is right for your towing combination.
Travel Trailer Breakaway Switch
The breakaway switch is a crucial part of the RV braking system. Located on the travel trailer A-frame (or beside the fifth wheel pinbox), this switch will apply the trailer brakes if the trailer becomes detached from the tow vehicle. Attach the breakaway switch lanyard to a permanent part of the tow vehicle (on a travel trailer do not attach it to the hitch ball or similar removable parts) when hitching the trailer. If the RV becomes detached from the tow vehicle, the pull pin will be pulled from the switch. This automatically causes the switch to “close” and activates the RV brakes. A battery (customer supplied) must be installed to activate the breakaway switch.
Hydraulic Brakes (if so equipped)
Your RV may be equipped with hydraulic surge brakes that operate automatically as the tow vehicle’s brakes are applied. When speed is decreased and brakes are applied, the weight of the trailer moving forward creates a reaction, which causes the brake fluid inside the wheel cylinder to activate the brake shoes against the drum.As a result of this design, backing the RV uphill may activate the surge brake system making it difficult to continue in reverse.
To aid in backing up the RV:
- Prior to backing up a slope or through soft ground, pull the recreation vehicle forward slightly to assure that the actuator socket is in the forward position.
- Move the lever on the side of the actuator downward from the “towing position” along the curved slot in the actuator frame to the “backup position.” The slot has a notch at the bottom of its travel. Push the lever down to engage the locking notch.
- The RV will now be back up. This lever will slide into the correct position when pulling forward.
Reference Link
Download Manuals: https://www.jayco.com/manuals/