| Distance Detection area | Distance between vehicle and obstruction | Beeper sound*1 |
| Front corner ultrasonic sensor/Rear corner, Rear side ultrasonic sensor | ||
| Far distance | Approx. 55.0―38.0 cm (21.6―14.9 in)  |
Medium intermittent sound |
| Middle distance | Approx. 38.0―25 cm (14.9―9.8 in)  |
Fast intermittent sound |
| Distance Detection area | Distance between vehicle and obstruction | Beeper sound*1 |
| Front corner ultrasonic sensor/Rear corner, Rear side ultrasonic sensor | ||
| Close distance | Within approx. 25 cm (9.8 in)  |
Continuous sound |
- If an obstruction in the same area excluding the close area is detected continuously for 6 seconds or longer, only the warning beeps stop activating. (Detection is indicated) If the detection area changes to the close side, the warning beeps resumes. (If the detection area changes to the far side, the warning beeps remain off)
- The sound volume (each of front and rear) can be changed. Refer to the Settings section in the Mazda Connect Owner’s Manual.
| Indicator/Beep | How to check |
| A message indicating a system malfunction or sensor malfunction is displayed. | There may be a problem with the system. Have your vehicle inspected by an Authorized Mazda Dealer as soon as possible. |
| A message indicating that the sensor is dirty is displayed. | Remove any foreign matter from the sensor area. If the system does not recover, have the vehicle inspected by an Authorized Mazda Dealer. |
| A certain obstruction detection indication is continuously displayed. | Foreign matter may have gotten on the sensor area corresponding to the detection indicator. If the system does not recover, have the vehicle inspected by an Authorized Mazda Dealer. |
FAQs
Simply push the “Cruise” button on the steering wheel to start the cruise control. Once it’s on, you can choose the pace you want.
To set your preferred speed after the cruise control is turned on, use the “Set” button on the steering wheel. After that, the car will keep moving at that pace on its own.
Using the cruise control while adjusting the set speed is possible. You can adjust the speed in tiny steps by pressing the “Set +” or “Set -” buttons on the steering wheel.
The Mazda Radar Cruise Control (MRCC) with Stop & Go feature, which makes use of radar and video sensors to adjust to traffic conditions and keep a safe distance from the vehicle in front, is present on the 2020 Mazda3.
The Mazda3’s speed is automatically adjusted by the MRCC system to maintain a safe following distance once it senses the distance to the car in front. The Mazda3 will slow down or stop completely if the car in front of it does so. It will then continue moving once the road is clear.
By depressing the “Cancel” button on the steering wheel or by slamming on the brakes, you can turn off the cruise control at any time.
The 2020 Mazda3’s cruise control system does, in fact, provide a “Resume” option. Pressing the “Resume” button will allow you to restore the pre-set speed after disabling the cruise control or applying the brakes.
Using the accelerator or brake pedal will allow you to momentarily change the vehicle’s speed without disabling the cruise control. The Mazda3 will resume moving at the predetermined speed once the pedals are released.
The 2020 Mazda3’s cruise control system is functional at speeds more than 25 mph (40 km/h) and up to the top speed of the car.
The Mazda3 cruise control system does have safety features, including the ability to automatically modify speed to maintain a safe following distance and the adaptive capabilities of MRCC.
In the Mazda3, you can change the adaptive cruise control’s following distance setting. You may often choose from a variety of distance settings to get the ideal space between your car and the one in front.
Even after you turn off the motor, the Mazda3’s cruise control system will remember the previous speed you set. When you restart the car, it won’t be operational, thus if you want to use it again, you’ll have to activate it again.
Useful Links
View Full User: 2020 Mazda3 User Manual | Auto User Guide
Download Link: Owner’s – Manuals, Guides, Maintenance Schedules | Mazda USA
 2020 Mazda3 Cruise Control User Manual
Introduction
The 2020 Mazda3 is a well-liked compact car that is renowned for its chic styling, agile handling, and cutting-edge technology. The Mazda3’s cruise control system, which was created to increase comfort and convenience on long rides, is one of its notable features. The 2020 Mazda3’s cruise control technology enables users to select a preferred speed for the car, which the system will then maintain automatically. This feature makes highway driving much easier because it frees the driver from frequent speed monitoring and adjustment. To improve the use and adaptability of the cruise control system, Mazda has incorporated smart technology. In order to maintain a safe following distance, the Mazda3 uses radar and video sensors to measure the distance to the car in front. Mazda Radar Cruise Control (MRCC) with Stop & Go capabilities is the name of this adaptive cruise control feature.
The Mazda3’s cruise control technology not only keeps the vehicle moving at a predetermined speed, but it can also lessen driver fatigue by automatically changing the speed to keep up with traffic. The Mazda3 will accelerate less if the car in front of it slows down, and once the road is free, it will resume its pre-set speed.
Cruise Control
Cruise Control
With cruise control, you can set and automatically maintain any speed of more than about 30 km/h (19 mph).
WARNING
Do not use the cruise control under the following conditions:
Using the cruise control under the following conditions is dangerous and could result in loss of vehicle control.
- Hilly terrain Steep inclines Heavy or unsteady traffic Slippery or winding roads Similar restrictions that require inconsistent speed The vehicle speed may exceed the set speed during sudden acceleration or on steep down slopes. In this case, depress the brake pedal to adjust the vehicle speed.
Cruise Control Switch
- CANCEL switch
- RES switch
- Cruise switch
NOTE
If your Mazda has the following steering switch, your Mazda is equipped with the Mazda Radar Cruise Control (MRCC) system, the Mazda Radar Cruise Control with Stop & Go function (MRCC with Stop & Go function) system. Refer to Mazda Radar Cruise Control (MRCC)
Refer to Mazda Radar Cruise Control with Stop & Go function (MRCC with Stop & Go function) on page 4-139. If the Mazda Radar Cruise Control (MRCC) or Mazda Radar Cruise Control with Stop & Go function (MRCC with Stop & Go function) is set to inoperable using the personalization feature, the system switches to the cruise control function. In this case, the MRCC functions as the cruise switch. In addition, this personalization feature setting is initialized by switching the ignition OFF, and it turns back on when the ignition is switched ON the next time
Cruise Standby Indication
(White)/Cruise Set Indication (Green)
Cruise standby Indication (White)
The indication turns on (white) when the cruise control system is activated. Cruise Set Indication (Green)
The indication turns on (green) when a cruising speed has been set. Activation/Deactivation
WARNING
Always turn off the cruise control system when it is not in use: Leaving the cruise control system in an activation-ready state while the cruise control is not in use is dangerous as the cruise control could unexpectedly activate if the activation button is accidentally pressed, and result in loss of vehicle control and an accident. If the headway control function is disabled using a Mazda Connect setting, the system switches to cruise control.
Activation
To activate the system, press the cruise switch. The cruise standby indication (white) turns on.
Deactivation
To deactivate the system, press the cruise switch again. The cruise standby indication (white) turns off.
To Set Speed
- Activate the cruise control system by pressing the cruise switch. The cruise standby indication (white) turns on.
- Accelerate to the desired speed, which must be more than 25 km/h (16 mph).
- Adjust the system to the desired vehicle speed using the accelerator pedal. Press the RES switch up (SET+) or down (SET-) to start cruise control. The cruise control indication (green) in the instrument cluster turns on at the same time. Quickly release the switch when the cruise control indication (green) turns on.
NOTE
- If the RES switch is operated up (SET+) or down (SET-) while the vehicle speed is between 25 and 30 km/h (16 to 19 mph), the set speed is set to 30 km/h (19 mph). The cruise control speed setting cannot be performed under the following conditions: Any of the doors is opened. The driver’s seat belt is unfastened. The brake pedal is depressed.
- The parking brake is applied.
- (Automatic transmission) The selector lever is in the P, N, or R position. (Manual transmission) The shift lever is in the neutral position.
- On a steep grade, the vehicle may momentarily slow down while ascending or speed up while descending.
- The cruise control will cancel if the vehicle speed decreases below 20 km/h (12 mph) when the cruise control is activated, such as when climbing a steep grade.
The vehicle speed preset using the cruise control is displayed in the instrument cluster and the active driving display (vehicles with active driving display).
Instrument cluster (Basic display) Instrument cluster (i-ACTIVSENSE display)
 Active driving display
 Changing the Set Vehicle Speed
Follow either of these procedures
To increase/decrease speed using cruise control switch
When the RES switch is pressed up (SET+), the vehicle accelerates and when the RES switch is pressed down (SET-), it decelerates. Press and release immediately: 1 km/h (1 mph) Press and hold: 10 km/h (5 mph)
NOTE
Even after releasing the RES switch, the cruise control accelerates/decelerates continuously until the set speed displayed in the instrument cluster and on the active driving display is reached. If you want to stop accelerating/decelerating, change the set speed or cancel the system (such as by depressing the brake pedal).
To increase speed using accelerator pedal
Depress the accelerator pedal and press the RES switch up (SET+) or down (SET-) at the desired speed. If the switch is not operated, the system returns to the set speed after you release your foot from the accelerator pedal.
NOTE
Accelerate if you want to speed up temporarily when the cruise control is on. Greater speed will not interfere with or change the set speed. Take your foot off the accelerator to return to the set speed. To Resume Cruising Speed at More Than 30 km/h (19 mph) If the cruise control system is temporarily canceled (such as by applying the brake pedal) and the system is still activated, the most recent set speed will automatically resume when the RES switch is pressed. If vehicle speed is below 30 km/h (19 mph), increase the vehicle speed up to 30 km/h (19 mph) or more and press the RES switch.
To Temporarily Cancel
To temporarily cancel the system, use one of these methods:
- Slightly depress the brake pedal. Press the CANCEL switch.
- (Manual transmission) Depress the clutch pedal.
If the RES switch is pressed when the vehicle speed is 30 km/h (19 mph) or higher, the system reverts to the previously set speed.
NOTE
- If any of the following conditions occur, the cruise control system is temporarily canceled. Even when the brake pedal is slightly depressed. The DSC is operating. There is a problem in the system. Any of the doors is opened. The driver’s seat belt is unfastened. The parking brake is applied. (Automatic transmission) The selector lever is in the P, N, or R position.
- (Manual transmission)
The shift lever is in the neutral position. - When the cruise control system is temporarily canceled by even one of the applicable cancel conditions, the speed cannot be re-set.
- (Automatic transmission)
- The cruise control cannot be canceled while driving in manual mode (selector lever shifted from D to M position). Therefore, engine braking will not be applied even if the transmission is shifted down to a lower gear. If deceleration is required, lower the set speed or depress the brake pedal.
To Deactivate
Press the cruise switch again.
Tire Pressure Monitoring System (TPMS)
Tire Pressure Monitoring System (TPMS)
The TPMS monitors the air pressure of each tire and if it decreases below the specified value, the system notifies the driver by turning on the TPMS warning light in the instrument cluster and indicating a message on the multi-information display. For the TPMS, the air pressure data sent from the tire pressure sensors installed on each wheel via radio signal is received by the receiver unit in the vehicle to monitor the tire pressures. Tire pressure sensors In addition, the current tire pressures can be checked using the center display. Refer to the Vehicle Status Monitor section in the Mazda Connect Owner’s Manual.
NOTE
- When the ambient temperature is low, the tire temperatures also decrease. If the tire temperatures decrease, the air pressure in the tires will also decrease which could turn on the TPMS warning light.
- Before driving, visually inspect the tires for abnormalities. Additionally, inspect the tire pressures monthly. A digital type air pressure gauge is recommended for inspecting the tire pressures.
The TPMS is not a substitute for your own periodic inspection of the tires. Always inspect the tires yourself periodically.
CAUTION
- Each tire, including the spare (if provided), should be checked monthly when cold and inflated to the inflation pressure recommended by the vehicle manufacturer on the vehicle placard or tire inflation pressure label. (If your vehicle has tires of a different size than the size indicated on the vehicle placard or tire inflation pressure label, you should determine the proper tire inflation pressure for those tires.) As an added safety feature, your vehicle has been equipped with a tire pressure monitoring system (TPMS) that illuminates a low tire pressure telltale when one or more of your tires is significantly under-inflated. Accordingly, when the low tire pressure telltale illuminates, you should stop and check your tires as soon as possible, and inflate them to the proper pressure. Driving on a significantly under-inflated tire causes the tire to overheat and can lead to tire failure. Under-inflation also reduces fuel efficiency and tire tread life, and may affect the vehicle’s handling and stopping ability.
- Please note that the TPMS is not a substitute for proper tire maintenance, and it is the driver’s responsibility to maintain correct tire pressure, even if under-inflation has not reached the level to trigger illumination of the TPMS low tire pressure telltale. Your vehicle has also been equipped with a TPMS malfunction indicator to indicate when the system is not operating properly. The TPMS malfunction indicator is combined with the low tire pressure telltale. When the system detects a malfunction, the telltale will flash for approximately one minute and then remain continuously illuminated. This sequence will continue upon subsequent vehicle start-ups as long as the malfunction exists. When the malfunction indicator is illuminated, the system may not be able to detect or signal low tire pressure as intended. TPMS malfunctions may occur for a variety of reasons, including the installation of replacement or alternate tires or wheels on the vehicle that prevent the TPMS from functioning properly. Always check the TPMS malfunction telltale after replacing one or more tires or wheels on your vehicle to ensure that the replacement or alternate tires and wheels allow the TPMS to continue to function properly.
- To avoid false readings, the system samples for a little while before indicating a problem. As a result it will not instantaneously register a rapid tire deflation or blow out.
If there is a problem with the Tire Pressure Monitoring System (TPMS)
If the TPMS warning light flashes, there may be a problem with the system. Consult an Authorized Mazda Dealer to have the system inspected. Refer to Tire Pressure Monitoring System (TPMS) Warning Indication/Warning Light (Flashing) In the following cases, the system cannot recognize the tire pressures correctly and the TPMS warning light may flash.
- There is equipment or a device nearby emitting radio signals the same as a tire pressure sensor. A metallic object such as a non-genuine electronic device is installed near the center of the dashboard (obstructs the radio signals from the tire pressure sensors to the receiver). A device such as one of the following is used in the cabin. Electronic devices such as a computer. Converter devices such as a DC-AC converter. There is a large accumulation of snow or ice around the vehicle tires. The battery in a tire pressure sensor is dead. A wheel not equipped with a tire pressure sensor is used. Tires employing steel in the sidewall of the tire are installed. Tire chains are used.
When a tire pressure decreases
If the TPMS warning light turns on, a tire pressure may be low. Inspect the tire pressures and adjust them to the correct inflation pressure. Refer to Tire Pressure Monitoring System (TPMS) Warning Indication/Warning Light (Turns on)
Tires and Wheels
CAUTION
When inspecting/adjusting the tire pressures, do not apply excessive force to the air valve of the tire pressure sensor. Otherwise, the tire pressure sensor could be damaged. When changing tires and wheels When changing the tires or wheels (such as installing winter tires), it will be necessary to register the ID signal code of the tire pressure sensor to the TPMS. Have an Authorized Mazda Dealer do the registration or register the ID signal codes of the tire pressure sensors using the following procedure.
NOTE
The tire pressure sensors on each wheel have a unique ID signal code. For the TPMS to operate correctly, the ID signal codes of the tire pressure sensors need to be registered to the system.
- Wait more than 19 minutes after changing a tire or wheel.
- After more than 19 minutes have passed, drive the vehicle at a speed of about 25 km/h (16 mph) or faster for 3 minutes or longer. While driving, the ID signal codes of the tire pressure sensors are automatically registered.
NOTE
If you drive the vehicle within 19 minutes of changing a tire or wheel, the TPMS warning light will flash because the ID signal codes for the tire pressure sensors were not registered. In this case, stop the vehicle and register the ID signal codes of the tire pressure sensors following the procedure. When replacing tires and wheels.
CAUTION
When replacing the tires and wheels, consult an Authorized Mazda Dealer Otherwise, the tire pressure sensors could be damaged when replacing them. Do not install non-genuine wheels. If wheels other than genuine ones are installed, it may not be possible to install the tire pressure sensors. When replacing a tire or wheel, always install the tire pressure sensor. The following combinations of tires, wheels, or tires and wheels are possible.
- The tire pressure sensor from the old wheel is removed and it is installed to the new wheel. Only a tire is replaced without replacing the tire pressure sensor and wheel. A new tire pressure sensor is installed to a new wheel.
NOTE
When installing a new tire pressure sensor, the ID signal code for the tire pressure sensor needs to be registered. For details on purchasing a tire pressure sensor and registering the ID signal of the tire pressure sensor, consult an Authorized Mazda Dealer.
Rear View Monitor
The rear view monitor provides visual images of the rear of the vehicle when reversing.
WARNING
Always drive carefully confirming the safety of the rear and the surrounding conditions by looking directly with your eyes:
Reversing the vehicle by only looking at the screen is dangerous as it may cause an accident or a collision with an object. The rear view monitor is only a visual assist device when reversing the vehicle. The images on the screen may be different from the actual conditions.
CAUTION
Do not use the rear view monitor under the following conditions: Using the rear view monitor under the following conditions is dangerous and could result in injury or vehicle damage or both.
- Icy or snow-covered roads.
- Tire chains or a temporary spare tire is installed.
- The vehicle is on a road incline.
- Bumpy roads.
- When the display is cold, images may course across the monitor or the screen and may be dimmer than usual, which could cause difficulty in confirming the surrounding conditions of the vehicle. Always drive carefully confirming the safety of the rear and the surrounding conditions by looking directly with your eyes.
- Do not apply excessive force to the camera. The camera position and angle may deviate.
- Do not disassemble, modify, or remove it as it may no longer be waterproof.
- The camera cover is made of plastic. Do not apply degreasing agents, organic solvents, wax, or glass coating agents to the camera cover. If any are spilled on the cover, wipe off with a soft cloth immediately.
- Do not rub the camera cover forcefully with an abrasive or hard brush. The camera cover or lens may be scratched which might affect the images.
- If a camera lens is severely damaged by flying gravel, have the camera replaced. For camera replacement, consult an Authorized Mazda Dealer.
NOTE
- If water, snow, or mud is stuck on the camera lens, wipe it off using a soft cloth. If it cannot be wiped off, use a mild detergent.
- If the camera temperature changes rapidly (Hot to cold, cold to hot), the rear view monitor may not operate correctly.
- When replacing the tires, consult an Authorized Mazda Dealer. Replacing the tires could result in deviation of the guide lines which appear on the display.
- If the vehicle’s front, side, or rear has been involved in a collision, the alignment of the rear view parking camera (location, installation angle) may have deviated. Always consult an Authorized Mazda Dealer to have the vehicle inspected.
- If “No camera signal.” is indicated in the display, there could be a problem with the camera. Have your vehicle inspected at an Authorized Mazda Dealer.
- (Predicted vehicle path assist lines display type) If force is applied to the steering wheel, the guide lines may not display. Loosen your grip on the steering wheel to allow the guide lines to display.
Rear View Parking Camera Location 4–Door
- Rear view parking camera

- Rear view parking camera
Switching to the Rear View Monitor Display
Shift the shift lever (manual transmission) or the selector lever (automatic transmission) to reverse (R) position with the ignition switched ON to switch the display to the rear view monitor display.
NOTE
When the shift lever (manual transmission) or the selector lever (automatic transmission) is shifted from reverse (R) position to another shift lever (manual transmission) or the selector lever (automatic transmission) position, the screen returns to the previous display.
Displayable Range on the Screen
The images on the screen may be different from the actual conditions.
- (Screen display)
- (Actual view)
- Bumper
- “Check surroundings for safety.” message is displayed
- Object
NOTE
- The displayable range varies depending on the vehicle and road conditions.
- If the camera lens is touched or there is any dirt on it, it could affect the screen image. Wipe the lens using a soft cloth.
- The displayable range is limited. Objects under the bumper or around the bumper ends cannot be displayed.
- The distance appearing in the displayed image is different from the actual distance because the rear view parking camera is equipped with a specific lens.
- Images displayed on the monitor from the rear view parking camera are reversed images (mirror images).
- Some optionally installed vehicle accessories may be picked up by the camera. Do not install any optional parts that can interfere with the camera view, such as illuminating parts or parts made of reflective material.
- It may be difficult to see the display under the following conditions, however, it does not indicate a malfunction.
- In darkened areas.
- When the temperature around the lens is high/low.
- When the camera is wet such as on a rainy day or during periods of high humidity.
- When foreign material such as mud is stuck around the camera.
- When the camera lens reflects sunlight or headlight beams.
- The surroundings are illuminated by vehicle lights, fluorescent lights, or LED lights (display may flicker).
- Extremely small dark or white dots appear on the screen (dots may flicker).
- An object is close to a camera.
- Image display may be delayed if the temperature around the camera is low.
Viewing the Display
Predicted vehicle path assist lines display type The projected path guidance mode displays the predicted path of the vehicle after you turn the steering wheel. Use this mode for parking your vehicle in a parking space or garage.
- Projected vehicle path (yellow) These lines are displayed as a reference for the projected path of the vehicle. The lines displaying the projected vehicle path change after you turn the steering wheel.
- Extended vehicle width lines (blue) These lines indicate the vehicle’s extended width. These lines are not displayed when the vehicle’s wheels are in the straight-ahead position.
- Distance guide lines (red)
- These lines indicate the approximate distance to a point measured from the vehicle’s rear (from the end of the bumper). The blue line indicates the point about 0.5 m (19 in) from the rear bumper. The red and yellow lines, which change position after you turn the steering wheel, indicate the points about 0.5 m (19 in) for the red line and 1.0 m (39 in) and 2.0 m (78 in) for the yellow lines from the rear bumper (at the center point of each of the lines). A degree of error occurs when the wheels are not in the straight-ahead position. In the above illustration, the right side of the vehicle is in a position closer to the actual distance displayed by the distance guide lines (red: about 0.5 m (19 in) point, yellow: about 1.0 m (39 in), and yellow: about 2.0 m (78 in) point behind the rear bumper), whereas the left side is in a position farther away.
CAUTION
The indicated position of the guide lines on the display changes depending on the vehicle conditions (such as the number of occupants/cargo load) and the road conditions (such as a steep gradient to the rear of the vehicle). Always check the area to the vehicle’s rear and the surrounding area directly with your eyes while backing up. Fixed assist lines display type Guide lines which indicate the width of the vehicle are displayed on the screen as a reference to the approximate width of the vehicle in comparison to the width of the parking space you are about to back into. Use this display view for parking your vehicle in a parking space or garage.
- Vehicle width guide lines Guide lines serve as a reference to the approximate width of the vehicle.
- Distance guide lines These guide lines indicate the approximate distance to a point measured from the vehicle’s rear (from the end of the bumper). The red line indicates the point about 0.5 m (19 in) from the rear bumper.
- The yellow lines indicate the points about 1.0 m (39 in) and 2.0 m (78 in) from the rear bumper.
CAUTION
The guide lines on the screen are fixed lines. They are not synced to the driver’s turning of the steering wheel. Always be careful and check the area to the vehicle’s rear and the surrounding area directly with your eyes while backing up.
Rear View Monitor Operation
The operation of the rear view monitor when reversing the vehicle varies depending on the traffic, road, and vehicle conditions. The amount of steering and the timing also varies depending on conditions, so confirm the surrounding conditions directly with your eyes and steer the vehicle in accordance with the conditions. Be well aware of the above cautions prior to using the rear view monitor. Predicted vehicle path assist lines display type.
NOTE
The following shows an example of vehicle parking in which the steering wheel is turned to the right when backing up the vehicle. The operation is reversed when backing up the vehicle from the opposite direction.
- Shift the shift lever (manual transmission) or the selector lever (automatic transmission) to reverse (R) position to switch the display to the rear view monitor display.
- Before backing the vehicle into the parking space, turn the steering wheel while referring to the projected vehicle path display so that the vehicle enters the center of the parking space.

- (Display condition)
- (Vehicle condition)
- Continue to adjust the steering wheel until the vehicle width guide lines are parallel to the left and right sides of the parking space.
- Once they are parallel, straighten the wheels and back your vehicle slowly into the parking space. Continue checking the vehicle’s surroundings and then stop the vehicle in the best possible position. (If the parking space has division lines, check whether the vehicle width guide lines are parallel to them.)

- (Display condition)
- (Vehicle condition)
- When the shift lever (manual transmission) or the selector lever (automatic transmission) is shifted from reverse (R) position to another shift lever (manual transmission) or the selector lever (automatic transmission) position, the screen returns to the previous display.
NOTE
Because there may be a difference between the displayed image, such as indicated below, and the actual conditions when parking, always verify the safety at the rear of the vehicle and the surrounding area directly with your eyes.
- In the image of the parking space (or garage) displayed on the screen, the back end and distance guide lines may appear aligned in the monitor, but they may not actually be aligned on the ground. When parking in a space with a division line on only one side of the parking space, the division line and the vehicle width guide line appear aligned in the monitor, but they may not actually be aligned on the ground.
 Fixed assist lines display type
- NOTE
Images displayed on the monitor from the rear view parking camera are reversed images (mirror images).
- Shift the shift lever (manual transmission) or the selector lever (automatic transmission) to reverse (R) position to switch the display to the rear view monitor display.
- Confirming the surrounding conditions, reverse the vehicle.
- After your vehicle begins entering the parking space, continue backing up slowly so that the distance between the vehicle width lines and the sides of the parking space on the left and right are roughly equal.

- (Display condition)
- (Vehicle condition)
- Continue to adjust the steering wheel until the vehicle width guide lines are parallel to the left and right sides of the parking space.
- Once they are parallel, straighten the wheels and back your vehicle slowly into the parking space. Continue checking the vehicle’s surroundings and then stop the vehicle in the best possible position. (If the parking space has division lines, check whether the vehicle width guide lines are parallel to them.)

- (Display condition)
- (Vehicle condition)
- When the shift lever (manual transmission) or the selector lever (automatic transmission) is shifted from reverse (R) position to another shift lever (manual transmission) or the selector lever (automatic transmission) position, the screen returns to the previous display.
NOTE
Because there may be a difference between the displayed image, such as indicated below, and the actual conditions when parking, always verify the safety at the rear of the vehicle and the surrounding area directly with your eyes.
- In the image of the parking space (or garage) displayed on the screen, the back end and distance guide lines may appear aligned in the monitor, but they may not actually be aligned on the ground.
- When parking in a space with a division line on only one side of the parking space, the division line and the vehicle width guide line appear aligned in the monitor, but they may not actually be aligned on the ground.Variance Between Actual Road Conditions and Displayed Image
- Some variance occurs between the actual road and the displayed road. Such variance in distance perspective could lead to an accident. Note the following conditions that may cause a variance in distance perspective. When the vehicle is tilted due to the weight of passengers and load When the vehicle rear is lowered, the object displayed on the screen appears farther than the actual distance.

- Object
- Variance
- Object on screen
When there is a steep grade behind the vehicle
When there is a steep upgrade (downgrade) behind the vehicle, the object displayed on the screen appears farther (downgrade: closer) than the actual distance.
- Appears farther than actual distance
- Appears closer than actual distance
- Distance between the vehicle and object displayed on the screen.
- Actual distance between the vehicle and object.
- Object at actual position
- Object on screen
Three-dimensional object on vehicle rear
Because the distance guide lines are displayed based on a flat surface, the distance to the three-dimensional object displayed on the screen is different from the actual distance.
- (Screen display)
- (Actual condition)
- Sensed distance on screen A>B>C
- Actual distance B>C=A
(Predicted vehicle path assist lines display type)
When reversing near a three-dimensional object When reversing near an overhanging object, the vehicle may hit the object even if the anticipated course line does not contact the object on the screen. The position of the object displayed on the screen is different from the actual position because the anticipated course lines on the screen are displayed based on a horizontal road surface. When backing up near an overhanging object, confirm the rear and surrounding conditions directly with your eyes.
- (Screen display)
- (Actual view)
Parking Sensor System
The parking sensors use ultrasonic sensors which detect obstructions around the vehicle when the vehicle is driven at low speeds, such as during garage or parallel parking, and a buzzer sound and detection indicator notify the driver of the approximate distance from the vehicle to the surrounding obstruction.
- Front ultrasonic sensor*
- Front corner ultrasonic sensor*
- Rear ultrasonic sensor
- Rear corner ultrasonic sensor
- Rear side ultrasonic sensor*
WARNING
Do not rely completely on the parking sensor system and be sure to confirm the safety around your vehicle visually when driving: This system can assist the driver in operating the vehicle in the forward and backward directions while parking. The detection ranges of the sensors are limited, therefore, driving the vehicle while relying only on the system may cause an accident. Always confirm the safety around your vehicle visually when driving.
CAUTION
- Do not install any accessories within the detection ranges of the sensors. It may affect the system operation.
- Depending on the type of obstruction and the surrounding conditions, the detection range of a sensor may narrow, or the sensors may not be able to detect obstructions.
- When washing the vehicle, do not spray highly pressurized water against the sensor area, or rub it strongly. Otherwise, it may not be able to detect obstructions correctly and the system may not operate normally.
NOTE
- When the ignition is switched OFF, the system status before it was turned off is maintained. For example, if the ignition is switched OFF while the parking sensor is activated, the system will be activated when the ignition is switched ON the next time.
- The system may not operate normally under the following conditions:
- Mud, ice, or snow is adhering to the sensor area (Returns to normal operation when removed).
- The sensor area is frozen (Returns to normal operation when the ice is thawed).
- The sensor is covered by a hand.
- The sensor is excessively shocked.
- The vehicle is excessively tilted.
- Under extremely hot or cold weather conditions.
- The vehicle is driven on bumps, inclines, gravel, grating, or grass-covered roads.
- Anything which generates ultrasonic waves such as another vehicle’s horn, the engine sound of a motorcycle, the air brake sound of a large-sized vehicle, or another vehicle’s sensors approaches the vehicle.
- The vehicle is driven in heavy rain or in road conditions causing water splash.
- A commercially-available fender pole or an antenna for a radio transmitter is installed to the vehicle.
- The vehicle is moving towards a tall or square curbstone or a steep grade.
- An obstruction is too close to the sensor.
- The vehicle is moving towards an uneven wall or stairs.
- There are multiple obstructions.
- The vehicle is driven in a place with low ceilings.
- Obstructions under the bumper cannot be detected. Obstructions that are lower than the sensor or thin may not be detected even though they were detected once.
- The following types of obstructions may not be detected:
- Thin objects such as wire, rope or poles
- Things that absorb sonic waves easily such as cotton or snow
- Angular shaped objects
- Very tall objects, and those which are wide at the top
- Small, short objects
- Always have the system inspected at an Authorized Mazda Dealer if any shock is applied to the bumpers, even in a minor accident. If the sensors are deviated, they cannot detect obstructions.
- The system may malfunction if a sound is not activated or the detection indication is not displayed even when the parking sensor OFF switch is pressed and the parking sensor is operable. Have your vehicle inspected by an Authorized Mazda Dealer.
- The system may malfunction if the indicator light does not turn on even when the parking sensor OFF switch is turned on. Have your vehicle inspected by an Authorized Mazda Dealer.
- The system may malfunction if a message indicating a system malfunction is displayed. Have your vehicle inspected by an Authorized Mazda Dealer.
- A message may be displayed even when the ambient temperature is extremely cold, or mud, ice, or snow adheres to the sensor area. Remove any foreign matter from the sensor area.
- When installing a trailer hitch, consult an Authorized Mazda Dealer.
- A message may be displayed even when the ambient temperature is extremely cold, or mud, ice, or snow adheres to the sensor area. Remove any foreign matter from the sensor area.
Sensor Detection Range
The sensors detect obstructions within the following range.
- Front ultrasonic sensor detection range
- Rear corner/Rear side ultrasonic sensor detection range
- Rear ultrasonic sensor detection range
- Front corner ultrasonic sensor detection range
- About 55.0 cm (About 21.6 in)
- About 150 cm (About 59.0 in)
- About 100 cm (About 39.3 in)
Viewing distance display
| Display | Distance between vehicle and obstruction | |||
| Without 360° view monitor | With 360° view monitor | Front ultrasonic sensor*/Front corner ultrasonic sensor* | Rear ultrasonic sensor/Rear corner ultrasonic sensor/ Rear side ultrasonic sensor* | |
| Without front ultrasonic sensor and front corner ultrasonic sensor | With front ultra- sonic sensor and front corner ultra- sonic sensor | |||
 |
 |
 Green Green |
Front ultrasonic sensor: Approx. 100―60.0 cm (39.3―23.6 in) | Rear ultrasonic sensor: Approx. 150―60.0 cm (59.0―23.6 in) |
|
|
Yellow |
Front ultrasonic sensor: Approx. 60.0―45.0 cm (23.6―17.7 in) Front corner ultra- sonic sensor: Approx. 55.0―38.0 cm (21.6―14.9 in) | Rear ultrasonic sensor: Approx. 60.0―45.0 cm (23.6―17.7 in) Rear corner ultra- sonic sensor/Rear side ultrasonic sensor: Approx. 55.0―38.0 cm (21.6―14.9 in) |
|
|
Amber |
Front ultrasonic sensor: Approx. 45.0―35.0 cm (17.7―13.7 in) Front corner ultra- sonic sensor: Approx. 38.0―25 cm (14.9―9.8 in) | Rear ultrasonic sensor: Approx. 45.0―35.0 cm (17.7―13.7 in) Rear corner ultra- sonic sensor/Rear side ultrasonic sensor: Approx. 38.0―25 cm (14.9―9.8 in) |
| Display | Distance between vehicle and obstruction | |||
| Without 360° view monitor | With 360° view monitor | Front ultrasonic sensor*/Front corner ultrasonic sensor* | Rear ultrasonic sensor/Rear corner ultrasonic sensor/ Rear side ultrasonic sensor* | |
| Without front ultrasonic sensor and front corner ultrasonic sensor | With front ultra- sonic sensor and front corner ultra- sonic sensor | |||
 |
|
Red |
Front ultrasonic sensor: Within approx. 35.0 cm (13.7 in) Front corner ultra- sonic sensor: Within approx. 25 cm (9.8 in) | Rear ultrasonic sensor: Within approx. 35.0 cm (13.7 in) Rear corner ultra- sonic sensor/Rear side ultrasonic sensor: Within approx. 25 cm (9.8 in) |
Parking Sensor OFF Switch
When the switch is pressed, the parking sensor is stopped and the indicator light turns on. If the switch is pressed again, the parking sensor becomes operational and the indicator light turns off.
- Indicator light
NOTE
- (Automatic vehicle)
The detection indicator and buzzer of the front ultrasonic sensors/front corner ultrasonic sensors do not operate when the selector lever is in the P position. - The detection indicator and buzzer sound do not activate when the parking brake is applied.
Obstruction Detection Indication
The position of a sensor which has detected an obstruction is indicated. The gauge illuminates in different areas depending on the distance to an obstruction detected by the sensor. As the vehicle approaches closer to an obstruction, the zone in the gauge closer to the vehicle illuminates. Without 360°view monitor.
- Front ultrasonic sensor gauge
- Right front corner ultrasonic sensor gauge*
- Right rear corner ultrasonic sensor gauge/Right rear side ultrasonic sensor gauge
- Rear ultrasonic sensor gauge
- Left rear corner ultrasonic sensor gauge/Left rear side ultrasonic sensor gauge*
- Left front corner ultrasonic sensor gauge
With 360°view monitor
- Front ultrasonic sensor gauge
- Right front corner ultrasonic sensor gauge
- Right rear corner ultrasonic sensor gauge/Right rear side ultrasonic sensor gauge*
- Rear ultrasonic sensor gauge
- Left rear corner ultrasonic sensor gauge/Left rear side ultrasonic sensor gauge*
- Left front corner ultrasonic sensor gauge
NOTE
The detection indicator can be switched between display and non-display and the buzzer volume can be changed. Refer to the Settings section in the Mazda Connect Owner’s Manual. (Vehicles with 360° View Monitor) When the detection indicator is set to “Display”, even with the 360° view monitor not displayed, if a front sensor or a front corner sensor detects an obstruction, the 360° view monitor switches automatically to display. When an obstruction is no longer detected, the display switches to the display before the obstruction was detected. However, while the 360°view monitor is displayed, it continues to display no matter if an obstruction is detected or not.
System problem notification
The indication displays if the system has a malfunction.
Without 360°view monitor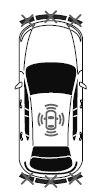 With 360°view monitor Check the reason for the indication displaying on the center display or multi-information display. Refer to If a Warning Light Turns On or Flashes.
Parking Sensor Warning Beep
Informs the driver of the approximate distance from the vehicle to the obstruction using warning beeps depending on the distance. If multiple obstructions are detected at the same time, warning beeps are activated according to the distance to the nearest obstruction. The warning beeps are activated as follows while the system is operating. However, the warning beeps are not activated while the seat belt reminder is operating. Front ultrasonic sensor*, Rear ultrasonic sensor
| Distance Detection area | Distance between vehicle and obstruction | Beeper sound*1 | |
| Front ultrasonic sensor | Rear ultrasonic sensor | ||
| Farthest distance | Approx. 100―60.0 cm (39.3―23.6 in)
|
Approx. 150―60.0 cm (59.0―23.6 in)
|
Slow intermittent sound |
| Far distance |  Approx. 60.0―45.0 cm (23.6―17.7 in) Approx. 60.0―45.0 cm (23.6―17.7 in) |
 Approx. 60.0―45.0 cm (23.6―17.7 in) Approx. 60.0―45.0 cm (23.6―17.7 in) |
Medium intermit- tent sound |
| Middle distance |  Approx. 45.0―35.0 cm (17.7―13.7 in) Approx. 45.0―35.0 cm (17.7―13.7 in) |
 Approx. 45.0―35.0 cm (17.7―13.7 in) Approx. 45.0―35.0 cm (17.7―13.7 in) |
Fast intermittent sound |


| Distance Detection area | Distance between vehicle and obstruction | Beeper sound*1 |
| Front corner ultrasonic sensor/Rear corner, Rear side ultrasonic sensor | ||
| Far distance | Approx. 55.0―38.0 cm (21.6―14.9 in) |
Medium intermittent sound |
| Middle distance | Approx. 38.0―25 cm (14.9―9.8 in) |
Fast intermittent sound |
| Distance Detection area | Distance between vehicle and obstruction | Beeper sound*1 |
| Front corner ultrasonic sensor/Rear corner, Rear side ultrasonic sensor | ||
| Close distance | Within approx. 25 cm (9.8 in) |
Continuous sound |
- If an obstruction in the same area excluding the close area is detected continuously for 6 seconds or longer, only the warning beeps stop activating. (Detection is indicated) If the detection area changes to the close side, the warning beeps resumes. (If the detection area changes to the far side, the warning beeps remain off)
- The sound volume (each of front and rear) can be changed. Refer to the Settings section in the Mazda Connect Owner’s Manual.
| Indicator/Beep | How to check |
| A message indicating a system malfunction or sensor malfunction is displayed. | There may be a problem with the system. Have your vehicle inspected by an Authorized Mazda Dealer as soon as possible. |
| A message indicating that the sensor is dirty is displayed. | Remove any foreign matter from the sensor area. If the system does not recover, have the vehicle inspected by an Authorized Mazda Dealer. |
| A certain obstruction detection indication is continuously displayed. | Foreign matter may have gotten on the sensor area corresponding to the detection indicator. If the system does not recover, have the vehicle inspected by an Authorized Mazda Dealer. |
FAQs
Simply push the “Cruise” button on the steering wheel to start the cruise control. Once it’s on, you can choose the pace you want.
To set your preferred speed after the cruise control is turned on, use the “Set” button on the steering wheel. After that, the car will keep moving at that pace on its own.
Using the cruise control while adjusting the set speed is possible. You can adjust the speed in tiny steps by pressing the “Set +” or “Set -” buttons on the steering wheel.
The Mazda Radar Cruise Control (MRCC) with Stop & Go feature, which makes use of radar and video sensors to adjust to traffic conditions and keep a safe distance from the vehicle in front, is present on the 2020 Mazda3.
The Mazda3’s speed is automatically adjusted by the MRCC system to maintain a safe following distance once it senses the distance to the car in front. The Mazda3 will slow down or stop completely if the car in front of it does so. It will then continue moving once the road is clear.
By depressing the “Cancel” button on the steering wheel or by slamming on the brakes, you can turn off the cruise control at any time.
The 2020 Mazda3’s cruise control system does, in fact, provide a “Resume” option. Pressing the “Resume” button will allow you to restore the pre-set speed after disabling the cruise control or applying the brakes.
Using the accelerator or brake pedal will allow you to momentarily change the vehicle’s speed without disabling the cruise control. The Mazda3 will resume moving at the predetermined speed once the pedals are released.
The 2020 Mazda3’s cruise control system is functional at speeds more than 25 mph (40 km/h) and up to the top speed of the car.
The Mazda3 cruise control system does have safety features, including the ability to automatically modify speed to maintain a safe following distance and the adaptive capabilities of MRCC.
In the Mazda3, you can change the adaptive cruise control’s following distance setting. You may often choose from a variety of distance settings to get the ideal space between your car and the one in front.
Even after you turn off the motor, the Mazda3’s cruise control system will remember the previous speed you set. When you restart the car, it won’t be operational, thus if you want to use it again, you’ll have to activate it again.
Useful Links
View Full User: 2020 Mazda3 User Manual | Auto User Guide
Download Link: Owner’s – Manuals, Guides, Maintenance Schedules | Mazda USA