Nissan Leaf 2019
The Nissan Leaf 2019 was introduced as the second generation of Nissan’s all-electric vehicle. It represented a significant step forward in terms of design, technology, and driving range compared to its predecessor. Here are some key features and highlights of the Nissan Leaf 2019:
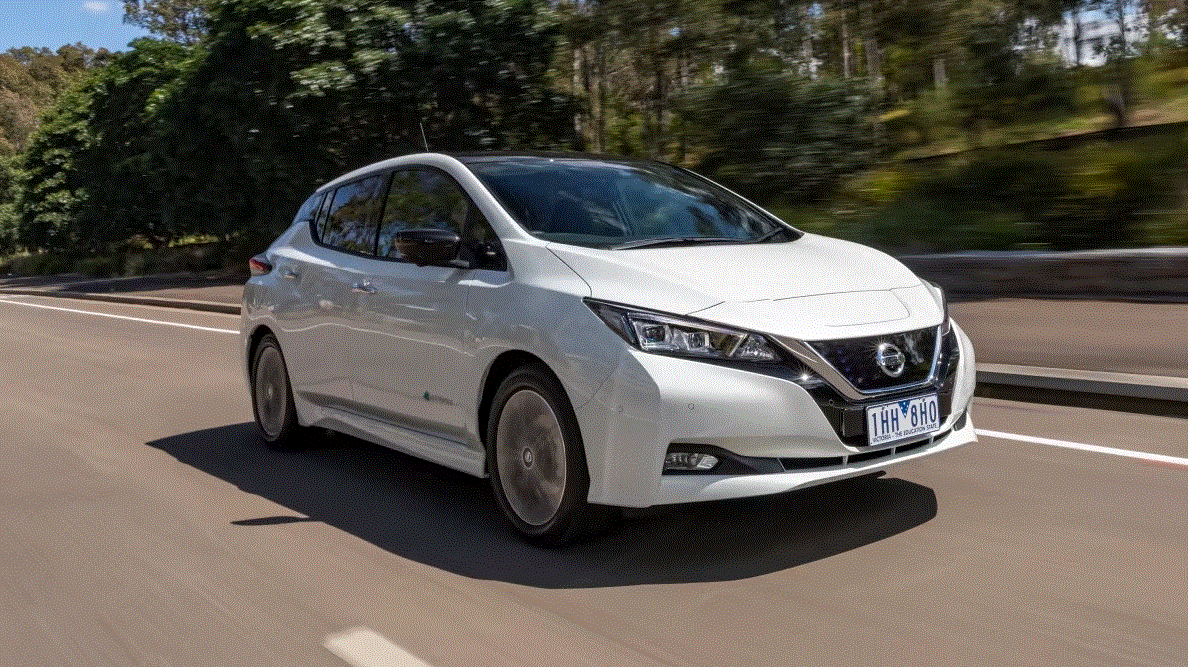
- Design: The Leaf 2019 featured a modern and aerodynamic design, with a sleek profile and distinctive Nissan styling cues. It had a streamlined front end, boomerang-shaped headlights, and a floating roof design. The overall look was both stylish and efficient.
- Electric Powertrain: The Leaf 2019 was powered by an all-electric powertrain, eliminating the need for gasoline. It featured a 40 kWh lithium-ion battery pack and an electric motor that produced 147 horsepower and 236 lb-ft of torque. The electric drivetrain offered smooth and instant acceleration, providing a responsive driving experience.
- Extended Driving Range: One of the significant improvements in the Leaf 2019 was its driving range. It offered an estimated range of up to 150 miles (241 kilometers), allowing for longer trips without the need for frequent recharging. The extended range made the Leaf 2019 more practical and suitable for daily commuting and longer journeys.
- ProPILOT Assist: The Leaf 2019 introduced Nissan’s ProPILOT Assist technology, which provided advanced driver assistance features. This included adaptive cruise control, lane-keeping assistance, and automatic emergency braking. ProPILOT Assist helped reduce driver fatigue and improve overall safety.
- e-Pedal Technology: The Leaf 2019 introduced e-Pedal technology, which enhanced the driving experience. With e-Pedal, the driver could accelerate, decelerate, and even come to a complete stop by using only the accelerator pedal. This regenerative braking system helped maximize energy efficiency and made driving more intuitive.
- Technology and Connectivity: The Leaf 2019 incorporated various technology features to enhance convenience and connectivity. It featured a 7-inch touchscreen infotainment system with Apple CarPlay and Android Auto compatibility. The system allowed access to navigation, smartphone integration, and other vehicle settings.
- Charging Options: The Leaf 2019 supported both Level 2 charging and DC fast charging. With Level 2 charging, the vehicle could be fully charged overnight using a standard home charging station. DC fast charging enabled quick charging at public charging stations, allowing for shorter charging times.
These are some of the key features and highlights of the Nissan Leaf 2019 model. For more specific details and to explore the available trim levels and options, I recommend visiting Nissan’s official website or contacting a Nissan dealership for the most accurate and comprehensive information.
REARVIEW MONITOR
(IF SO EQUIPPED)
- 1. CAMERA button (if so equipped)
WARNING Failure to follow the warnings and instructions for proper use of the Rear-View Monitor system could result in serious injury or death.- RearView Monitor is a convenience feature and is not a substitute for proper backing. Always turn and look out the windows and check mirrors to be sure that it is safe to move before operating the vehicle. Always back up slowly.
- The system is designed as an aid to the driver in showing large stationary objects directly behind the vehicle, to help avoid damaging the vehicle.
- The distance guide line and the vehicle width line should be used as a reference only when the vehicle is on a level paved surface. The distance viewed on the monitor is for reference only and may be different than the actual distance between the vehicle and displayed objects.
CAUTION Do not scratch the camera lens when cleaning dirt or snow from the front of the camera.
The RearView Monitor system automatically shows a rear view of the vehicle when the shift lever is shifted into the R (Reverse) position. The radio can still be heard while the RearView Monitor is active.
To display the rearview, the RearView Moni-tor system uses a camera located just above the vehicle’s license plate 1.
REARVIEW MONITOR SYSTEM OPERATION
With the EV (electric vehicle) system on and in “READY to Drive”, move the shift lever to the R (Reverse) position to operate the RearView Monitor.
HOW TO READ THE DISPLAYED LINES
Guiding lines which indicate the vehicle width and distances to objects with refer-
ence to the vehicle body line A are displayed on the monitor.
Distance guidelines
Indicate distances from the vehicle body.
- Red line 1: approx. 1.5 ft (0.5 m)
- Yellow line 2: approx. 3 ft (1 m )
- Green line 3: approx. 7 ft (2 m)
Vehicle width guidelines 4
Indicate the vehicle width when backing up.
The width of the vehicle width guide line is wider than the actual width.
Predictive course lines (if so equipped) 5
Indicate the predicted course when backing up. The predictive course lines will be displayed on the monitor when the shift lever is in the R (Reverse) position and the steering wheel is turned. The predictive course lines will move depending on how much the steering wheel is turned and will not be displayed while the steering wheel is in the straight-ahead position.
The vehicle width guide lines and the width of the predictive course lines are wider than the actual width and course.
DIFFERENCE BETWEEN PREDICTED AND ACTUAL DISTANCES
The displayed guidelines and their locations on the ground are for approximate reference only. Objects on uphill or downhill surfaces or projecting objects will be actually located at distances different from those displayed in the monitor relative to the guidelines (refer to illustrations). When in doubt, turn around and view the objects as you are backing up, or park and exit the vehicle to view the positioning of objects behind the vehicle.
Backing up on a steep uphill
When backing up the vehicle up a hill, the distance guide lines and the vehicle width guide lines are shown closer than the actual distance. Note that any object on the hill is further than it appears on the monitor.
Backing up on a steep downhill
When backing up the vehicle down a hill, the distance guide lines and the vehicle width guide lines are shown farther than the actual distance. Note that any object on the hill is closer than it appears on the monitor.
Backing up near a projecting object
The predictive course lines (if so equipped)
A do not touch the object in the display. However, the vehicle may hit the object if it projects over the actual backing-up course.
Backing up behind a projecting object
Position C is shown farther than position B in the display. However, position C is actually at the same distance as position A . The vehicle may hit the object when backing up to position A if the object projects over the actual backing-up course.
HOW TO PARK WITH PREDICTIVE COURSE LINES (IF SO EQUIPPED)
WARNING
- If the tires are replaced with different-sized tires, the predictive course lines may be displayed incorrectly.
- On a snow-covered or slippery road, there may be a difference between the predictive course line and the actual course line.
- If the battery is disconnected or becomes discharged, the predictive course lines may be displayed incorrectly. If this occurs, please perform the following procedures:
- Turn the steering wheel from lock to lock while the EV (electric vehicle) system is running.
- Drive the vehicle on a straight road for more than 5 minutes.
- When the steering wheel is turned with the power switch in the ACC position, the predictive course lines may be displayed incorrectly.
- Visually check that the parking space is safe before parking your vehicle.
- The rear view of the vehicle is displayed on screen A when the shift lever is moved to the R (Reverse) position.
- Slowly back up the vehicle adjusting the steering wheel so that the predictive course lines B enter parking space C.
- Maneuver the steering wheel to make the vehicle width guide lines D parallel to the parking space C while referring to the predictive course lines.
- When the vehicle is parked in the space completely, move the shift lever to the P (Park) position and apply the parking brake.
ADJUSTING THE SCREEN (MODELS WITH 40 KWH BATTERY)
Models without Navigation System
- While on a RearView Monitor screen, press the ENTER/SETTING button until the Brightness or Contrast setting bar is displayed on the RearView Monitor screen.
- Turn the TUNE/SCROLL knob to adjust the level.
- To complete the adjustment, press the ENTER/SETTING button until the Bright-ness or Contrast setting bar disappears from the RearView Monitor screen.
NOTE:
Do not adjust any of the display settings of the RearView Monitor while the vehicle is moving. Make sure the parking brake is firmly applied
Models with Navigation System
- While on a RearView Monitor screen, touch the touch-screen display. Touch the “Display Settings” key to bring up the Display Settings screen.
- Touch the “Brightness,” “Contrast,” “Tint,” “Color,” or “Black Level” key.
- Adjust the item by touching the “+” or “-” key on the touch-screen display.
NOTE:
Do not adjust any of the display settings of the RearView Monitor while the vehicle is moving. Make sure the parking brake is firmly applied
ADJUSTING THE SCREEN
(MODELS WITH 62 KWH BATTERY)
- Push the MENU button.
- Touch the ”Settings” key.
- Touch the “Camera” key.
- Touch the “Display Settings” key.
- Touch the “Brightness”, “Contrast”, “Tint”, “Color”, or “Black Level” key.
- Adjust the item by touching the “+” or “-” key on the touch-screen display.
NOTE:
Do not adjust any of the display settings of the RearView Monitor while the vehicle is moving. Make sure the parking brake is firmly applied
HOW TO TURN ON AND OFF PREDICTIVE COURSE LINES (FOR MODELS WITH 40 KWH BATTERY)
To toggle ON and OFF the predictive course lines while in the P (Park) position:
- Touch the “Settings” key.
- Touch the “Camera” key.
- Touch the “Predictive Course Lines” key to turn the feature ON or OFF.
To toggle ON and OFF the predictive course lines while in the R (Reverse) position:
- Touch the touch-screen display.
- Touch the “Predictive Course Lines” key to turn the feature ON or OFF.
HOW TO TURN ON AND OFF PREDICTIVE COURSE LINES (FOR MODELS WITH 62 KWH BATTERY)
To toggle ON and OFF the predictive course lines while in the P (Park) position:
- Touch the “Settings” key.
- Touch the “Camera” key.
- Touch the “Predictive Course Lines” key to turn the feature ON or OFF.
REARVIEW MONITOR SYSTEM LIMITATIONS
WARNING Listed below are the system limitations for the RearView Monitor. Failure to operate the vehicle in accordance with these system limitations could result in serious injury or death.
- The system cannot completely eliminate blind spots and may not show every object.
- Underneath the bumper and the corner areas of the bumper cannot be viewed on the RearView Monitor because of its monitoring range limitation. The system will not show small objects below the bumper, and may not show objects close to the bumper or on the ground.
2024 Nissan Leaf Specs, Price, Features, Mileage (Brochure)
-
Reference Link
Download Manuals: https://www.nissanusa.com/owners/ownership/manuals-guides.html