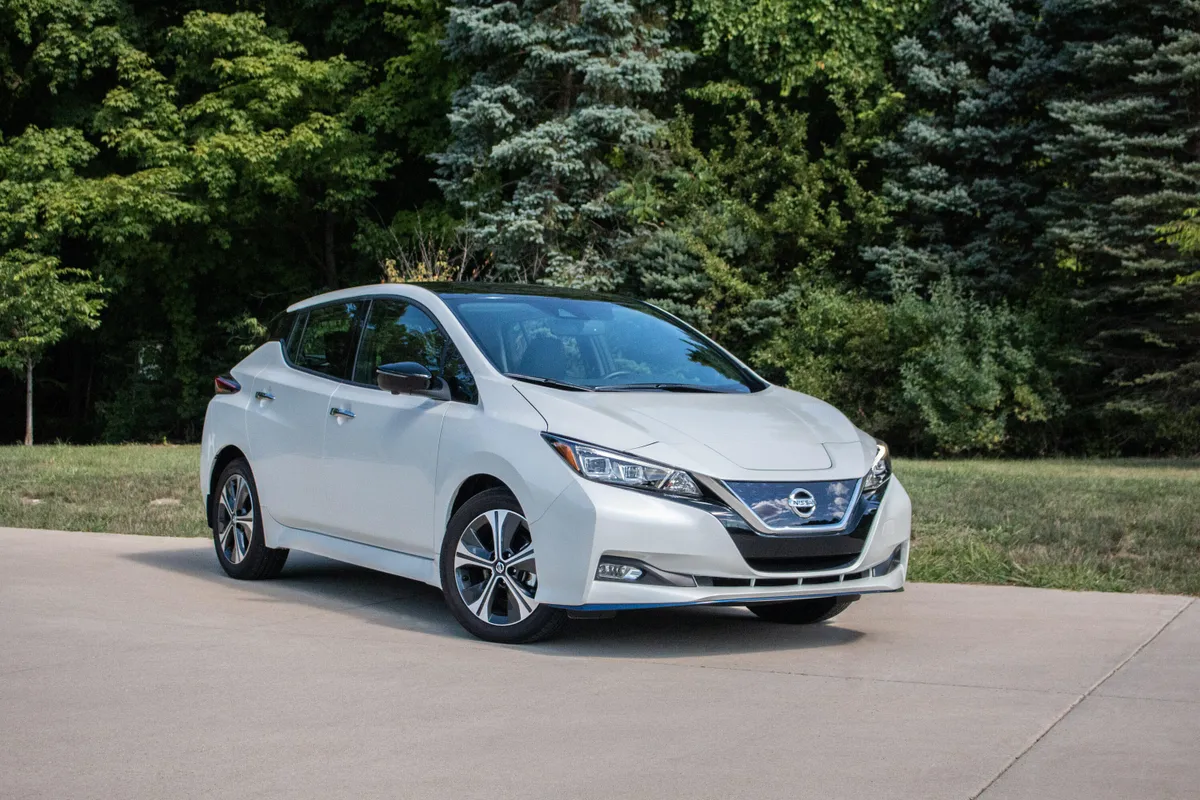
Nissan Leaf 2020
The Nissan Leaf 2020 builds upon the success of its predecessors as an all-electric vehicle that offers an eco-friendly driving experience. It comes with several enhancements in terms of technology, performance, and range. Here are some key features and highlights of the Nissan Leaf 2020:
- Design: The Leaf 2020 maintains a sleek and aerodynamic design, with a modern and distinctive look. It features Nissan’s signature V-motion grille, boomerang-shaped headlights, and a floating roof design. The overall design promotes efficient airflow and reduces drag.
- Electric Powertrain: The Leaf 2020 is powered by an all-electric powertrain, delivering instant torque and smooth acceleration. It features a 40 kWh or an available larger 62 kWh lithium-ion battery pack, providing improved driving range compared to previous models. The electric motor produces 147 horsepower and offers responsive performance.
- Extended Driving Range: With the larger 62 kWh battery option, the Leaf 2020 offers an estimated range of up to 226 miles (363 kilometers), allowing for longer trips and reducing range anxiety. The extended range makes the Leaf 2020 more practical for everyday use and road trips.
- ProPILOT Assist: The Leaf 2020 incorporates Nissan’s ProPILOT Assist technology, offering advanced driver assistance features. This includes adaptive cruise control, lane-keeping assistance, and automatic emergency braking. ProPILOT Assist helps enhance safety and reduce driver fatigue during highway driving.
- e-Pedal Technology: The Leaf 2020 continues to feature e-Pedal technology, allowing drivers to accelerate, decelerate, and come to a complete stop using only the accelerator pedal. This regenerative braking system helps maximize energy efficiency and makes driving more intuitive.
- Technology and Connectivity: The Leaf 2020 offers a range of technology features for convenience and connectivity. It includes a touchscreen infotainment system with available Apple CarPlay and Android Auto integration. Other features may include a navigation system, voice recognition, and access to various vehicle settings.
- Charging Options: The Leaf 2020 supports Level 2 charging and also offers an available quick-charging capability with DC fast charging. Level 2 charging can be done at home using a standard charging station, while DC fast charging allows for faster charging times at public charging stations.
These are some of the key features and highlights of the Nissan Leaf 2020 model. For more specific details and to explore the available trim levels and options, I recommend visiting Nissan’s official website or contacting a Nissan dealership for the most accurate and comprehensive information.
SEATS
WARNING
- Do not ride in a moving vehicle when the seatback is reclined. This can be dangerous. The shoulder belt will not be against your body. In an accident, you could be thrown into it and receive neck or other serious injuries. You could also slide under the lap belt and receive serious internal injuries.
- For the most effective protection when the vehicle is in motion, the seat should be upright. Always sit well back and upright in the seat with both feet on the floor and adjust the seat properly. For additional information, refer to “Precautions on seat belt usage” in this section.
- After adjustment, gently rock in the seat to make sure it is securely locked.
- Do not leave children unattended inside the vehicle. They could unknowingly activate switches or controls or make the vehicle move. Unattended children could become involved in serious accidents.
- To help avoid risk of injury or death through the unintended operation of the vehicle and/or its systems, do not leave children, people who require the assistance of others or pets unattended in your vehicle. Additionally, the temperature inside a closed vehicle on a warm day can quickly become high enough to cause a significant risk of injury or death to people and pets.
- Do not adjust the driver’s seat while driving so full attention may be given to vehicle operation. The seat may move suddenly and could cause loss of control of the vehicle.
- The seatback should not be reclined any more than needed for comfort. Seat belts are most effective when the passenger sits well back and straight up in the seat. If the seatback is reclined, the risk of sliding under the lap belt and being injured is increased.
CAUTION
When adjusting the seat positions, be sure not to contact any moving parts to avoid possible injuries and/or damage.
FRONT MANUAL SEAT
ADJUSTMENT (for passenger’s seat and if so equipped for driver’s seat)
Your vehicle seats can be adjusted manually. For additional information about adjusting the seats, refer to the steps outlined in this section.
Forward and backward
Pull the bar up and hold it while sliding the seat forward or backward to the preferred position. Release the bar to lock the seat in position.
Reclining
To recline the seatback, pull the lever up and lean back. To bring the seatback forward, pull the lever up and lean your body forward. Release the lever to lock the seat back in position.
The reclining feature allows adjustment of the seatback for occupants of different sizes for added comfort and to help obtain proper seat belt fit. For additional information, refer to “Precautions on seat belt usage” in this section. Also, the seatback can be reclined to allow occupants to rest when the vehicle is stopped and the vehicle is in the P (Park) position.
Seat lifter (driver’s seat)
Pull up or push down the adjusting lever to adjust the seat height to the preferred position.
FRONT POWER SEAT ADJUSTMENT (if so equipped for driver’s seat)
Operating tips
- The power seat motor has an auto-reset overload protection circuit. If the motor stops during operation, wait 30 seconds then reactivate the switch.
- Do not operate the power seat switch for a long period of time when the system is not in the READY mode. This will discharge the battery.
Forward and backward
Moving the switch as shown will slide the seat forward or backward to the desired position.
Reclining
Move the recline switch as shown until the desired angle is obtained.
The reclining feature allows adjustment of the seatback for occupants of different sizes for added comfort and to help obtain proper seat belt fit. For additional information, refer to “Precautions on seat belt usage” in this section. Also, the seatback can be reclined to allow occupants to rest when the vehicle is stopped and the shift lever is in P (Park).
Seat lifter
Move the switch as shown to adjust the angle and height of the seat cushion.
Lumbar support
The lumbar support feature provides adjustable lower back support to the driver. Move the switch as shown to adjust the seat lumbar area.
REAR seat Folding
Before folding the rear seats
Secure the seat belts on the seat belt hooks located on the side wall. For additional information, refer to “Seat belt hook” in this section.
To fold down the seatback, pull the release knob.
To return the seatback to the seating position, lift up each seatback and push it to the upright position until it is latched.
WARNING
- Do not fold down the rear seats when occupants are in the rear seat area or any objects are on the rear seats.
- Never allow anyone to ride in the cargo area or on the rear seats when they are in the folded-down position. Use of these areas by passengers without proper restraints could result in serious injury or death in an accident or sudden stop.
- Properly secure all cargo with ropes or straps to help prevent it from sliding or shifting. Do not place cargo higher than the seatbacks. In a sudden stop or collision, unsecured cargo could cause personal injury.
- When returning the seatbacks to the upright position, be certain they are completely secured in the latched position. If they are not completely secured, passengers may be injured in an accident or sudden stop.
HEAD RESTRAINTS/HEADRESTS
WARNING
Head restraints/headrests supplement the other vehicle safety systems. They may provide additional protection against injury in certain rear-end collisions. Adjustable head restraints/headrests must be adjusted properly, as specified in this section. Check the adjustment after someone else uses the seat. Do not attach anything to the head restraint/headrest stalks or remove the head restraints/headrests. Do not use the seat if the head restraint/headrest has been removed. If the head restraint/headrest was removed, reinstall and properly adjust the head restraint/headrest before an occupant uses the seating position. Failure to follow these instructions can reduce the effectiveness of the head restraint/headrest. This may increase the risk of serious injury or death in a collision.
The illustration shows the seating positions equipped with head restraints/headrests.
- Indicates the seating position is equipped with a head restraint.
- Indicates the seating position is equipped with a headrest.
+ Indicates the seating position is not equipped with a head restraint or headrest (if applicable). - Your vehicle is equipped with a head restraint/headrest that may be integrated, adjustable or non-adjustable.
- Adjustable head restraints/headrests have multiple notches along the stalks to lock them in a desired adjustment position.
- The non-adjustable head restraints/headrests have a single locking notch to secure them to the seat frame.
- Proper Adjustment:
- For the adjustable type, align the head restraint/headrest so the center of your ear is approximately level with the center of the head restraint/headrest.
- If your ear position is still higher than the recommended alignment, place the head restraint/headrest at the highest position.
- If the head restraint/headrest has been removed, ensure that it is reinstalled and locked in place before riding in that designated seating position.
ADJUSTABLE HEAD RESTRAINT/HEADREST COMPONENTS
- Removable head restraint/headrest
- Multiple notches
- Lock knob
- Stalks
NON-ADJUSTABLE HEAD RESTRAINT/HEADREST COMPONENTS
- Removable head restraint/headrest
- Single notch
- Lock knob
- Stalks
REMOVE
Use the following procedure to remove the head restraint/headrest.
- Pull the head restraint/headrest up to the highest position.
- Push and hold the lock knob.
- Remove the head restraint/headrest from the seat.
- Store the head restraint/headrest properly in a secure place so it is not loose in the vehicle.
- Reinstall and properly adjust the head restraint/headrest before an occupant uses the seating position.
INSTALL
- Align the head restraint/headrest stalks with the holes in the seat. Make sure the head restraint/headrest is facing the correct direction. The stalk with the notch (notches) 1O must be installed in the hole with the lock knob 2O.
- Push and hold the lock knob and push the head restraint/headrest down.
- Properly adjust the head restraint/headrest before an occupant uses the seating position.
ADJUST
For adjustable head restraint/headrest
Adjust the head restraint/headrest so the center is level with the center of your ears. If your ear position is still higher than the recommended alignment, place the head restraint/headrest at the highest position.
For non-adjustable head restraint/headrest
Make sure the head restraint/headrest is positioned so the lock knob is engaged in the notch before riding in that designated seating position.
2024 Nissan Leaf Specs, Price, Features, Mileage (Brochure)
-
Reference Link
Download Manuals: https://www.nissanusa.com/owners/ownership/manuals-guides.html


