![]()
2020 Renault Twizy Owner’s Manual
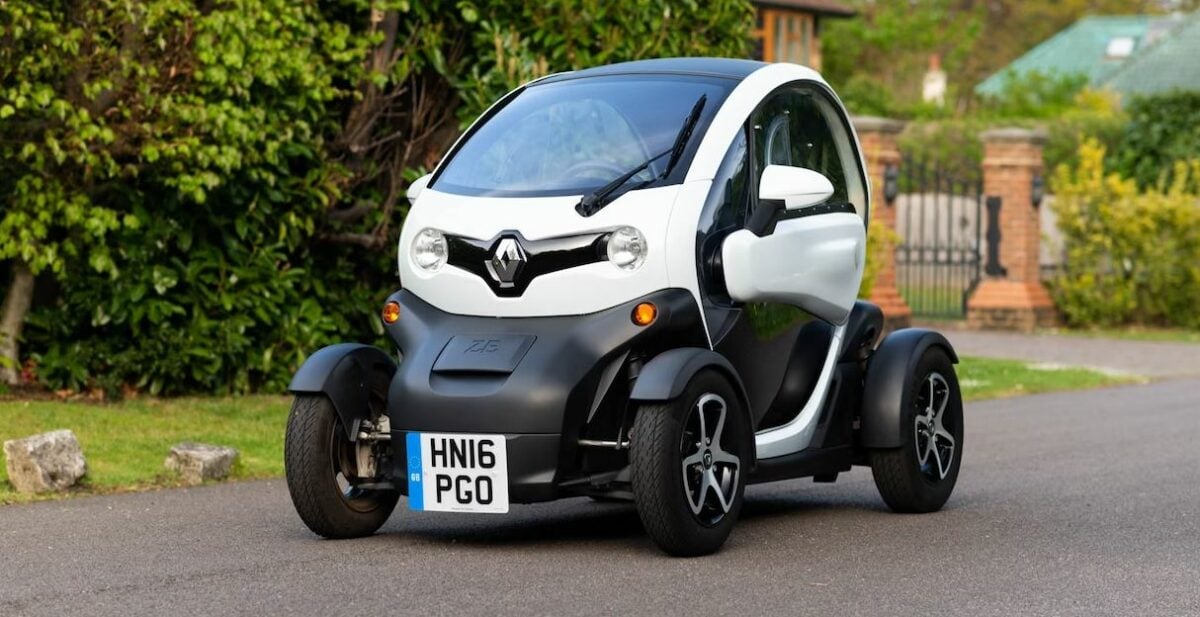
The 2020 Renault Twizy, designed with urban commuting demands and obstacles in mind, has become a unique and trailblazing figure in the tiny electric vehicle market. With its distinctive and futuristic look, this little, two-seater car caught attention for its practical yet understated approach to city transportation. Its all-electric drivetrain was designed with short-range mobility in mind, providing an environmentally responsible way to get around crowded metropolitan areas. Due to its modest size and open design, the Twizy was perfect for parking spaces and small city streets. It also lacked traditional doors. The 2020 Twizy, despite its compact size, did not skimp on safety, including the necessary equipment to guarantee the passengers’ well-being. The Twizy offered a fresh take on urban transportation with its focus on efficiency, simplicity, and environmental awareness.
DISPLAYS AND INDICATORS
The presence and operation of the display and indicators depend ON THE LEVEL OF EQUIPMENT AND THE COUNTRY.
Charge level 1
The gauge indicates the level of energy remaining.
NB: Each time you switch off the ignition, the remaining energy level will be calculated. Once you switch on the ignition again, you will see a slight change in the level display.
Reserve level
When the battery reaches approximately 12% charge, a warning light comes on, along with a beep. To optimise your range, please see the information on “Recommendations: saving energy” in Section 2.
Immobilisation threshold imminent
When the battery reaches less than 6% charge, a beep repeats every 20 seconds and a warning light Ṏ flashes on and off. Motor performance gradually decreases until the vehicle comes to a stop. Please see the information on “Towing: in the event of energy loss” in Section 5.
Charge meter 2
Please refer to the information on the “Charge meter” in Section 2.
Speedometer 3
In kilometres or miles per hour.
Display 4
Press and hold button 5 to reset the trip mileage recorder. The display must be set to “Trip mileage recorder”.
Zones 6 of the instrument panel dis-play the information detailed below by pressing button 5 repeatedly:
- estimated range;
- total mileage recorder;
- trip mileage recorder;
- Eco score;
- clock (CS : Clock setting).
Forecast range display features
- Sporty driving will strongly affect the forecast range value. Once you return to a calmer driving style, you will need to drive for several miles to return to an estimate that is closer to the real situation;
- the forecast range displayed after charging the traction battery is calculated based on the power consumption over the last 93 miles (150 kilo-metres) travelled.
Instrument panel in miles
It is possible to switch to km/h. Press button 5 and switch on the ignition. The speed measurement unit indicator flashes for approximately three seconds, then the new unit flashes on the display and is then lit up continuously: release button 5. To return to miles, proceed in the same manner.
CLOCK
With the ignition switched on, the clock is displayed on the instrument panel.
Adjusting the time on the instrument panel 1
- Press button 2 in quick succession, as many times as necessary, to obtain the time adjustment mode;
- Press and hold button 2. The hour reading flashes;
- repeatedly press button 2 as necessary to adjust the hour;
- Press and hold button 2 to confirm the hours. The minute display flashes;
- repeatedly press button 2 as necessary to adjust the minutes;
- Press and hold button 2 to confirm the minutes.
Horn
Press the end of stalk 1. Electric vehicles are particularly quiet. This system enables you to warn people of your presence – especially pedestrians and cyclists.
Headlight flasher
Pull stalk 1 towards you to flash the headlights.
Direction indicators
Move stalk 1 parallel to the steering wheel and in the direction you are going to turn it. When driving on the motorway, the steering wheel is not often turned enough to return the stalk automatically to 0. There is also an intermediate position in which the switch may be held when changing lanes. When the stalk is released, it automatically returns to 0.
Hazard warning lights
Press switch 2. This switch lights up all four indicators simultaneously. It must only be used in an emergency to warn drivers of other vehicles that you have had to stop in an area where stopping is prohibited or unexpected or that you are obliged to drive under special conditions.
Activating the system
With the engine running, turn centre
ring 1 on the stalk until the symbol ṫ faces mark 2.
Deactivating the system
Turn the centre ring 1 to position 0 again.
Daytime running lights
The dipped headlights come on without using the stalk A when the engine is started.
Side lights
Turn end 1 of stalk A until the symbol is opposite mark 2. The instrument panel lighting dims.
Dipped beam headlights
Manual operation Turn end 1 of stalk A until the symbol is opposite mark 2. With the ignition switched off, it is not possible to operate the lights (to avoid lights being used when parked).
Main beam headlights
With the stalk A in position k, pull it towards you. An indicator light on the instrument panel will come on. To return to the dipped headlights position, pull stalk A towards you again.
Switching off the lights
Return the stalk to its original position. When the engine is started, the dipped headlights stay on. They will go out once the engine is switched off.
When the vehicle is driven at maximum permissible load (refer to the information on «Weights» in section 6), you must have the dipped beam headlights adjusted, while it is being used, by an Approved Dealer.
Retroreflectors 3
Remember to check the condition of the side retroreflectors regularly. In the event of damage, please replace them.
Windscreen washer
With the ignition on, pull stalk 1 towards you. In the snow or ice, make sure that the wiper blades are not stuck by ice. Keep an eye on the condition of the blade. Replace the wiper blades as soon as they begin to lose efficiency: approximately once a year.
SCREEN WASHER, WIPER
Efficiency of a wiper blade
Check the condition of the wiper blades. How long they last depends on you:
- it must remain clean: clean the blade and the screen regularly with soapy water;
- do not use it when the screen is dry;
- free it from the screen when it has not been used for a long time.
Replace wiper blades as soon as their performance starts to diminish: Approximately every year (refer to the information on “Wiper blades” in section 5).
Precautions for using the wipers
- In freezing or snowy weather, clear the screen before starting the wipers (risk of motor over-heating);
- ensure that no objects are obstructing the travel of the blade.
Before any action involving the windscreen (washing the vehicle, de-icing, cleaning the windscreen, etc.) return stalk 1 to position A (park). Risk of injury and/or damage. When working on the vehicle, ensure that the windscreen wiper stalk is in position A (off). Risk of injury.
“Stop, steering and handbrake lock” position St
To unlock: turn the key and the steering wheel slightly. To lock: remove the key and turn the steering wheel until the steering column locks. To release the handbrake, please see the information on “Handbrake” in Section 2.
“Accessories” position A
No power-consuming device will operate when the ignition is switched off.
“On” position M
The ignition is switched on:
Start position D
Starting the engine Turn the key to the D position and hold it in this position until you hear a beep. Release the key. As soon as the warning light Ṑ stops flashing, your vehicle is ready to drive. The vehicle cannot be started if the charging cord is plugged in and powered or if the charging flap is open.
Stopping the engine
Bring the key to the “Stop” position. Warning light Ṑ goes out.
Driver’s responsibility when parking or stopping the vehicle
Never leave an animal, child or adult who is not self-sufficient alone on your vehicle, even for a short time. They may pose a risk of injury, such as by starting the engine or activating equipment. Risk of serious injury.
GEAR CONTROL
Display 1
Display 1 on the instrument panel indicates the selection control position 2.
Selection control 2
- D: forward
- N: Neutral
- R: reverse
The vehicle can only be started if the charging cord is unplugged from the vehicle and stored away.
Operation
- Switch on the ignition;
- start the engine;
- with your foot on the brake pedal, release the handbrake (refer to the information under “Handbrake” in Section 2). It will now be possible to drive off.
Only engage D or R when the vehicle is at a standstill, with your foot on the brake and the accelerator pedal released.
To protect the charging cord, always check that it is properly stored in its housing before setting off.
Driving
Press switch D, a beep will sound. During driving, press the accelerator pedal to reach the speed desired.
Hill start
When setting off on a slope, release the handbrake whilst pressing the brake pedal before pressing the accelerator pedal.
Steep hill start
When starting on steep hills:
- Press the brake pedal with the left foot to release the handbrake;
- accelerate by pressing the accelerator pedal with the right foot while easing the left foot from the brake pedal to prevent the vehicle from reversing.
Reverse
Press the switch R. The reversing light will come on as soon as the reverse gear is selected (igni- tion on). A beep sounds.
Parking the vehicle
With the vehicle at a standstill, press switch N. Warning light 3 comes on the instrument panel. Engage the handbrake (please see the “Handbrake” information in Section 2).
NB: when the ignition is switched off, the gear control automatically switches to position N.
Temporary stop
At a standstill and with the engine running, when position D or R is engaged, a beep will sound and a warning light flash until one of the following conditions is met:
- brake pedal pressed;
- accelerator pedal pressed;
- press switch N;
- the handbrake is secured.
In the event of an impact to the underside of the vehicle (e.g.: striking a post, raised kerb or other street furniture), this may result in damage to the vehicle (e.g.: twisted axle), the electrical circuit or the traction battery. Do not touch the circuit elements or any fluids or liquids. To prevent any risk of an accident, have your vehicle checked by an authorised dealer. Risk of serious injury or electric shock.
Handbrake
To release:
With the ignition on:
- support on the brake pedal and maintain it sunk ;
- press 2 ;
- gently pull lever 1 towards you, keeping the 2 button pressed down;
- push the lever down as far as it will go.
When stationary and depending on the slope and/or vehicle load, it may be necessary to pull up the handbrake at least two extra notches.
Special conditions
It is not possible to release the hand brake when the 12-volt battery is discharged. You must recharge it (see “12V battery” in Section 4) before you can release the handbrake, or have the 12V battery re-placed by an authorised dealer. The handbrake is a vehicle safety measure. It cannot be released unless the ignition is switched on.
To apply:
Pull lever 1 upwards and make sure the vehicle is immobilised. Warning light 3 will come on on the instrument panel.
Steep hill start
When starting on steep hills:
- Press the brake pedal with the left foot to release the handbrake;
- accelerate by pressing the accelerator pedal with the right foot while easing the left foot from the brake pedal to prevent the vehicle from reversing.
Make sure that the hand-brake is properly released when driving (red indicator light off), otherwise overheating may occur.
VEHICLE RANGE: recommendations
The vehicle range is approved for an ECE-15 cycle. In real usage, the range of an electric vehicle may vary depending on several factors over which you have partial con-trol, which may make a considerable difference to the vehicle range.
These factors are:
- speed and driving style;
- type of road;
- electrical accessories and equipment;
- vehicle loading;
- tyres;
Speed and driving style
High speeds will reduce your vehicle’s range. A “sporty” driving style reduces your vehicle range: opt for a “lighter” driving style. Drive at a constant speed. Adapt your driving style to avoid excessive energy consumption. Please refer to the information on the “Charge meter” in Section 2. Anticipate traffic changes by lifting your foot off the accelerator pedal in order to recover energy.
Road type
Do not try to maintain the same speed up a hill, accelerate no more than you would on the level. Keep your foot in the same position on the accelerator pedal.
Use of electrical accessories and equipment
In the event of freezing, manually de-ice the windscreen (using a scraper) to reduce the usage of the de-icing/demist-ing function and to save energy. Please see the information on “Deicing, demisting the windscreen” in Section 3. The use of electrical accessories (GPS, phone charger, etc.) reduces vehicle range.
Vehicle loading
Avoid pointlessly overloading your vehicle.
Tyres
An under-inflated tyre increases energy consumption. Comply with the specific tyre pressures for your vehicle. When replacing them, you must use tyres made by the same manufacturer, with the same dimensions, type and structure as the originals. For safety reasons, the use of tyres other than those recommended by the manufacturer is prohibited. Failure to respect this recommendation may adversely affect stability, behaviour, braking or the play between the bodywork and the tyres… Some of these effects may lead to the loss of control of the vehicle under certain driving conditions, and lead to an accident and serious injury.
FAQ
The 2020 Renault Twizy is an electric microcar, often classified as a quadricycle.
The Twizy is designed to seat two people in a tandem arrangement.
The driving range is limited, ideal for short, urban commutes.
Charging times are relatively short, typically a few hours for a full charge.
No, it’s designed primarily for city driving, not for highway speeds.
The top speed is modest, and suitable for urban environments.
The Twizy has optional doors and windows; its standard model is open-sided.
Storage space is very limited, emphasizing its focus on short trips.
It includes basic safety features like seat belts and a protective frame.
It’s more suitable for fair weather due to its open or semi-open design.
It’s usually classified as a quadricycle due to its size and power.
It generally lacks traditional heating or cooling systems.
License requirements vary by country and the specific Twizy model.
Its small size and electric powertrain make it well-suited for manoeuvring in city traffic.
Its compact size, ease of parking, and zero emissions are major advantages in urban areas.