
Suzuki New CARRY 2019 Headlight Aiming User Manual
Headlight Aiming
Since special procedures are required, ask a SUZUKI dealer or a qualified workshop for this job.
Bulb Replacement
CAUTION
Light bulbs can be hot enough to burn your finger right after turning off lights. This is true, especially for halogen headlight bulbs. Replace the bulbs after they become cool enough.
The headlight bulbs are filled with pressurized halogen gas. They can burst and injure you if they are hit or dropped. Handle them carefully.
To avoid injury by sharp-edged parts of the body, wear gloves and a long-sleeved shirt when replacing light bulbs.
NOTICE
The oils from your skin may cause a halogen bulb to overheat and burst when the lights are on. Grasp a new bulb with a clean cloth.
Frequent bulb replacement indicates the need for an inspection of the electrical system. This should be carried out by a SUZUKI dealer or a qualified workshop.
Headlight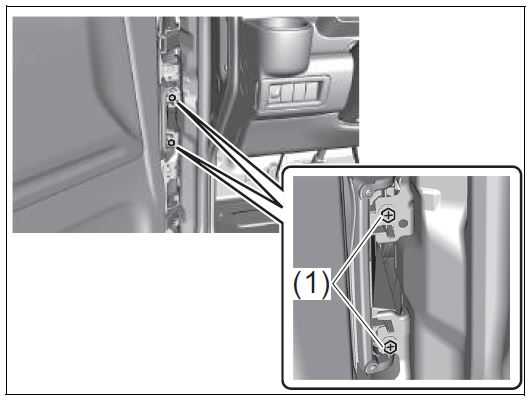
- Open the driver’s or passenger’s door, loosen the screws (1) and then remove the light housing.
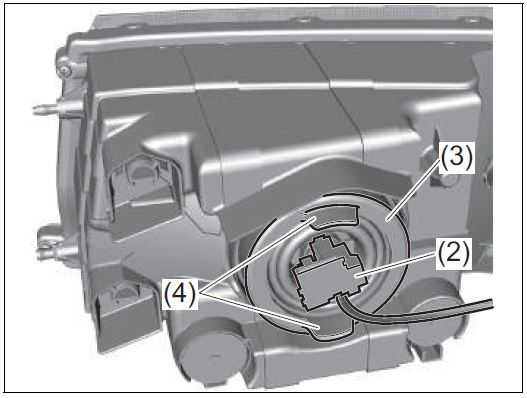
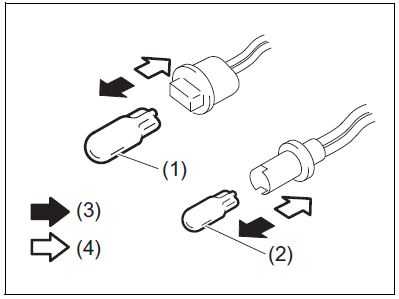
- Disconnect the coupler (2). Remove the sealing rubber (3) by pulling the grips (4).
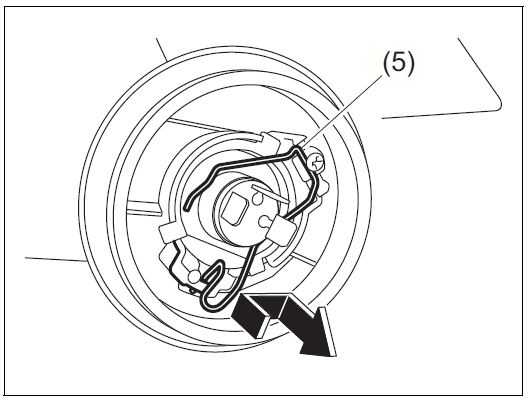
- Push the retaining spring (5) forward and unhook it. Then remove the bulb. Install a new bulb in the reverse order of removal.
CAUTION
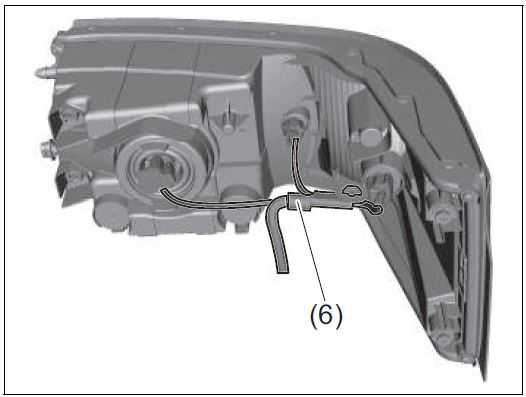
Install the wiring harness (6) on the original portion of the headlight. Otherwise, the wiring harness can be damaged and a fire can result.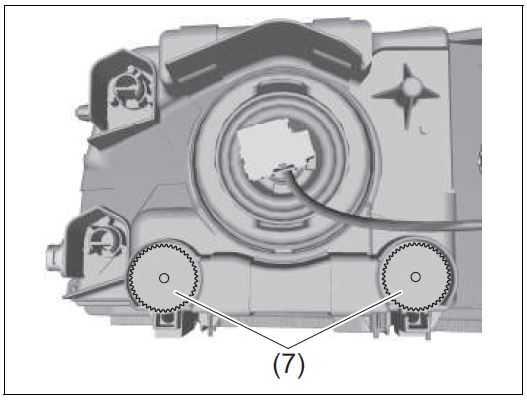
NOTE:
Do not touch the aiming screws (7). Otherwise, the headlight aiming axis may be slipped off.
Have your vehicle inspected by a SUZUKI dealer or a qualified workshop for the headlight aiming after replacing the headlight bulbs.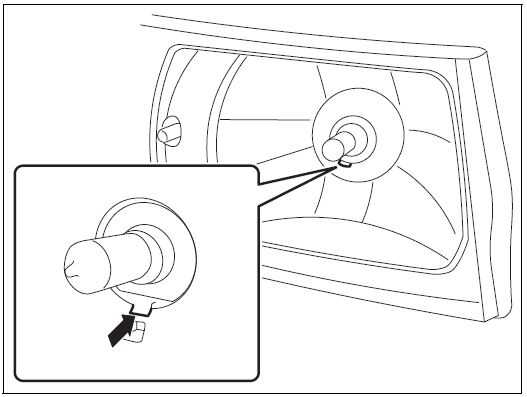
NOTE:
You can see the position of the retaining spring from the hole of the headlight.
Front Turn Signal Light and Front Position Light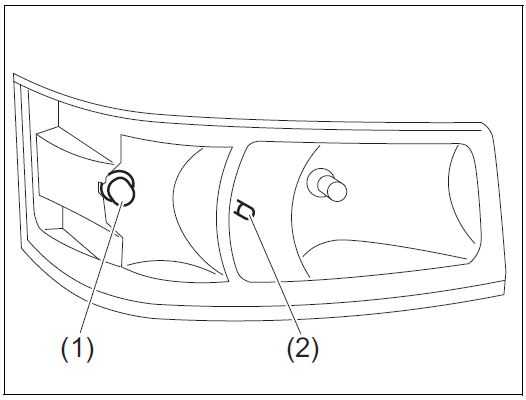
- Front turn signal light
- Front position light
- Perform step 1) of “Headlight” in this section.
- To remove the bulb holder of the front turn signal light or the front position light from the light housing, turn the holder counterclockwise and pull it out.
- To remove and install the bulb of the front turn signal light (1) and front position light (2), simply pull out or push in the bulb.
Daytime Running Light (D.R.L.)(if equipped)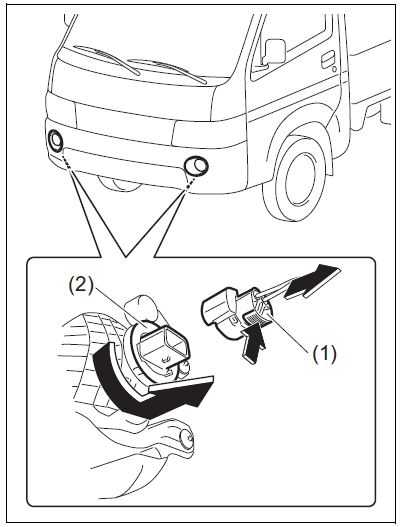
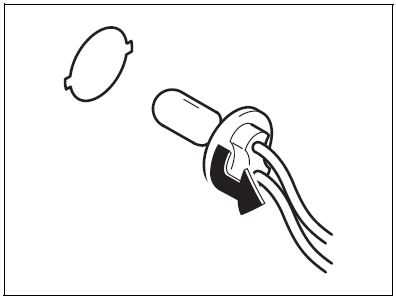
Disconnect the coupler (1) by pushing the lock release. Turn the bulb holder (2) counterclockwise and remove it.
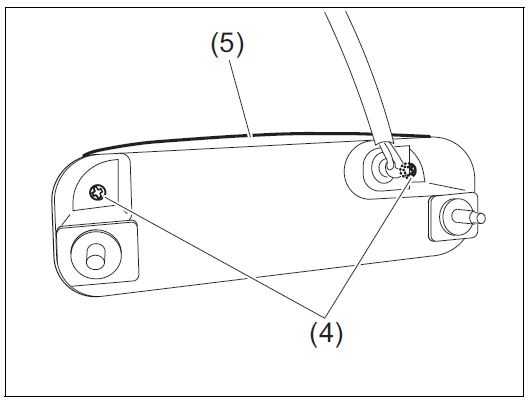
Rear Combination Light
- Remove the screws (1) and remove the cover (2).
- Removal
- Installation
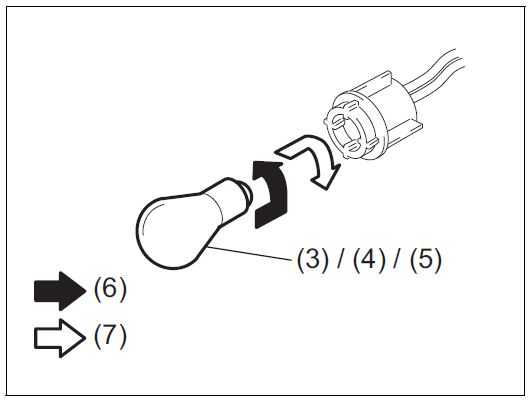
- To remove the bulb of the turn signal light (3), the tail/brake light (4) or the reversing light (5) from bulb holder, push in the bulb and turn it counterclockwise. To install a new bulb, push it in and turn it clockwise.
Rear Fog Light (if equipped)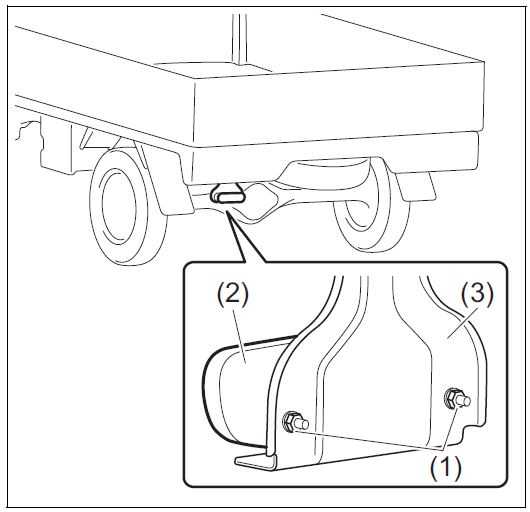
- Loosen the nuts (1) and then remove the rear fog light housing (2) from the bracket (3).
- Removal
- Installation
- Loosen the screws (4) and then remove the lens (5).
- To remove the bulb of the rear fog light from the bulb holder, push in the bulb and turn it counterclockwise. To install a new bulb, push it in and turn it clockwise.
License Plate Light
Vehicle with a single license plate light
A vehicle with a dual license plate light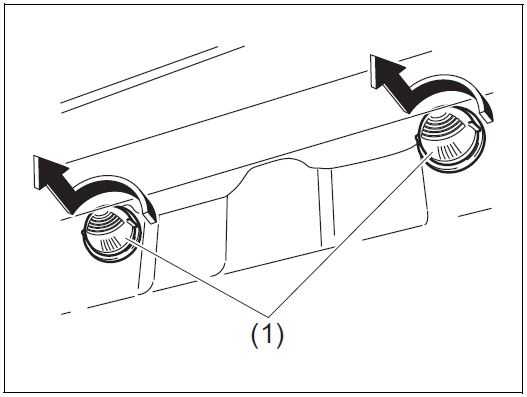
- Remove the cover (1) by turning it counterclockwise.
- To remove and install the bulb of the license plate light (2), simply pull out or push in the bulb.
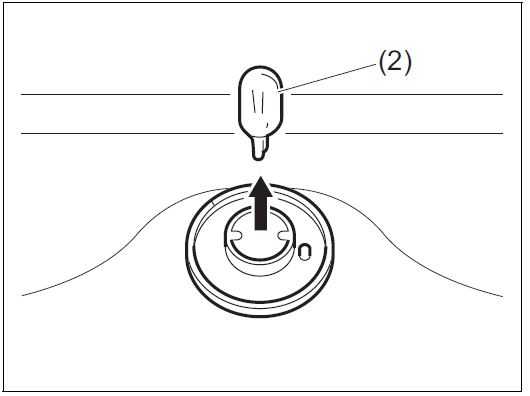
High-mount Stop Light (if equipped)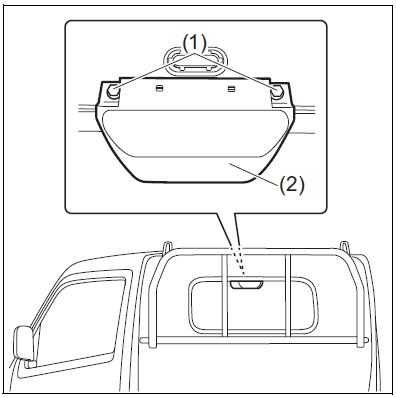
- Loosen the bolts (1) and then remove the high-mount stop light housing (2).

- Turn the bulb holder (3) counterclockwise and pull it out.
- Removal
- Installation
- To remove and install the bulb of the high-mount stop light (4), simply pull out or push in the bulb.
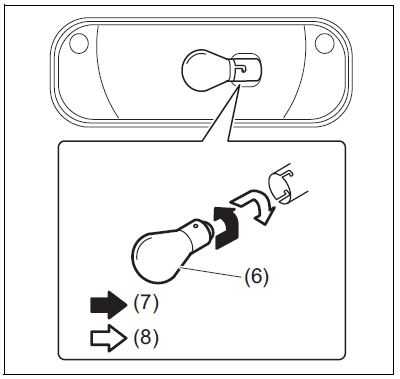
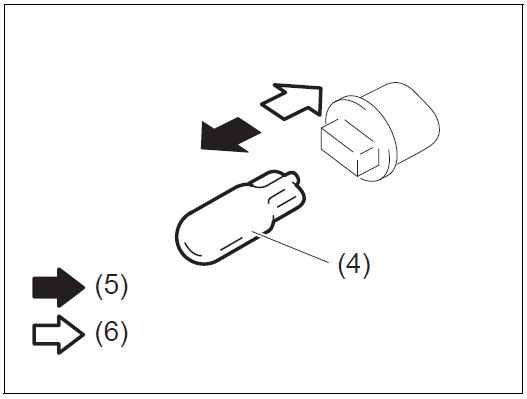
Interior Light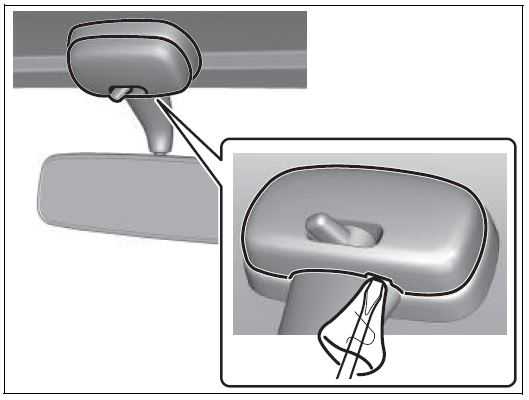
Remove the lens by using a flat-bladed screwdriver covered with a soft cloth as shown. To install it, simply push it back in. The bulb can be removed by simply pulling it out. When replacing the bulb, make sure that the contact springs are holding the bulb securely.
Wiper Blades
If the wiper blades become brittle or damaged, or make streaks when wiping, replace the wiper blades. To install new wiper blades, follow the procedures.
NOTES
To avoid scratching or breaking the window, do not let the wiper arm strike the window while replacing the wiper blade.
NOTE:
Some wiper blades may be different from the ones described here depending on vehicle specifications. If so, consult a SUZUKI dealer or a qualified workshop for proper replacement method.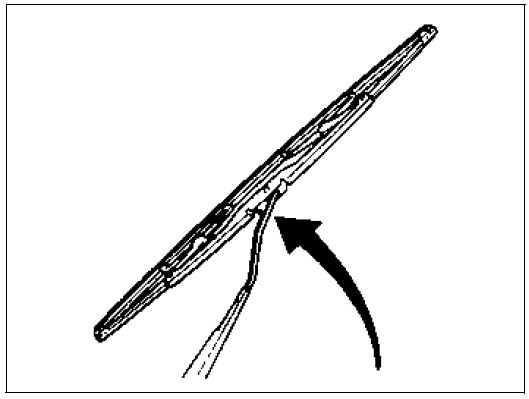
- Hold the wiper arm away from the window.
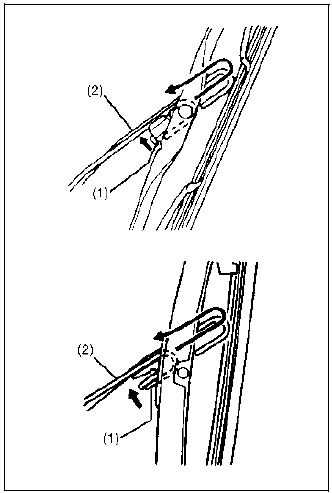
- Squeeze lock (1) towards the wiper arm (2) and remove the wiper frame from the arm as shown.
- Unlock the lock end of the wiper blade and slide the blade out as shown.
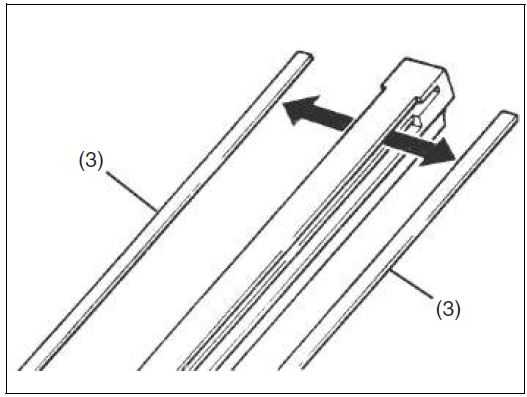
- Retainers
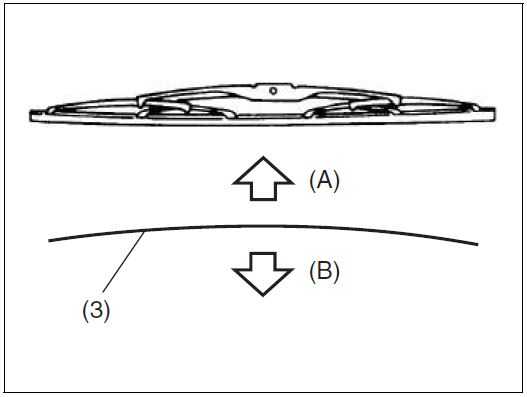
- If the new blade is provided without the two metal retainers (3), move them from the old blade to the new one.
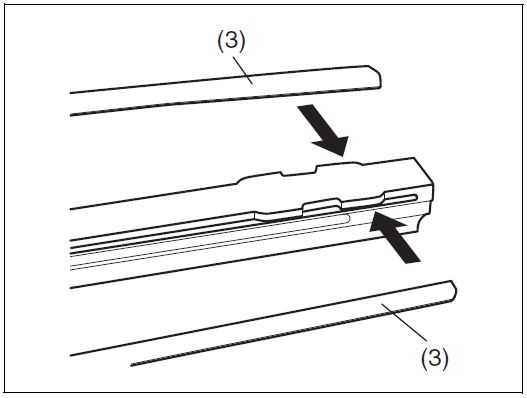
- Up
- Down
NOTE:
When you install the metal retainers (3), make sure the direction of the metal retainers as shown in the above illustrations.
- Locked end
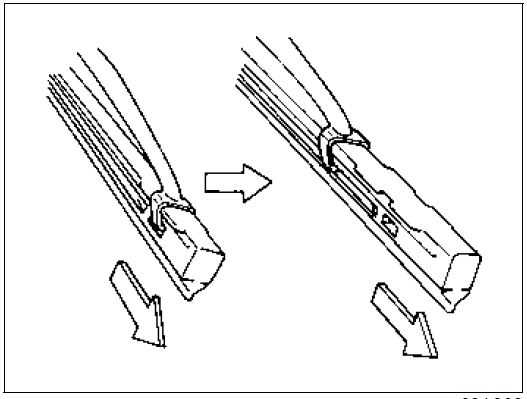
- Install the new blade in the reverse order of removal, with the locked end (4) positioned toward the wiper arm. Make sure the blade is properly retained by all the hooks. Lock the
the blade end into place. - Reinstall the wiper frame to the arm, making sure that the lock lever is snapped securely into the arm.
Reference Links
View Full User Guide: Suzuki New CARRY 2019 User Manual
Download Manuals: https://suzuki-aftersales.net/manuals