Tata Tigor BS VI 2020 Seat Adjustments User Manual
Introduction
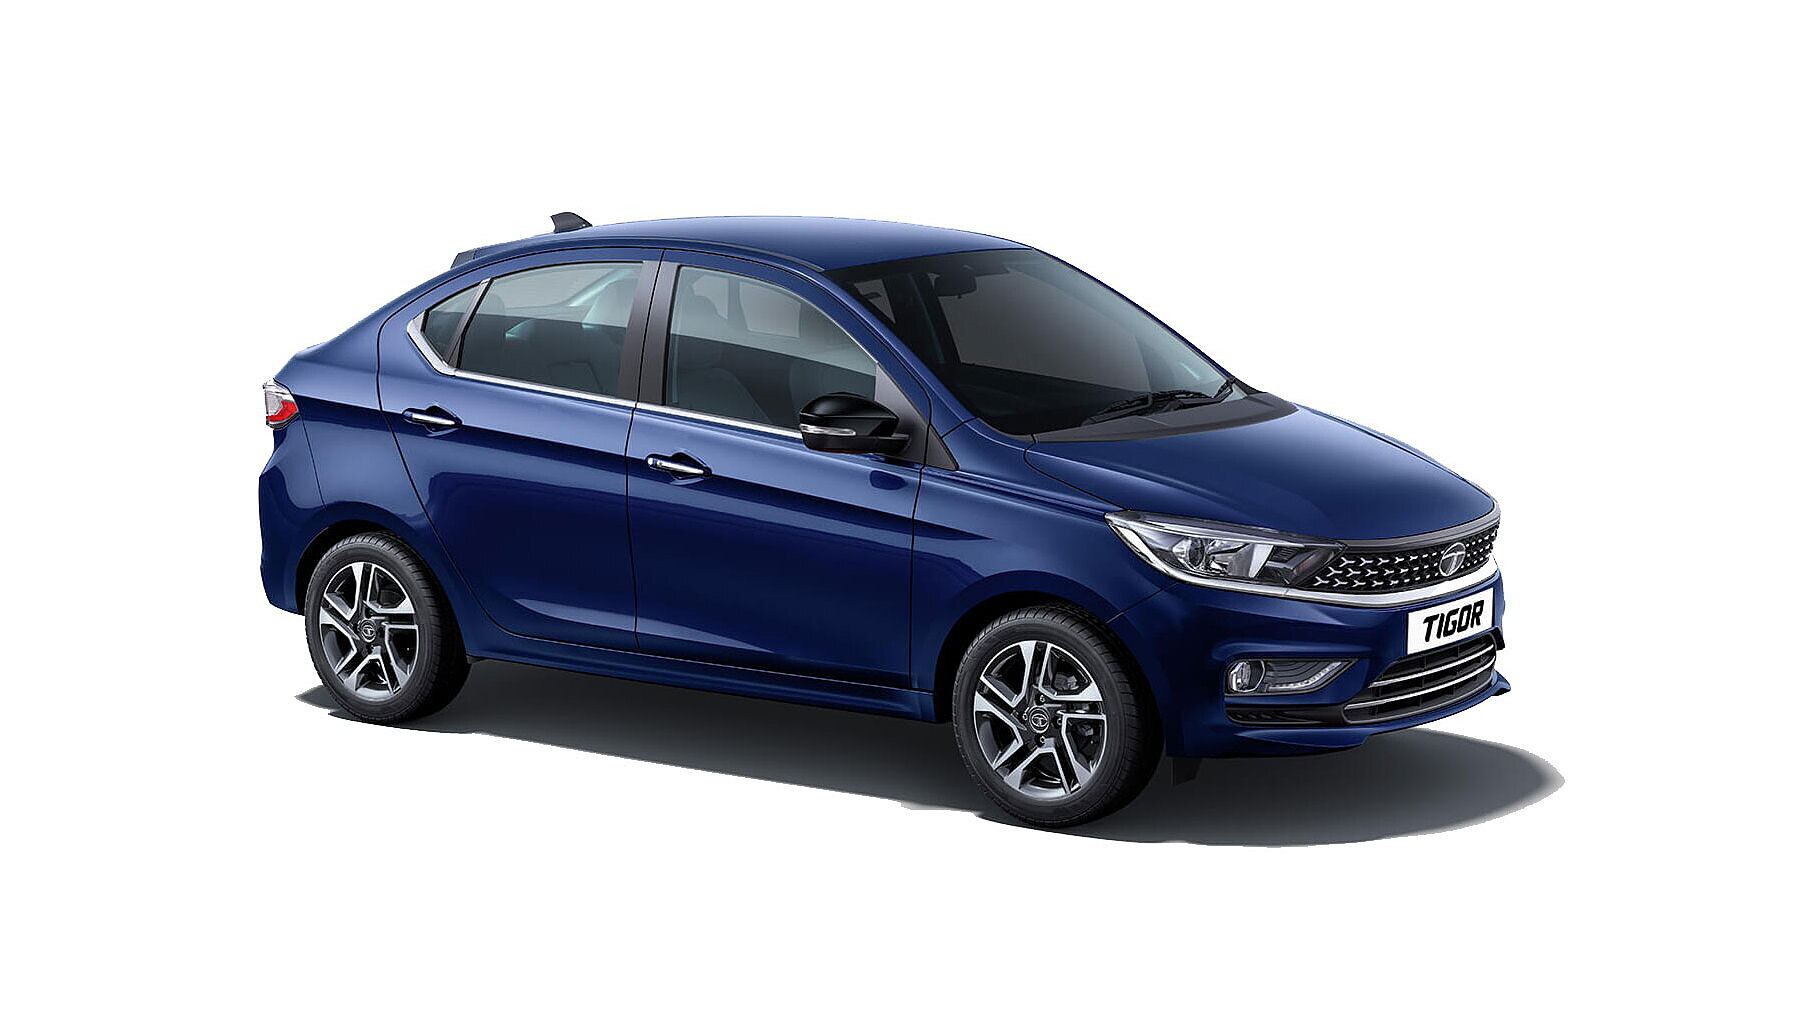
The Tata Tigor BS VI 2020 is a sleek, feature-rich sedan with plush seats and flexible seat adjustments. This vehicle was created with the contemporary driver in mind and offers a pleasurable and individualized driving experience. The Tata Tigor BS VI 2020’s seat changes are made to accommodate each driver and passenger’s unique tastes, ensuring maximum comfort during every ride. The vehicle is outfitted with ergonomic seats that offer great support and padding. The driver can find the ideal seating position thanks to the numerous adjustment options for the driver’s seat. These modifications often include sliding seat positions, seatback reclining, and seat height adjustment. These features enable the driver to quickly adjust the seat to fit their height, reach, and driving style, ensuring the highest level of comfort and control. The Tata Tigor BS VI 2020 front passenger seat also has a number of changes, giving the occupant freedom and comfort.
In order to choose the most comfortable setting for their travel, passengers can adjust the seat position, recline the seatback, and make other changes. In addition to the front seats, the Tata Tigor BS VI 2020’s back seats are also intended to give passengers a comfortable and carefree riding experience. Even while they may not have as many changes as the front seats, the back seats nonetheless give passengers plenty of headroom, legroom, and padding for a comfortable journey.
Seat Adjustments
Pre Driving Checks
Make sure that
- Windshield, windows, mirrors, lights, and reflectors are clean and unobstructed.
- Tool kit, jack & handle, warning triangle, owner’s manual, first aid kit and vehicle documents are available and stored at their locations.
WARNING
Do not put any mat on the floor carpet near control pedals area.
- All doors, engine bonnet and tail gate are securely closed and latched.
- All occupants should always wear seat belts or suitable CRS as applica-ble while travelling.
- Objects, luggage or loads are se-cured correctly against slipping or tip-ping.
- Rear seat is securely latched.
- There is sufficient fuel for the trip.
Daily check
- Tyres for unusual wear, cracks or damage and embedded foreign material such as nails, stones, etc.
- Traces of fluid and oil below vehicle.
NOTE
Water dripping below the car is normal. This is due to the usage of air conditioning system.
- All lamps, wipers, wiper blades and horn for proper operation.
- All switches, gauges and tell tales are working properly.
Adjust:
- Seats, head restraints and steering wheel position.
- Adjust all the mirrors before you start the car.
Weekly check
- Engine oil level
- Coolant level
- Brake fluid level
- Windshield washer fluid level
- Battery electrolyte level
- Fuel level
NOTE
Tyre pressure should always be measured in cold conditions. Do a check of the tyre pressure and condition after every 15 days, including the spare tyre.
Driving Tips
Fuel consumption, engine, transmission, brake and tyre wear are mainly affected by the below factors:
- Operating conditions of your vehicle
- Your personal driving style
Operating conditions
- Avoid frequent starts and stops as these actions increase the fuel consumption of the vehicle.
- Always ensure correct tyre pressure.
- Do not carry any unnecessary weight.
- Regularly service your vehicle and adhere to the recommended service maintenance schedule.
Personal driving style
- Do not press the accelerator pedal when starting the engine.
- Do not warm up the engine when the vehicle is stationary.
- Always adapt your driving style to suit the prevailing road, weather conditions, and maintain a safe distance from the vehicle in front. Drive care-fully.
- Avoid frequent, sudden acceleration and braking.
- Select appropriate gear according to varying speeds and load conditions.
NOTE
- Do not rest your foot on the clutch pedal while driving.
- If clutch pedal is pressed for more than 3 minutes, then re-lease the clutch pedal & again press clutch pedal with start stop button to crank the engine.
- Switch ‘OFF’ the engine in stationary traffic or at signals.
- Keep an eye on the vehicle’s fuel consumption.
- Safety systems are merely aids de-signed to assist driving. You are responsible for the distance between the vehicles in front, for vehicle speed and anticipating braking in good time.
WARNING
- You could lose control of your vehicle if you try to adjust the driver’s seat, head restraint, mirror, steering wheel and fasten the seat belt while driving. There is a risk of an accident. Do not rest your hand on the shift lever during driving; Pres-sure transmitted from your hand may result in premature wear of the transaxle internal gear shift mechanism.
- Press the clutch fully while shifting the gears. The reverse gear should be engaged only when the vehicle is stationary. Transmission may get damage by trying to shift into reverse gear while the vehicle is moving. Wait for 5 seconds after declutching to ensure smooth engagement of the reverse gear or shift into one of the forward gears for a moment while clutch is pressed fully. This will avoid grinding of reverse gear while shifting.
Recommended fuel economy speeds (For MT)
| Petrol | |
| Gear
Speed(kmph) |
|
| 1 | 20 |
| 2 | 40 |
| 3 | 60 |
| 4 | 80 |
| 5 | 100 |
Good driving practices
- Slow down before you shift to a lower gear. This helps the engine to keep a lower rpm and result in less wear and tear of the engine components.
- Avoid frequent brake application which can cause overheating of brakes.
- Slow down the vehicle when you drive in cross winds to get better control over the vehicle.
- Avoid high speed when cornering or turning.
- Press the clutch fully while shifting gears.
- Make sure that vehicle is completely stationary before you attempt to shift in reverse gear.
- Drive slowly on wet roads.
- You can get extra braking from the engine by shifting to a lower gear. This can help you to maintain a safe speed and prevent your brakes from overheating specially while going down a hill.
Tips for obtaining better fuel efficiency
- Always maintain the specified tyre pressure during fuel top-ups and also before a long trip. Vehicle running with low tyre pressure will consume more fuel than the one running with specified tyre pressure.
- Keep the vehicle clean. Get rid of the unwanted stuff lying in the boot etc., to reduce weight.
- Regularly inspect your vehicle for any leakages, worn out wires by rat bites etc.
- Always follow periodic & regular ser-vice schedule of the vehicle.
- In places with high dust content (e.g.: Gurgaon, Jaisalmer etc.), Clean the air filter element at every 5000 km.
- Anticipate the road conditions and drive in a smooth manner.
- Do not accelerate excessively when you are in lower gears (1st or 2nd). Be gentle on the accelerator when you are in traffic. In lower gears, opening up the throttle will increase the engine rpm while keeping the vehicle at lower speeds. This reduces the fuel efficiency of the vehicle.
- Be in the maximum possible higher gear at a given speed. This reduces the engine operating speeds which means the engine is running at lower rpm (Revolutions per Minute) for the same vehicle speed. Lesser the number of engine revolution lesser the fuel burned.
- Avoid harsh braking.
- Maintain healthy driving habits & while decelerating, do coasting in gear and not in neutral or with clutch pedal pressed.
- Use the car AC only when you re-quire. For cooling, keep the blower speeds low, as at higher blower speeds, the AC consumes more electric power which is ultimately drawn from engine by burning fuel.
- Avoid unnecessary extra electrical loading on the car.
- Stop the engine wisely at traffic signals. Switch ‘OFF’ the engine at the traffic signal only if the stoppage time is high (typically more than 30 sec).
- When you drive on highways, close all the windows. This reduces the drag on the vehicle and improves fuel efficiency.
- Do not over speed. Follow the speed limits. With increasing speed, the engine rpm increases to overcome external air resistance and this reduces fuel efficiency.
Running-in period (For MT)
The purpose of running in a car is to give time for the mechanical parts to settle so that they work efficiently. This involves gentle acceleration and not revving the engine too much. This is done by changing gears early for the first 1,500 – 1,800 km. This will increase the life of the engine. The more you look after the engine when it is new, the more satisfied you will be with its performance in the future. Do not exceed the following road speeds during running in period.
| Petrol | |
| Gear
Speed(kmph) |
|
| 1 | 20 |
| 2 | 40 |
| 3 | 60 |
| 4 | 80 |
| 5 | 100 |
Avoid heavy loads, e.g. driving at full throttle, during this period. Change gears judiciously.
NOTE
Avoid excessive revving up of engine rpm. Do not keep engine at idling for long duration.
Seat Adjustments
Front seat adjustments
Following seat adjustments can be carried out manually.
- Seat height adjustment lever
- Backrest recliner adjustment lever
- Seat forward / rearward adjustment lever
WARNING
Do not adjust the driver’s seat while driving. Adjusting the seat while driving could cause the driver to lose control of the vehicle.
Seat height adjustment
To raise the seat, pull and continue pumping the lever (2) in the upward direction until the seat is at the desired height. To lower the seat, pump the lever down-ward until the seat is at desired height.
NOTE
Adjust the seat backrest until your arms are slightly angled when holding the steering wheel.
WARNING
Do not travel in a moving vehicle with the seat backrest in an excessively reclined position as this can be dangerous.
Seat backrest angle adjustment
To change the seat back rest angle, lean forward slightly and pull up the lever (1). Adjust seat backrest until it reaches de-sired comfortable position. Make sure that lever returns to its original position and seat is securely latched.
Seat forward/rearward adjustment
Lift lever (3) and slide the seat forwards or to the rear. Release lever and make sure that seat is securely latched.
NOTE
Adjust the driver seat position in such a way that the driver will be able to operate the control pedals comfortably.
Head restraint (if available)
Adjust the head restraint so that it is as close to the head as possible and the center of the head restraint supports the back of the head at eye level. This will reduce the risk of injury to the head and neck in the event of an accident or similar situation.
WARNING
Do not drive the vehicle without the seat head restraints. Head restraints are intended to help reduce injuries during an accident.
An occupant detection sensor is in-stalled in the front passenger seat to detect whether the seat is occupied or not. The sole purpose of this sensor is to is-sue seat belt reminder warnings for the front passenger seat. The sensor does not have any control on the deployment of airbags.
WARNING
Any modification in the seat material or addition of seat cover may damage or affect the performance of the sensor.
Rear seats
Rear View Mirrors
Inside Rear View Mirror (IRVM)
To adjust the mirror move the mirror up, down or sideways manually to obtain the best rear view. When you drive at night, set the selector tab to select anti-glare mode (if available) to reduce glare from the headlights of vehicles behind you.
NOTE
Use antiglare position only when necessary, as it reduces rear view clarity.
Outer Rear View Mirrors (ORVM)
You can adjust the outer rear view mirrors manually by Tip-Tap (By hand) or re-motely by knob. Adjust the outside rear view mirrors to desired position.
NOTE
Objects visible in mirror are actually closer than they appear. Always make sure of the actual distance from the road users traveling behind by glancing over your shoulder.
Motorized ORVM adjustment
The switch to adjust the motorized mirrors is located on the driver’s door. You can adjust the mirrors when the ignition switch is in the “ACC” or “ON” position.
To adjust the mirrors:
- Move the mirror selection switch to L (for left side) and R (for right side) to select the mirror you wish to adjust.
- Use the four positions of the knob to adjust the rear view mirrors to required position.

Manual ORVM adjustment (if available) 
You can adjust the outer rear view mirrors manually.
ORVM folding (as applicable)
Option 1: Manual folding
ORVMs can be folded or unfolded manually. This is applicable only for vehicles which are not equipped with motorized folding provision.
Option 2: Auto folding by smart key
When you lock the vehicle, ORVMs will be folded automatically. When you unlock the vehicle, ORVMs will be unfolded automatically. In case to repeated usage, Mirror Folding/Un-folding will stop functioning and will be re-activated after delay of 2 mins. During that period avoid repeated pressing of Switch.
Option 3: Auto folding by knob
 To fold / unfold the ORVMs, keep the Se-lector switch in center position (i.e. neither ‘L’ nor ‘R, position) and then toggle down. This will operate when the ignition switch is in the “ACC” or “ON” position.
Sun Visors (if available) 
The sun visors can be pulled down to block the glare coming through the wind-shield. To block the glare from side windows, pull down the sun visor and release it from retainer. Swing the sun visor to the side.
Vanity mirror (if available)
Vanity mirror is provided on the back of the front passenger / Driver side sun visor.
Electric Power Assisted Steering (EPAS)
Your vehicle is equipped with electric power assisted steering system. The EPAS system makes steering the vehicle easier with less effort. In EPAS system, the steering effort be-comes heavier as the vehicle speed in-creases and becomes lighter as the vehicle speed decreases for better control of the vehicle at different vehicle speeds. If the engine is ‘OFF’ or if the EPAS system becomes inoperative, the vehicle still can be steered with more steering effort. This EPAS system is available with the following assist features
- Speed sensitive assist control
- Active return control
NOTE
- A click noise may be heard from the EPAS relay after the ignition switch is turned ON or OFF position.
- The steering wheel may not un-lock normally in some cases when ignition key turned ‘ON’. If this happens, turn the steering wheel to the right or left slightly to unlock the steering wheel while turning the ignition key.
WARNING
Below are the symptoms of the system malfunction. Then, take your vehicle to the nearest TATA MOTORS service center and have the EPAS system checked as soon as possible.
- The EPAS warning light does not illuminate even in case of abnormal operation.
- If the EPAS system does not operate normally, the warning light will illuminate on the instrument cluster. The steering wheel rotation may become difficult to control or operate.
Steering wheel adjustment 
You can adjust the steering wheel postion to suit your convenience. The release lever is located under the steering column.
To adjust the steering wheel
- Adjust the seat to a comfortable position.
- Push “Tilt lever” completely down to unlock the steering column.
- Adjust the steering wheel to the de-sired position.
- Pull release lever up completely to lock the steering column.
- Make sure that steering wheel is securely locked by checking up and down direction.
NOTE
When adjusting the steering wheel, make sure that:
- You can operate control pedals without any obstacles.
- You can see all the displays in the instrument cluster clearly.
WARNING
Before you start the car, make sure the steering wheel position is locked. Do not unlock or adjust the steering wheel while the vehicle is in motion.
NOTE
- The steering effort can suddenly increase, if the operation of the EPAS system is stopped to prevent serious accidents when it detects malfunction of the EPAS system during self-diagnosis.
- When steering for a prolonged period, the steering effort will increase to prevent overheating and damage to the steering system.
WARNING
You could lose control of your vehicle if you try to adjust the steering wheel while driving. There is a risk of an accident.
Steering lock and ignition switch
The ignition switch has the following four positions:
LOCK
This is the normal parking position. Key from lock can be removed in this position only. “LOCK” position prevents normal use of the steering wheel after the key is removed.To release the steering lock, put the key in the slot and turn it clockwise to one click (ACC).
ACC
Accessories such as the infotainment system can be operated, but the engine remains ‘OFF’. Steering gets un-locked.
ON
This is the normal operating position. All electrical systems are ‘ON’.
START
Turn the key further clockwise to the START position, (spring loaded) to start the engine. As soon as the engine starts, release the ignition key, which re-turns to ON position. While cranking, all accessories will be momentarily ‘OFF’.
Illuminated Key Ring (if available)
When the vehicle is unlocked, the illuminated key ring glows. This helps to locate ignition switch in the dark.
Starting and stopping (without PEPS)
Starting the Engine
Make sure that parking brake is en-gaged and vehicle is in neutral gear. Press the clutch pedal fully and crank the engine. Do not press the accelerator pedal when starting the engine.
NOTE
The Starter protection system fitted in this vehicle does not allow you to crank the engine until you fully press the clutch pedal.
Release the key as soon as the engine starts. Repeat if engine does not start.
NOTE
- The Starter protection system switches off the starter when it is continuously cranked for more than 10 secs. In such a case, get the key back to ‘OFF’ position & wait for 30 secs.
- For vehicle equipped with turbo-charger, after you start the engine, run the engine at idle speed for 30 seconds. Do not press accelerator pedal while starting the engine to avoid damage to the turbocharger.
Starting off
To start off, press the clutch pedal fully and shift into 1st gear. After releasing the parking brake, gradually release the clutch and slowly press the accelerator.
NOTE
When shifting or starting off, do not race the engine. Racing the engine can shorten engine life and affect smooth shifting.
Stopping the vehicle
For vehicle equipped with turbocharger, turn the key to ‘ACC’ position to switch off the engine. Before switching off the engine, run the engine at idle speed for 30 seconds and then switch off. This will allow the engine oil to lubricate the tur bocharger, till its speed is fully reduced and also allow the unit to cool down.
WARNING
- Do not switch off the ignition while driving.
- For vehicle equipped with turbo-charger, do not switch the engine off when it is running at high speed. This will lead to premature turbocharger bearing wear.
- If you switch off the ignition while driving, safety-relevant functions are only available with limitations, or not at all. This could affect the power steering and the brake boosting effect. You will re-quire considerably more effort to steer and brake. There is a risk of an accident.
Starting and stopping (PEPS) (if available)
Engine Passive Start/Stop
Start/Stop switch is provided on the dashboard towards the left side of steer-ing wheel.
Start/Stop button
The start/stop button or Push to Start Button is a main component of Passive (Engine) Start and Stop system. It is used to control ACC, IGN outputs as well as to start and stop the engine.
NOTE
- If smart key is inside the vehicle and on pressing start stop switch, if start stop switch green LED blinks more than 10 sec. duration then contact authorized TATA MOTORS dealer.
- If ESCL (Electronic Column Steering Lock) is not unlocked properly, then vehicle doesn’t go into ACC mode
Backup start:
To start the engine when smart key battery voltage is low, the user needs to press start/stop button two times with an interval of 2.5 seconds after pressing the clutch with valid smart key near im-mobilizer antenna (in Centre Console).
Emergency start:
If the engine is switched from ON to OFF and start/stop button is pressed with clutch pressed within 5 seconds, engine gets cranked.
NOTE
Engine Passive Start – conditions
Single Press Start:
- Bring the smart key with you and sit in the driver seat.
- Press the clutch pedal and then press the start/stop switch.
- Green colour LED on start/stop but-ton will turn ON.
- Once engine is started successfully, the green colour LED on start/stop button stays ON.
Two Step Start:
Step 1
- Have the smart key with you and sit on the driver’s seat.
- Press the start/stop button without pressing clutch pedal.
- Amber colour LED on start/stop switch turns ON.
- Engine will remain OFF and all electrical equipment and infotainment system can be used. Steering is un-locked.
Step 2
- Press the clutch pedal and then press start/stop button to start the engine.
- Green colour LED on start/stop but-ton will turn ON.
- Once engine start successfully, green colour LED on start/stop switch will remain ON.
Three Step Start
Step 1
- Have the smart key with you and sit on the driver’s seat.
- Press the start/stop button without pressing clutch pedal.
- Amber colour LED on start/stop but-ton will turn ON.
- Limited information will be displayed on instrument cluster and steering will be unlocked. Engine remains OFF.
Step 2
- Press the start/stop button without pressing clutch pedal again.
- Green colour LED on start/stop but-ton will turn ON.
- Engine will remain OFF but all electrical equipment and infotainment system can be used.
Step 3
- Press the clutch pedal and then press start/stop button to start the engine.
- Green colour LED on start/stop but-ton will turn ON.
- Once the engine is started successfully, the green colour LED on start/stop button stays ON.
Engine Passive Stop – conditions 1
- Single Press Stop:
- IGN is ON and engine is running.
- Press the start/stop button with or without clutch.
- ACC and IGN turns OFF.
- LED on start/stop switch turns OFF.
- Single Long Press Stop:
- IGN is ON and engine is running.
- Vehicle is in running condition i.e. wheel rpm >10 RPM or wheel sensor faulty.
- Press the start/stop button for more than three seconds.
- IGN returns OFF, ACC remains ON.
- Amber colour LED on start/stop switch turns ON.
WARNING
When vehicle is in OFF mode (ACC, IGN and Crank OFF) and user tries to lock the vehicle from outside by pressing any door handle switch and if PEPS detects that the smart key is left inside the vehicle, an audio warning/ chime is sounded.
NOTE
If clutch pedal is pressed for more than 3 minutes, then release the clutch pedal & again press clutch pedal with start stop button to crank the engine.
Gear Shifting
The gearshift pattern is as shown on the gear lever knob. Gear shifting should al-ways be done with the clutch pedal fully pressed.
NOTE
- Gear recommendation is dis-played when the clutch pedal is fully released.
If “F” is displayed in DIS of instrument cluster, it means ‘Fault’ condition. Contact TATA MO-TORS Authorized Dealer/Service Center. - Press the clutch fully when gear shifting. The reverse gear should be engaged only when the vehicle is stationary.
- Use the clutch only to shift gears and do not use it when vehicle is stationary on a slope, as the car will roll down due to gravity.
- If all doors are closed when the vehicle is in ACC/IGN/RUN mode and if PEPS does not detect the smart key inside the car, then an audio warning is given.
- Do not rest your hand on the shift lever during driving; Pressure transmitted from your hand may result in premature wear of the transaxle internal gear shift mechanism.
Current gear indication
The Driver Information display (DIS) in the Instrument Cluster indicates the current gear position engaged.
Gear recommendation
Up or down arrow will be displayed in DIS, recommending whenever gear should be shifted to up or down.![]()
Reverse gear
To engage reverse gear, shift to reverse position as shown on the gear lever knob.
NOTE
NOTE
Press the clutch fully when gear shifting. The reverse gear should be engaged only when the vehicle is stationary.
Driving
Climbing Sharp Gradients on Loose Surfaces (MT)
Start off smoothly in a suitable gear. Accelerate smoothly so that there is no loss of traction by over-revving of the engine. Choose a smooth slope and select the appropriate gear so that gear changing in the middle of the climb is not required. Changing gears in the middle of the climb can cause loss of momentum and engine stalling. Shifting to lower gear has to be done cautiously to avoid loss of traction. Under no conditions should the vehicle be moved diagonally across a hill. The danger is in loss of traction and sideways slippage, possibly resulting in toppling over. If unavoidable, choose a mild angle and keep the vehicle moving.
If the tyres start to slip within few feet at the end of the climb, keep the vehicle stable by steering left and right. It gives increased grip to the tyres.
If the vehicle stalls or losses headway while climbing a steep hill, make a quick shift to reverse and allow the vehicle to move back with the help of engine braking.
Descending Sharp Gradients (MT)
Depending on the severity of the gradient, shift into appropriate gear. Use engine braking judiciously without over-revving the engine. Brake gently in such situations.
WARNING
When descending on sharp gradients, do not turn the ignition key to the ‘OFF’ position. The braking assist and steering assist may malfunction and the emission control system may be damaged.
Starting the Engine
Make sure that parking brake is engaged and vehicle is in neutral gear. Press the clutch pedal fully and crank the engine. Do not press the accelerator pedal when starting the engine. Release the key as soon as the engine starts. Repeat if engine does not start.
WARNING
The engine emits poisonous exhaust gases such as carbon monoxide. Inhaling these exhaust gases leads to poisoning. There is a risk of serious health problems. Therefore, never leave the engine running in enclosed spaces without sufficient ventilation.
NOTE
After starting, run the engine in idle speed for at least 30 seconds. Do not press accelerator pedal while starting the engine to avoid damage to turbocharger.
Braking
Your vehicle has vacuum assisted brakes. The distance needed to bring the vehicle to a halt increases with the speed of the vehicle. Start applying brake anticipating the distance and slow down gradually.
WARNING
- Do not use the brake pedal as a footrest.
If you rest your foot on the brake pedal while driving, the braking system can overheat and cause fading of brake pads. This in-creases the stopping distance and can even cause the braking system to fail. There is a risk of an accident. - Do not press the brake pedal and the accelerator pedal at the same time.
If you have driven for a long time in heavy rain without braking, there may be a delayed reaction from the brakes when you brake for the first time. This may also occur after the vehicle has been washed. Brake performance may become poor and unpredictable if brakes are wet. After you drive through water or if you wash the underside of the vehicle, test the brakes at slow speeds to see if the brakes work fine. If the brakes are less effective than normal, dry them by repeatedly applying the brakes at slow speeds until the brakes have regained their normal effectiveness.
Check traffic conditions before doing the above activity.
Braking on downhill gradients
When you drive on downhill slopes, re-duce the load on the brakes by shifting to a lower gear. This is called as engine braking and aids to reduce overheating and wear of brakes.
WARNING
- Do not shift to lower gears on a slippery road surface to increase the engine’s braking effect. By doing so, the tyres could lose their grip.
- There is an increased danger of skidding and accidents.
Automated Manual Transmission (AMT) Gearbox (if available)
Gear Shift Lever (AMT)
The 5-speed Automated Manual Trans-mission (AMT) Gearbox offers a choice of two driving modes:
- Automated mode with the gear lever in position ‘A’
- Manual mode with the gear lever in position ‘M’.
Starting
- Engage the parking brake firmly Press Brake pedal.

- Put the ignition ‘ON’
- While the brake pedal is pressed, bring the shifter lever to Neutral – ‘N’. Check ‘N on instrument cluster.
- Crank to start the engine with the brake pedal still pressed.
NOTE
The engine can only be started when the gearshift lever is in “N” position with the brake pedal firmly pressed.
Driving
- With the engine running and brake pedal pressed, depending on your requirement shift the lever on R, A or
M. Check the position engaged on the Instrument Cluster display. - Release the parking brake.
- Release the brake pedal then be-cause of creep feature, vehicle will move and if required press accelerator pedal.
NOTE
- Use right foot only to operate brake or accelerator pedal.
- Do not operate accelerator and brake pedal simultaneously.
- Do not use your left leg to operate the pedals while driving AMT vehicle.
NOTE
If F displayed on the Instrument Cluster display, it means ‘Fault condition. Contact a TATA MOTORS Authorized Service Centre immediately.
AMT Instruction sticker
Follow the instructions provided on the sticker before driving the vehicle.
Driving Modes
Neutral
Vehicle is in neutral gear position. This will be indicated on instrument cluster.
WARNING
Always make sure to keep the gear shift lever in the “N” position, when the engine is running and vehicle is stationary. Do not shift the lever in “N” position, even momentarily, when the vehicle is in motion.
Reverse Reverse gear will be engaged only when vehicle is stationary and brake pedal pressed. An audio signal indicates when reverse gear is engaged. will be indicated on instrument cluster.
Automatic Mode  Automatic mode will be engaged only when vehicle is stationary and brake pedal pressed. An audio signal indicates when Automatic gear is engaged
![]() . will be indicated in instrument cluster Gear Upshift and Downshift will be done automatically while driving.
. will be indicated in instrument cluster Gear Upshift and Downshift will be done automatically while driving.
Manual Mode  Shift gear lever to left for engaging manual mode. An audio signal indicates when manual mode is engaged. be indicated in instrument cluster. In manual mode, driver should select the desired gear by shifting lever to,
+ Upshift the gears.
– Downshift the gears.
Push the gearshift lever to the ‘+’ direction and release it. Every time the lever is operated, upshifting takes place 1. step in the order of 1st 2nd3rd 4th 5th gear.
Pull the gearshift lever to the ‘–’ direction and release it. Every time the lever is operated, downshifting takes place in the order 5th 4th 3rd 2nd 1st gear.
NOTE
Down shifting of gear occurs automatically while braking/engine rpm reduction. In manual mode, gears are not shifted automatically unless the engine RPM threshold is reached.
Stopping
The vehicle can be stopped by depressing the brake pedal regardless of the gear position. This is because the clutch is automatically disengaged to prevent the engine from stalling.
If the gearshift lever is in the ‘A’ position, the gear will be downshifted to ‘1st’ when the vehicle stops. Also, if the gear-shift lever is in the ‘M’ position, the gear will be downshifted to ‘1st’ when the ve-hicle stops.
NOTE
Exhaust fan in the engine compartment will remain ‘ON’ for a short while after IGN is switched ‘OFF’.
Parking
AMT does not have a parking position. The vehicle can be parked with the gear-shift lever in any position.
- Apply the parking brake firmly.
- Depress the brake pedal and shift the gearshift lever to the ‘R’ position on a downhill slope, or to the drive ‘A’ mode or the ‘M’ position in the manual ‘M’ mode on an uphill slope or flat road and confirm the gear position by checking the gear position indicator on instrument cluster. Gear engagement (R or A) can be done with ignition ON/engine running condition only.
- Turn the key to ‘ACC’ position to switch off the engine. Before switch-ing off the engine, run the engine in idle condition for at least 30 seconds and then switch off.
WARNING
Do not switch the engine off when it is running at high speed.
Creeping feature
Creeping function allows the car movement without accelerator Pedal pressed when the brake pedal is released. This functionality is generally used in parking maneuvers, with 1st or ‘R’ gear engaged, in this situations the driver enters and exits from creeping just by pressing the Acc. pedal.
- Creep feature is enabled for Manual as well as Auto Mode for first and re-verse gear.
- After vehicle cranking and brake pe-dal released vehicle starts moving without pressing accelerator Pedal.
- Whenever accelerator pedal is pressed creep function will be disabled.
- Whenever driver door is opened and / or parking brake is engaged, creep function will be disabled.
Kick down feature
In Automatic mode, while driving at a constant speed if the accelerator pedal is quickly pressed the AMT downshifts the gear (if required). It ensures optimum acceleration to complete overtaking in minimal time.
Climbing Sharp Gradients using AMT
Apply the parking brake firmly so that the vehicle does not roll backwards. Shift the gearshift lever to the “A” posi-tion while depressing the brake pedal. Make sure that the gear position indicator in the instrument cluster displays ‘1st’ gear. Release the brake pedal and depress the accelerator pedal gradually, and when the vehicle starts to move, release the parking brake and depress the accel-erator pedal to start off.
Descending Sharp Gradients using AMT
Depress the brake pedal and shift the gear shift lever to the ‘A’ position. Make sure that the gear position indicator in the instrumental cluster displays ‘1st’ gear. Release the brake pedal and depress the accelerator pedal slowly. Even if the accelerator pedal is not depressed, the clutch will be engaged when the vehicle speed increases.
Using Engine Braking
When driving on the downhill slope, down shifting is recommended. So you can use engine braking. By placing the gearshift lever in “M” position, the manual (M) mode is selected, and you can shift to a lower gear manually.
Parking Brake
Mechanical parking brake acting on the rear wheels is provided on the vehicle.
Parking brake applied
To apply the parking brake, pull the lever up fully (1). The parking brakes tell-tale light comes on in the instrument cluster.

Parking brake released
To release it, pull the lever up slightly (1), press the release button (2) and push the lever down (3). The parking brakes’ telltale in the instrument cluster will turn ‘OFF’ when the lever is fully released.
NOTE
Apply the parking brake properly before leaving the vehicle and release it before moving.
Vehicle parking
- Park the vehicle in a safe place. Switch on the indicator signal before turning to park.
- Apply the parking brake.
- Make sure that all window glasses are closed and all lamps are turned ‘OFF’.
- At night, put on the parking lights if required.
- Remove the key from the ignition switch and lock the vehicle.
- Use wheel chocks if the vehicle is parked on a slope.
NOTE
When parking on a downhill gradient, place the gear lever in ‘Reverse’ position. While parking on uphill gradient, place the gear lever in the ‘1st’ position.
WARNING
Never leave children unsupervised in the parked vehicle. They could also operate the vehicle’s equipment. There is a risk of an accident and injury.
NOTE
Do not use parking brake for braking unless unavoidable circumstances like when service brake is not working properly. The braking distance is considerably longer and the wheels could lock. There
is an increased danger of skidding and accidents.
Reverse Park Assist (if available)
Reverse Park Assist system is an electronic parking aid that will assist you to park your vehicle safely when in reverse gear mode. It provides audio and visual information through the vehicles infotainment system. Always look out for kids, pets and elderly people behind the vehicle before reversing. There are ultrasonic sensors placed in on the rear bumper. Number of sensors may vary depending on the variant. Once the system is activated, the sensors will detect how near the obstacle is from the bumper, and this information would be displayed on the vehicle’s infotainment system. In base variants, only audio warning shall be given through a buzzer.
WARNING
Due to ultrasonic sensor technology limitation, detection of obstacles from 0-25 cm is not guaranteed.
| Approximate distance from Bumper (in cm) | Tone Information |
| 25 – 40 | Continuous Beep |
| 41 – 80 | Fast Beep |
| 81 – 120 | Slow Beep |
Variant where infotainment display is not present and audio warning is given through a buzzer, on activating the Re-verse Park Assist system, a tone will be played within first two seconds to indicate the proper functioning of the sys-tem. After these two seconds, normal functioning of the system will continue. If no tone is heard for first two seconds, it shall mean that RPAS system is faulty. The owner should, in that case, go to the nearest dealer for rectification.
Operations
The reverse park assist system can also be activated manually through infotainment screen. Display will be seen on infotainment screen.
Park assist indications
In case reverse park assist system mal-functions, fault message may appear on the infotainment screen.
Reason for this fault may be
- Park Assist Controller / Body Control Module Failure”
- Sensor Malfunction
- Partner components such as Infotainment music system, Instrument Cluster failure.
Reverse park assist limitations
Reverse Park Assist system is not a collision avoiding system. It is solely the driver’s responsibility to park the vehicle safely. Reverse Park Assist feature works on ultra sound echo technology, due to which performance is not guaranteed in following scenarios:
- If the object has a sharp edge sur-face, where surface may divert echoes from sensor reception.
- If object is mesh fence made up of thin wires, where echoes can’t be given by the surface.
- Fast moving objects passes in the sensor’s field of detection, where echoes are not processed by the system.
- If object is made/covered by foam or sponge or snow where ultrasonic sound signals are absorbed.
- Objects close to the rear bumper can go undetected by the Reverse Park Assist’s field of detection. Driver should use extreme caution while parking the vehicle.
- If height of the bumper is changed due to alteration to the suspension or other causes
- If the sensor areas are extremely hot from direct sunlight or cold due to freezing weather.
- If Sensors are covered by a hand, sticker, accessory, etc.
- If ultrasonic noise is present around Vehicle due to other vehicle sensors, horn, engine, air braking system (large vehicles), Exhaust Fans, Wire-less transmitters or mobile phones
- If the vehicle speed exceeds 10kmph, the system will not warn you even though objects are detected, error message ‘Vehicle Speed is high, drive slowly!’ will appear.
- Driving on uneven road surfaces e.g. Gravel, unpaved roads, Artificial Speed Breakers, or gradient.
- Poles of square/rectangular cross section might not be detected.
WARNING
Due to any reason, if the sensor gets misaligned or loses its intended fitment position, contact your dealer for referment.
NOTE
Turning the ignition ‘OFF’ ‘while the park assist feature is active would disable it.
Reverse park assist system preventive maintenance
- Regularly clean the Sensors/cam-era* (*if available) and keep them free from dust, ice, mud, water, chewing gum etc. for proper working of the system. Use a smooth cloth for cleaning.
- Do not use water at high pressure for cleaning the sensor or camera.
- Do not cover the Sensors/camera* (*if equipped) surface with any additional fitment. This will interrupt park assist performance.
- Do not remove mud, snow on the sensors using stick or hard material. Use normal water and soft cloth.
General Warning
- In low light conditions, the screen may darken or image may appear faint.
- If the tire sizes are changed, the position of the fixed guidelines dis-played on the screen may change.
- In case of damage of the rear portion of the vehicle, Reverse Park Assist sensors position may change which causes wrong visual information on display. In case of damage make sure that Reverse Park Assist sensors are fitted properly at the in-tended location.
- In case of uneven road conditions or up-hill or downhill conditions, do not depend on Reverse Park Assist aid.
- Do not apply any kind of force on the reverse park assist sensors.
- Always use rear view mirrors along with Reverse Park Assist for confirming the safety of the rear and the sur-rounding conditions.
Rear View Camera (if available) 
Rear View Camera is a visual reverse guiding system. When reversing or park-ing, make sure that there are no per-sons, animals or objects in the area where you are reversing. The display will be shown on the Infotainment Screen.
Activation
Reverse gear
This system will start, if reverse gear is engaged, or park assist button (if available) is pressed.
Deactivation
System will stop, if reverse gear is disengaged, or park assist button (if available) is pressed. If started through infotainment, the system can be stopped using a cross button on infotainment screen.
Understanding Guidelines Indication 
Green Line
You can safely reverse the vehicle, but be cautious if objects fall in this zone.
Yellow Line
You have to take utmost care if objects fall in this zone. However, the objects may not hit vehicle.
Red Line
Red line indicates that you have to stop reversing the vehicle. If you still go back-wards, the car will hit the obstacle.
Do’s and don’t
- Do not use camera when tailgate is open. If tailgate is open, visual information may not be the actual rear view of the vehicle & system will warn with message ‘Tail Gate Open, Please close.
- When the camera is operated under fluorescent lights, sodium light or mercury light etc., illuminated areas on the lens may appear to flicker in the display.
- Do not attach any advertisement or styling or any kind of stickers on top of camera. If this happens, camera cannot provide you the visual image and it may damage the camera.
- Do not add any accessory, which will cause blockage to the camera’s field of view.
Cleaning camera
- Due to environmental reasons, dust, mud or fog may accumulate on the camera lens. So regularly clean the camera lens.
- Use water to clean the camera lens. Do not use extreme cold or hot water. Rapid changes in temperature may brittle the camera lens. Do not apply High Pressure water for cleaning.
- Wipe the camera lens with soft cloth.
- Do not use hard cloth or material to wipe the camera lens. This will cause scratches on the camera, and leads to deteriorated visual image on the display.
- Do not apply organic solvent, car wax, window cleaner or glass coat to clean the camera. If this is applied, wipe it off as soon as possible.
- Do not apply heavy force on lens, while cleaning.
- Do not remove mud, snow on the camera lens using stick or hard material. Use normal water and soft cloth.
WARNING
- The camera uses fish eye lens. So the size of the objects or in the display may differ from the actual size and distance. In low light conditions, the screen may darken or image may appear faint.
- If the tire sizes are changed, the position of the fixed guidelines displayed on the screen may change.
- During rainy conditions, image may get obscured. In such conditions, do not depend on camera view. The camera used in the vehicle, may not reproduce the same color of the real object.
- In case of damage of the rear portion of the vehicle, camera position may change. Which causes wrong visual information on display. In case of damage, make sure that, camera is fitted properly at the intended location.
- In case of uneven road conditions or up-hill or downhill conditions, do not depend on rear view camera park aid.
- Do not apply any kind of force on the camera.
- Always use rear View mirrors along with Rear View Camera for confirming the safety of the rear and the surrounding conditions.
- High humidity and variation in ambient temperature may result into condensation inside the camera lens, which may further result into degradation of cam-era video feed on the screen. It is recommended that not to rely on camera video feed for parking assistance in such scenario. This phenomenon is temporary and will be automatically recovered with reduction in humidity and
less variation in ambient temperature. - The area displayed by the rear view camera is limited. The camera does not display objects that are close to or below the bumper, underneath the vehicle, or objects out of the camera’s field of
view. The area displayed on the screen may vary according to vehicle orientation or road conditions.
Rear view camera system pre-cautions
- Area displayed on screen
The rear view camera system displays an image of the view from the bumper of the rear area of the vehicle.
- The area displayed on the screen may vary according to vehicle orientation conditions.
- Objects, which are close to either corner of the bumper or under the bumper, cannot be seen on the screen.
- The camera uses a special lens. The distance of the image that appears on the screen differs from the actual distance. The camera may not dis-play items that are located higher than the camera’s field of view.
When sharp up gradient behind the vehicle

When sharp down gradient behind the vehicle

The distance guidelines will appear to be further from the vehicle than the actual distance.
Because of this, objects will appear to be closer than they actually are. In the same way, there will be a margin of error between the guidelines and the actual distance/course on the road.
When any part of the vehicle sags
When any part of the vehicle sags due to the number of passengers or the distribution of the load, there is a margin of error between the fixed guide lines on the screen and the actual distance/course on the road.
When approaching three dimensional objects
The distance guidelines are displayed according to flat surfaced objects (such as the road). It is not possible to deter-mine the position of three-dimensional objects (such as vehicles) using the distance guidelines. When approaching a three-dimensional object
Distance guidelines
Visually check the surroundings and the area behind the vehicle. On the screen, it appears that a truck is parked at point B. However, in reality if you back up to point A, you will hit the truck. On the screen, it appears that A is closest and C is furthest away. However, in reality, the distance to A and C is the same, and B is further away from A and C.
Vehicle width guidelines
Visually check the surroundings and the area behind the vehicle. In the case shown below, the truck appears to be outside of the vehicle width guidelines and the vehicle does not look as if it hits the truck. However, the rear body of the truck may actually cross over the vehicle width guidelines. In reality if you back up as guided by the vehicle width guide-lines, the vehicle may hit the truck.
FAQs
Five passengers can fit in the Tata Tigor BS VI 2020 because it is a five-seater vehicle.
Yes, the Tata Tigor BS VI 2020’s front passenger and driver seats may both be adjusted.
The Tata Tigor BS VI 2020’s front seats have manual adjustment options.
The Tata Tigor BS VI 2020 does not have seats that may be adjusted in height.
The Tata Tigor BS VI 2020’s front seats may be moved forward and backward to accommodate different seating positions.
The Tata Tigor BS VI 2020’s front seats do really recline, and you can change the position of the backrest for more comfort.
There are no customizable features available for the Tata Tigor BS VI 2020’s rear seat. It remains in place permanently.
Yes, the Tata Tigor BS VI 2020’s rear seats can be folded down to add more cargo room as needed.
Yes, the Tata Tigor BS VI 2020’s front seats have adjustable headrests for better comfort and safety.
No, the seats in the Tata Tigor BS VI 2020 lack adjustable lumbar support.
The seats in the Tata Tigor BS VI 2020 have fabric upholstery. Depending on the individual type and extras selected, leather upholstery might be an optional upgrade or available in higher trims.
Yes, the Tata Tigor BS VI 2020 has the same manual adjustment options for the driver’s and front passenger’s seats.
Useful Links
Download Link: Owner’s Manuals | Tata Motors Service
View Full Manual: Tata Tigor BS VI 2020 User Manual | Auto User Guide